
What Is FRAMING in Photography? A Craft, Not a Rulebook
Updated 6 Oct 2026
LESSON 27 · INTENTION
What framing really means
Framing in photography is the craft of deciding what belongs inside your four edges, what to leave out and how the elements you keep relate to one another. Your position, timing and choice of boundaries all influence what the photograph communicates.
Begin with what matters to you. It might be a person or tree, but it could also be a relationship, a feeling or the space between things. Ask whether the frame helps that interest come across.
A doorway, arch or gap in the branches can provide a frame within a frame. Use one when it contributes useful depth, context or meaning. The wider craft is learning to notice how everything within the photograph works together.
Three things to take from this lesson
Give your framing a purpose
Recognise what drew your attention and what you want the photograph to express. A subject, relationship, feeling or space can give the frame its purpose.
Consider all four edges
Notice what you include, exclude or cut through. Judge those choices by their contribution to the image and the relationships they create.
Compare before deciding
Change your position or framing and assess the result. Space, tension and deliberate imbalance can all serve a photograph. Explain which version works and why.
Academy Composition Framework · Lesson 27
Where this lesson fits
Notice what draws your attention, recognise what you want to communicate, then choose the tools that support it.
SEE → FEEL → TECHNIQUE
- Intention
- Restraint
- Observation
- Judgement
Intention
What am I trying to communicate?
Framing gives your intention a boundary. What you include, leave out and place alongside other elements shapes what the photograph communicates. Begin with what drew your attention—a subject, relationship, feeling or space—then choose a frame that helps it come across.
Video 1 · Intention
- Lesson 26 · Composition Rules
- Lesson 27 · Framing — you are here
- Lesson 29 · Leading Lines
The four themes work together throughout the photographic process. Return to any of them whenever it helps you reconsider a choice. The video groups connect related lessons; the Academy lesson sequence remains unchanged.
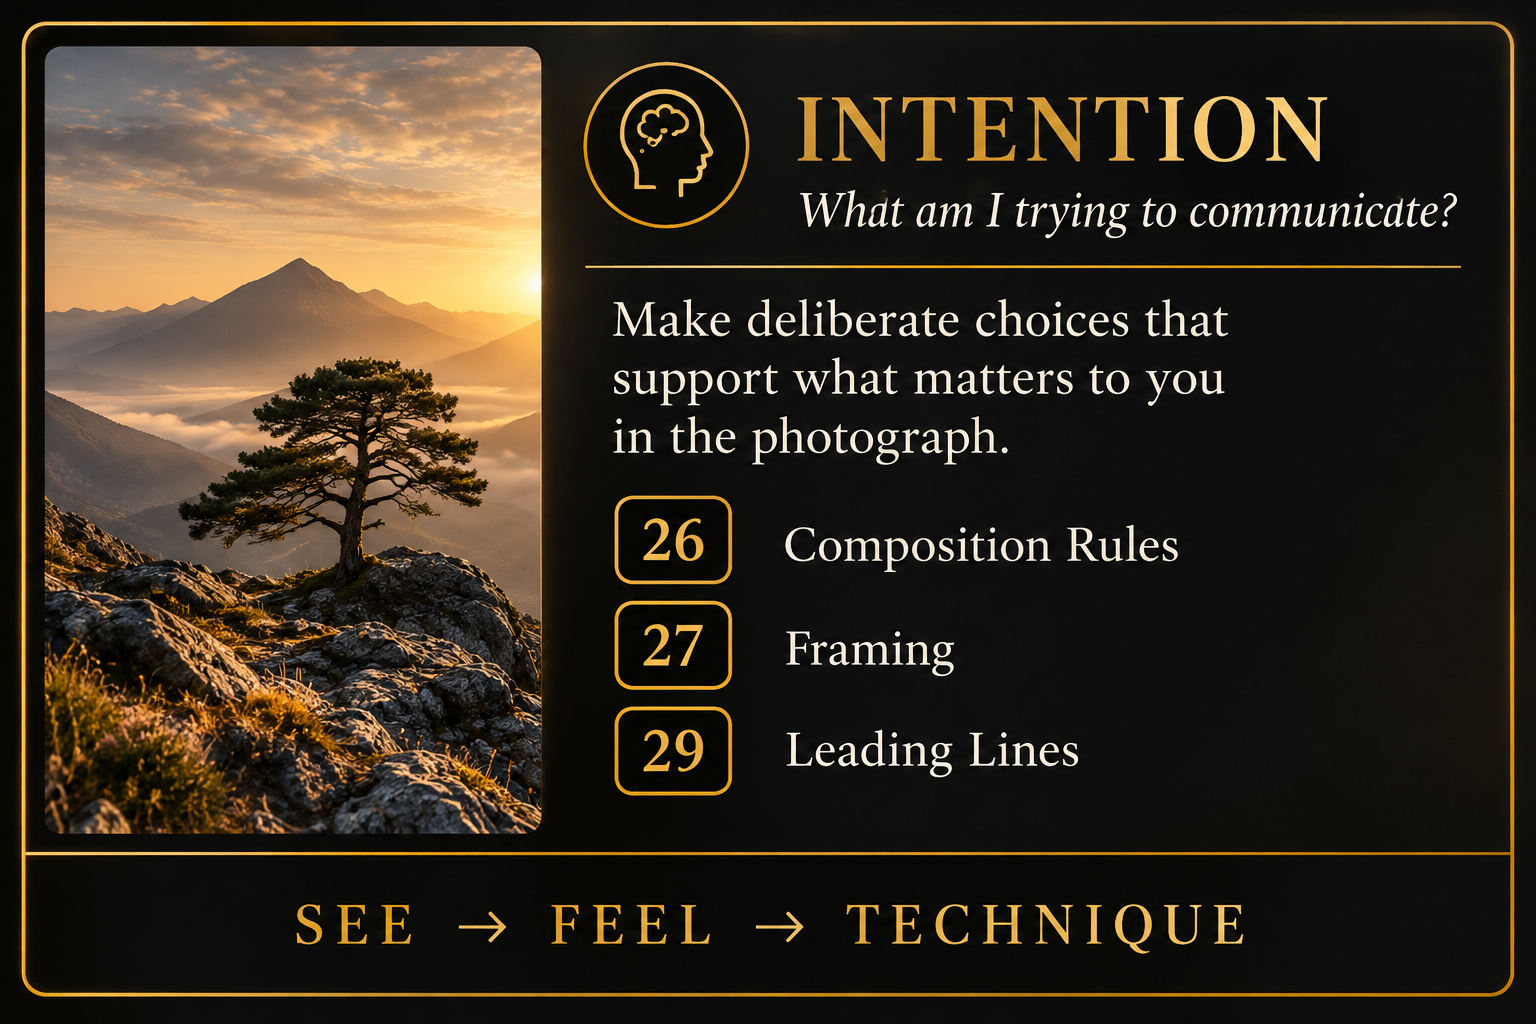
Table of Contents Show
⏱️ CHAPTERS
00:00 - Introduction: Composition with Intention
01:15 - Lesson 26: Mastering Composition Rules
02:02 - Starting with What Caught Your Attention
02:38 - Rule of Thirds & Subject Placement
03:21 - Understanding Visual Weight & Balance
04:05 - Creating Depth with Layers & Viewpoint
04:40 - Rules as Tools to Compare, Not a Checklist
05:09 - Lesson 27: What Is Framing in Photography?
05:36 - Subject Emphasis vs Context & Story
06:03 - Checking All Four Edges of the Frame
06:51 - Balance & The Half-Closed Eyes Technique
07:11 - When to Simplify vs When to Keep Complexity
07:46 - Lesson 29: Leading Lines & Visual Pathways
08:34 - Directional Lines: Diagonals, Curves & Converging
09:18 - Horizontal vs Vertical Lines
09:48 - Implied Pathways: Gaze, Gesture & Sub-Frames
10:28 - 3 Rules for Purposeful Visual Pathways
11:16 - Common Myths About Leading Lines
12:37 - Summary: Stop Applying Rules, Start Making Choices

What good framing actually asks of you
Build the habit of noticing what is in your frame. Then judge each choice by what you want the photograph to communicate. These questions help you compare possibilities.
| What to consider | What to ask | How to use it |
|---|---|---|
| Subject or intention | What drew my attention: a person, an object, a relationship, a feeling or the space between things? | Let that interest guide the frame. Making one subject clear is a useful exercise; mood and ambiguity are also valid starting points. |
| Attention | What stands out, and does it help the photograph? Notice brightness, contrast, colour, sharpness and recognisable forms. | Strengthen a focal point when it helps. Several areas of interest can also create a useful relationship or tension. |
| Edges | What am I including, excluding or cutting through? Are there awkward overlaps or distractions I have overlooked? | Make looking around all four edges a habit. Keep or change what you find according to its effect; a deliberate crop can add energy or meaning. |
| Balance | How is visual weight distributed? Does the frame feel calm, tense, spacious or weighted towards one side? | Compare different arrangements. Both balance and imbalance can support your intention. |
| Tonal and colour breaks | Does a strong change in light, shade or colour strengthen the image or interrupt what matters? | Try another position or framing when a break distracts. Retain it when separation, contrast or disruption contributes to the photograph. |
| Pathways | Do lines, repeated shapes, light or a person's gaze suggest connections within the frame? | Use those connections when helpful. Viewers may explore an image in different ways; an obvious route to a single subject is optional. |
| Supporting elements | What does each element contribute: context, depth, atmosphere, a relationship or a useful contrast? | Compare frames with and without an element. Remove what weakens the image; retain complexity when it contributes to the meaning. |
In practice: use these questions while learning and reviewing your photographs. With experience, noticing these relationships can become more instinctive.
Start with what drew your attention
Before deciding where the edges should fall, notice what interests you. It may be a lone tree, a person's expression, the relationship between two shapes or the feeling of space around something. That gives your framing a purpose.
Making one subject clear is a useful way to practise. Try framing the same subject from several positions and compare what changes. You can also begin with a mood, a pattern or an uncertain relationship that makes you curious. A photograph does not have to resolve everything for the viewer.
Let your intention develop as you look. You may notice something through the viewfinder that changes your first idea. The point is to respond to what you see, then choose the framing that best expresses it.
This is the approach explored in Most Photography Teaching Has It Backwards : begin with seeing and meaning, then apply technique with a purpose.
Notice what holds the attention
What interests you in a scene may not stand out in the photograph. A bright patch of sky, a vivid sign or a sharp background detail can compete with the part you care about. Look at the whole frame and ask whether that competition helps the image.
If you want a particular subject to hold attention, try changing your position, waiting for a distraction to move or using focus to separate it from its surroundings. Compare the result before deciding which version works.
Several areas of interest can also give a photograph its meaning. A small figure within a large landscape, for example, may communicate scale or isolation precisely because the surroundings occupy so much of the frame. Judge the relationship by what it expresses.
Ask yourself: does the way attention is shared across this frame support what drew me to the scene?
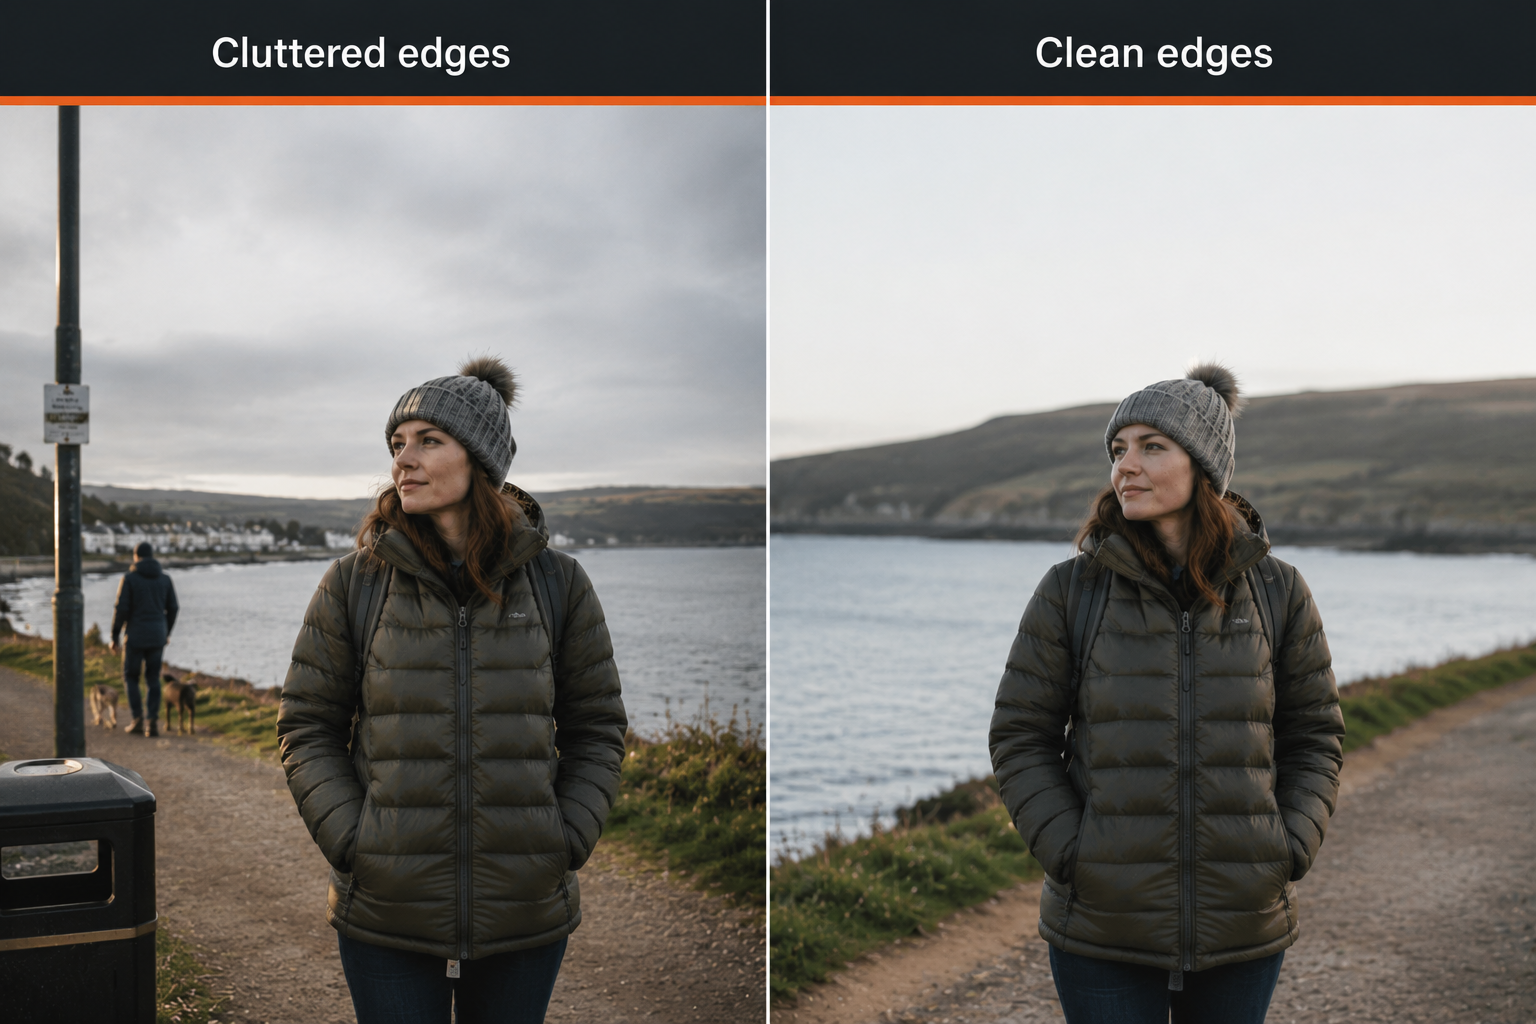
Check the edges
When the moment allows, run your eye around all four sides of the frame. Notice anything you have included, excluded or cut through without meaning to: a bright corner, an awkwardly cropped object or a background post that appears to grow out of someone's head.
A small step sideways, a change of angle or a slightly wider or tighter frame may improve those relationships. Check what else changes as you move. Removing one distraction can also remove useful context or introduce a different overlap.
The useful habit is noticing the edges. What you do with them remains a creative choice. Cutting through a figure, letting a shape continue beyond the frame or keeping a busy edge can suggest movement, tension or a world extending outside the photograph.
With a fleeting expression or gesture, make the photograph while the opportunity is there. If time allows, refine the framing for another version and compare them afterwards.
Feel the balance
Visual weight describes how strongly something attracts attention within a photograph. Size, brightness, contrast, colour and recognisable subjects can all contribute. Their effect depends on the surrounding scene: a small dark figure against pale sand may hold considerable weight.
Look at how that weight is distributed. Does the arrangement feel calm, spacious, crowded or tense? Balance can help create a settled feeling, while placing more weight towards one side can introduce movement, uncertainty or anticipation. Choose according to what you want the photograph to express.
Try half-closing your eyes to simplify the scene into broad patches of light, shade and colour. This can help you notice their distribution, although it leaves out details and meanings that also affect the image. Compare the overall impression with what you see when you look normally.
Explore this further in Lesson 32 · Compositional Balance .
Watch for breaks
A sudden change in tone or colour can divide the frame or draw attention to a particular area. A bright strip of sky, a deep shadow or a vivid sign may interrupt a quiet scene. The same contrast could be essential to a photograph about separation or tension.
Notice the effect before deciding what to change. Try moving so the break falls elsewhere, including more of its surroundings or excluding it. Compare whether the new arrangement strengthens what interested you in the first place.
Consider pathways through the frame
Lines, repeated shapes, changes in light and the direction someone is looking can suggest connections between parts of a photograph. A path may connect foreground and distance; a person's gaze may encourage us to look towards another part of the scene.
These are possibilities rather than a fixed route every viewer will follow. A photograph can invite attention towards one subject, encourage exploration between several elements or leave something for the viewer to discover.
Ask whether a pathway contributes to your intention. A strong line can become distracting if it draws attention away from the relationship or feeling you wanted to show. Changing your position may alter that connection.
Lesson 29 · Leading Lines develops this idea further and belongs to the same Intention video group as this lesson.
Consider what each element contributes
Foreground, background and surrounding details can add context, depth, atmosphere or a relationship that gives the photograph meaning. Notice what each contributes before deciding whether to keep it.
Removing an element can make an image clearer, but it can also remove the reason the image matters. A busy setting may tell us something important about a person or place. Keep complexity when it contributes; simplify when it helps the photograph communicate.
Try this: make one frame that includes a surrounding element and another that excludes it. Compare what changes in the context, depth, mood and relationships. Explain which version better expresses your intention and what you gained or lost.
For more on recognising unnecessary elements, read Your Photographs Have Too Much in Them .
And the frame-within-a-frame?
A doorway, window, arch or gap in foliage can surround part of a scene. This can create depth, establish a viewpoint or help draw attention to what lies beyond. Its value comes from what it contributes to the photograph.
Compare a version with the surrounding frame and one without it. Does the doorway add a sense of place? Do the branches create depth or obscure something important? Choose the version that best supports what you want to communicate.

From checks to instinct
While learning, you may consciously notice the edges, compare the space around a subject or consider how two elements relate. Practise one or two of these things at a time, so you can see what difference your choices make.
Through practice and review, those relationships can become easier to recognise while you photograph. You may sense that a small change of position would help before you can explain exactly why. Stay receptive to that response, and use the resulting photograph to assess it.
Give yourself room to respond when a scene changes. A fleeting gesture may call for an immediate photograph; a still subject may allow several considered variations. Both give you something useful to learn from afterwards.
When reviewing: compare two versions of the same scene. What changed in the framing? What changed in the feeling or meaning? Decide which version better expresses your intention, and identify one choice you would explore next time.
This connects Intention with Judgement: does the photograph do what I intended? Sometimes the image reveals something you had not planned. Look at that possibility too, rather than judging it only against your original idea.
Continue developing that practice in Lesson 34 · How to Improve Your Photography Composition .

Key takeaways
- Begin with what matters to you. A subject, relationship, feeling or space can give your framing a purpose. Let what you notice guide your choices.
- Consider the whole frame. Your position and timing affect what you include, exclude and place alongside other elements. Notice all four edges when the moment allows.
- Judge choices by their effect. Balance, tension, simplicity and complexity can all contribute. Ask whether the arrangement supports what you want the photograph to communicate.
- Compare alternatives. Try a different viewpoint or make versions with and without an element. A doorway, arch or other frame within the frame is useful when it adds something to the image.
- Develop instinct through practice and review. Compare what you intended with what the photograph communicates. Recognise what worked, stay open to unexpected results and choose what to explore next.
Continue learning
Follow the Academy lesson sequence or explore a related aspect of framing and composition.
Conclusion and summary
Framing in photography gives shape to what you notice and want to communicate. Your position, timing and choice of boundaries influence the relationships within the image. Judge those choices by what the photograph expresses.
A clear focal point, a quiet background or a balanced arrangement may help. So may ambiguity, a busy setting or deliberate tension. Compare alternatives and notice what each version gains or loses.
This is framing's place within the Photography Composition Framework : see what draws you, feel what matters, then apply technique with purpose. Practice and review help those choices become more instinctive.
If you would value feedback on your own photographs, one-to-one mentoring can help you recognise what your framing communicates and explore the choices available to you.
Framing in photography — FAQs
What is framing in photography?
Framing in photography means choosing what appears within the image boundaries, what is left out and how the included elements relate. Your viewpoint, timing and choice of edges influence what the photograph communicates. A frame within a frame is one technique within this wider craft.
How is framing different from composition?
Composition concerns the arrangement and relationships of elements throughout a photograph. Framing focuses on the boundaries and viewpoint that determine what is included, excluded or cut through. They overlap: changing the frame changes the composition.
What are examples of framing in photography?
Examples include moving closer to exclude a distraction, leaving space around a person to show their surroundings, changing position to separate overlapping shapes, or photographing through a doorway. Each choice changes the context, emphasis or relationships within the image.
When should you use a frame within a frame?
Use a doorway, window, arch or foliage when it adds useful depth, context or emphasis. Compare a version with the surrounding frame and one without it. Keep the version that best supports what you want to communicate; the technique is optional.
How can beginners improve their framing?
Begin by noticing what interests you, then try different viewpoints and boundaries. When time allows, check all four edges for unintended distractions or overlaps. Compare two versions afterwards and explain how the framing changed the feeling or meaning.
Does every photograph need one clear subject?
No. A photograph can centre on one subject or explore a relationship, mood, pattern or space. Making a subject clear is a useful exercise, but ambiguity and several areas of interest can also contribute. Judge the framing by what the image communicates.
Does good framing always need balance and clean edges?
No. Balance and uncluttered edges can help, but deliberate imbalance, cropped elements or complexity may express tension, movement or context. The useful habit is noticing their effect and deciding whether it serves the photograph.