
What Are LEADING LINES in Photography: A How-To-Guide
Updated 6 Oct 2026
LESSON 29 · INTENTION
Leading lines as visual pathways
Leading lines in photography are lines within a scene that can suggest direction, connect elements or create a sense of depth. Roads, rivers, fences, shadows and the edges of buildings are familiar examples.
I prefer to think in terms of visual pathways. Leading lines are one kind of pathway; a person's gaze, a sequence of shapes or a change in light can also suggest connections within a photograph. Different viewers may explore those connections in different ways.
Begin with what drew your attention and what you want to communicate. Then notice what a line contributes: does it connect, divide, suggest distance or compete with what matters? Keep it when its contribution helps, or change your viewpoint to reduce or exclude it.
Three things to take from this lesson
Give the pathway a purpose
A line may emphasise a subject, connect parts of a scene or contribute to a feeling. It does not need to end at a named object.
Consider the whole frame
Judge a line alongside the space, light and other elements around it. A line continuing beyond the edge can be a deliberate part of the photograph.
Compare alternatives
Make versions with a strong line and with it reduced or excluded. Decide which better expresses what interested you, and explain why.
Academy Composition Framework · Lesson 29
Where this lesson fits
Notice what draws your attention, recognise what you want to communicate, then choose the tools that support it.
SEE → FEEL → TECHNIQUE
- Intention
- Restraint
- Observation
- Judgement
Intention
What am I trying to communicate?
Leading lines can give your intention direction. A pathway may connect elements, suggest distance, divide the frame or contribute to its mood. Notice what it does in this particular photograph, then decide whether that contribution supports what you want to communicate.
Video 1 · Intention
- Lesson 26 · Composition Rules
- Lesson 27 · Framing
- Lesson 29 · Leading Lines — you are here
The four themes work together throughout the photographic process. Return to any of them whenever it helps you reconsider a choice. The video groups connect related lessons; the Academy lesson sequence remains unchanged.
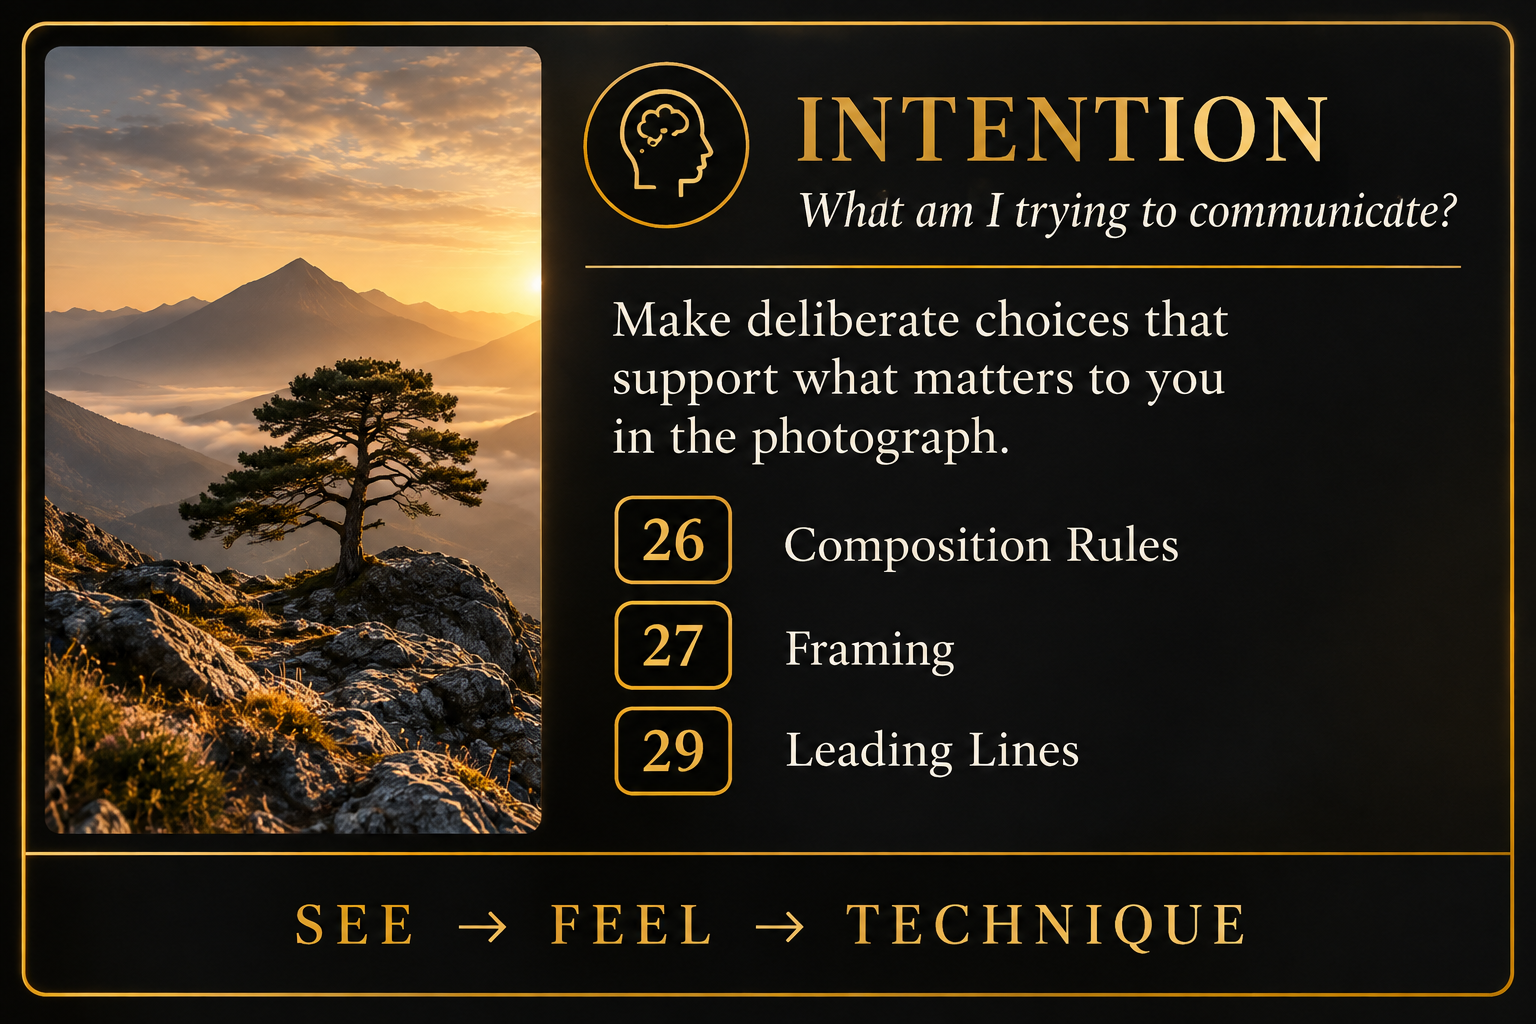
Table of Contents Show
⏱️ CHAPTERS
00:00 - Introduction: Composition with Intention
01:15 - Lesson 26: Mastering Composition Rules
02:02 - Starting with What Caught Your Attention
02:38 - Rule of Thirds & Subject Placement
03:21 - Understanding Visual Weight & Balance
04:05 - Creating Depth with Layers & Viewpoint
04:40 - Rules as Tools to Compare, Not a Checklist
05:09 - Lesson 27: What Is Framing in Photography?
05:36 - Subject Emphasis vs Context & Story
06:03 - Checking All Four Edges of the Frame
06:51 - Balance & The Half-Closed Eyes Technique
07:11 - When to Simplify vs When to Keep Complexity
07:46 - Lesson 29: Leading Lines & Visual Pathways
08:34 - Directional Lines: Diagonals, Curves & Converging
09:18 - Horizontal vs Vertical Lines
09:48 - Implied Pathways: Gaze, Gesture & Sub-Frames
10:28 - 3 Rules for Purposeful Visual Pathways
11:16 - Common Myths About Leading Lines
12:37 - Summary: Stop Applying Rules, Start Making Choices
The Basics of Leading Lines
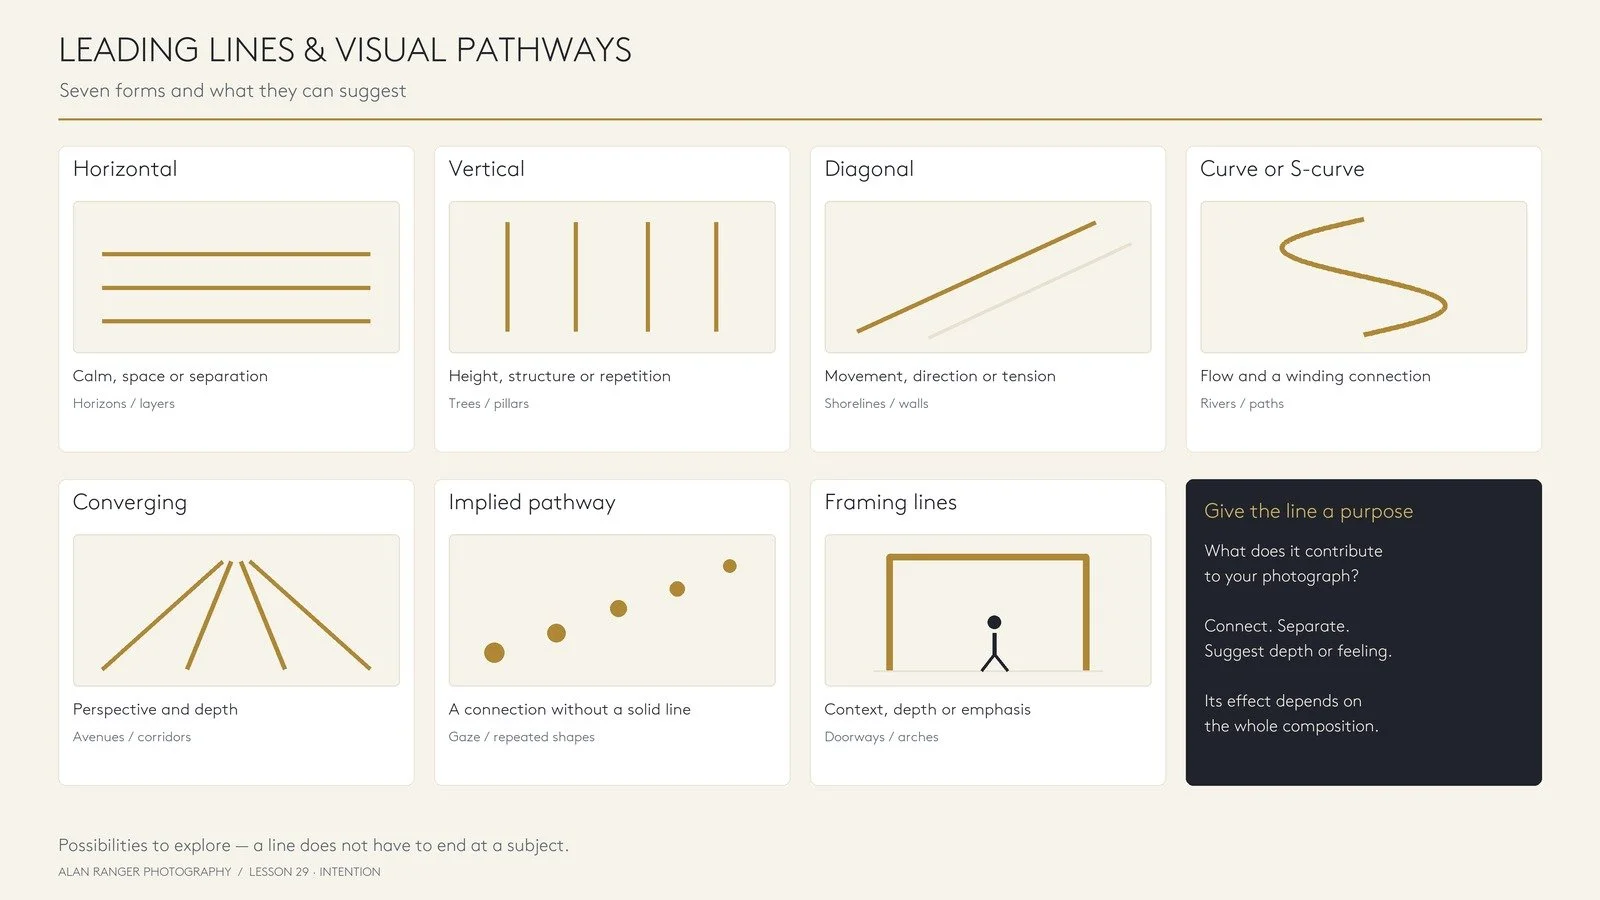
Types of lines and visual pathways
These forms can suggest different relationships and feelings. Their effect depends on the whole photograph: the subject, light, space and viewpoint all contribute.
| Type and examples | What it can contribute | What to consider |
|---|---|---|
|
Diagonal Roads, shorelines, walls |
Direction, movement or a connection between near and distant parts of the scene. | Compare viewpoints to change the line's angle. Tilt the camera only when the sloping frame itself contributes to your intention. |
|
Curve or S-curve Rivers, paths, dunes |
A winding connection, a sense of flow or a gradual suggestion of distance. | Notice how the curve relates to surrounding elements. A subject can sit along it, beside it or elsewhere in the frame. |
|
Converging Avenues, corridors, rows |
Perspective and depth as lines appear to approach one another in the distance. | Compare camera heights and positions. Strong convergence can emphasise distance; a quieter treatment may better suit the scene. |
|
Horizontal Horizons, layers, benches |
Calm, separation or a relationship between layers across the photograph. | Consider the space above and below the line. Include foreground detail when it adds meaning; open space may already express what you want. |
|
Vertical Trees, pillars, buildings |
Height, repetition, structure or a division of the frame into separate areas. | Decide whether parallel or converging verticals suit the image. Camera position and angle affect the result; correction in editing is an option. |
|
Implied pathway Gaze, gestures, repeated shapes |
A suggested connection without a continuous physical line. | Consider what the connection suggests. It may relate visible elements or invite curiosity about something beyond the frame. |
|
Framing lines Doorways, arches, branches |
Depth, context or emphasis around part of the scene. | Compare versions with and without the surrounding frame. Notice whether its edges and overlaps help what you want to communicate. |
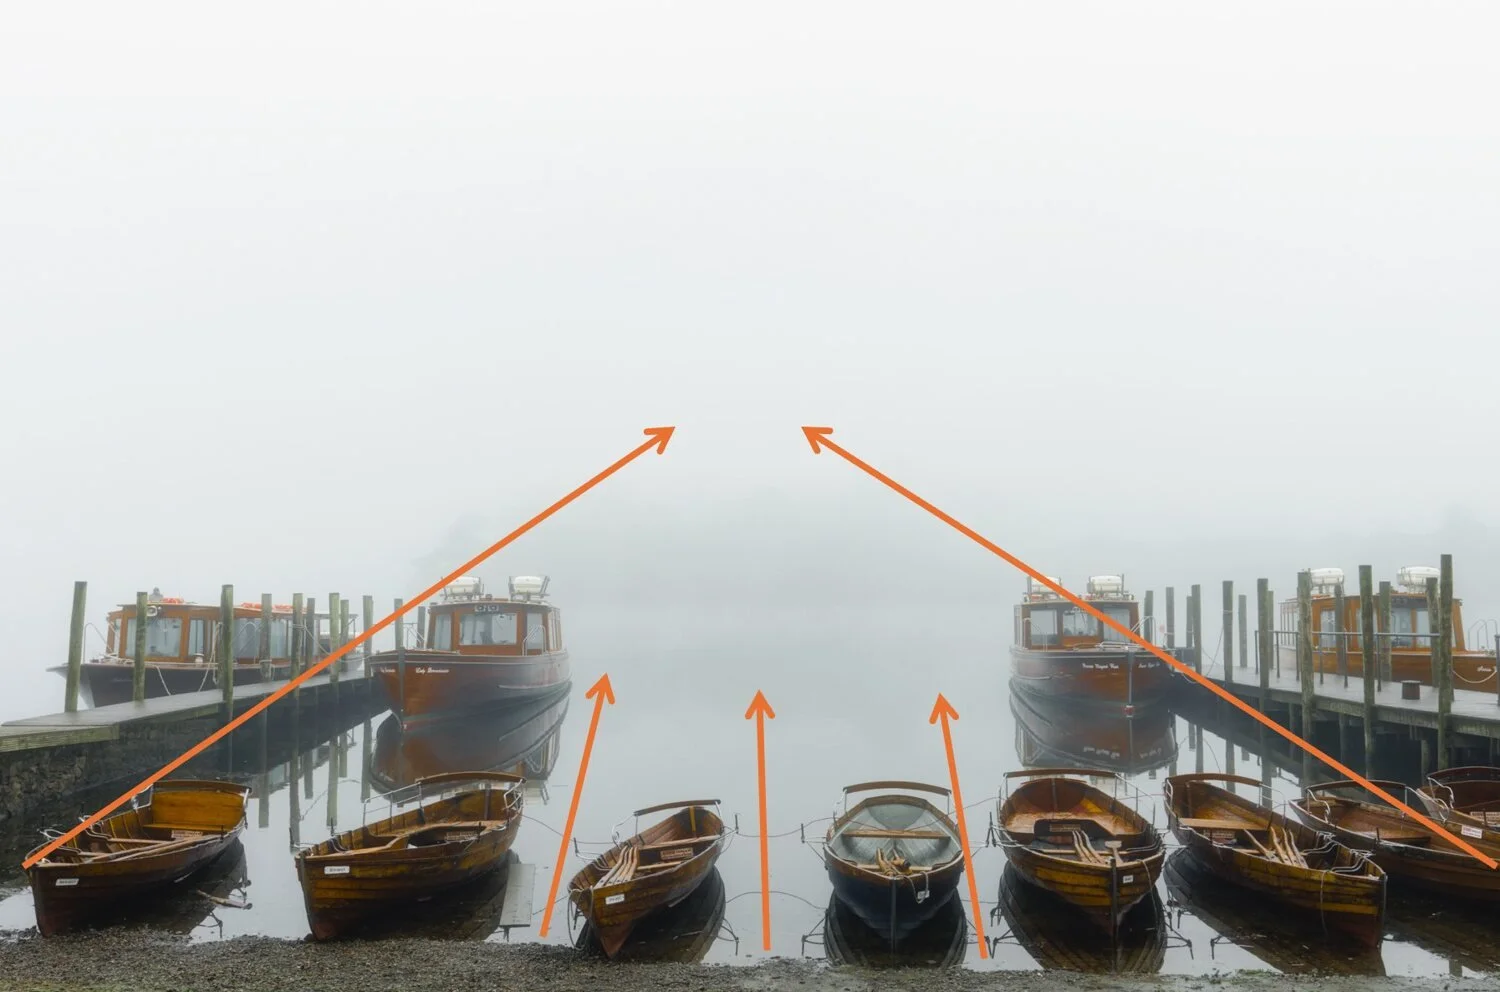
Recognising visual pathways
A pathway may be obvious, such as a road winding through a landscape, or subtle, such as a sequence of trees, people or patches of light. Notice how these elements relate to the rest of the scene before deciding how strongly to emphasise them.
A river can connect foreground and distance. A row of people can create repetition or suggest a shared direction. A fallen tree might divide the frame as much as lead through it. The useful question is what that relationship contributes to this photograph.
In Lesson 27 · Framing , we considered pathways formed by lines, light, repeated shapes and a person's gaze. Changing your framing changes those connections: a step sideways can separate elements, create an overlap or make a previously prominent line less noticeable.
Begin with the scene and your response to it. This follows the approach in Most Photography Teaching Has It Backwards : recognise what interests you, then choose the technique that helps express it.
Quick tips for using leading lines
- Notice before arranging. Look for paths, edges, shadows and repeated shapes. Ask what they connect, separate or emphasise.
- Choose a destination when it helps. Position a line towards a subject if you want to strengthen that connection. A pathway can also suggest distance or invite exploration without ending at a single object.
- Consider what happens at the edges. A line continuing out of the frame may suggest movement or a world beyond the photograph. Change it when it creates an unwanted distraction.
- Compare viewpoints. Try a higher, lower or sideways position when practical. Notice how the line changes alongside the surrounding space and other elements.
- Compare stronger and quieter versions. Make one frame that emphasises the pathway and another that reduces or excludes it. Judge which better communicates your intention.
Why use leading lines?
Use a leading line when it contributes to what interests you in the scene. Its value depends on the relationship it creates within the whole photograph.
- Connect elements. A path, edge or repeated shape can suggest a relationship between different parts of the image. Emphasise that connection when it helps the photograph communicate.
- Suggest depth. Lines that appear to converge or become smaller with distance can help describe space. Decide how strongly you want that sense of distance to feature.
- Contribute to mood. A curve may feel flowing, while an abrupt diagonal may introduce tension. Light, subject matter and surrounding space influence that response too.
- Emphasise or divide. A line can draw attention towards something, separate areas of the frame or create a boundary between people and their surroundings. Any of these effects may support your intention.
Ask yourself: if this line were less prominent or absent, what would the photograph gain or lose? Use that comparison to decide how much emphasis to give it.

Common misconceptions about leading lines
Advice about leading lines becomes limiting when a useful possibility turns into a requirement. Consider these choices in relation to the photograph you want to make.
Must the line end at the subject?
Placing a subject near the end of a line can strengthen their connection. A person partway along a path, however, may suggest a journey still unfolding. A line can also describe distance, divide the frame or connect several areas without ending at a single subject.
Are several lines always confusing?
Several pathways may compete for attention, but that complexity can contribute to the image. Intersections might express the activity of a busy place, while repeated lines can create rhythm. Compare a simpler frame when the relationships become difficult to read, and decide what the photograph gains or loses.
Is a line leaving the frame a mistake?
A line continuing beyond an edge can suggest movement, distance or something outside our view. Notice whether it adds to the photograph or draws attention away from what matters. Change your position or framing when that effect is unwanted.
Does a strong line automatically improve the image?
A prominent line can contradict the mood or relationship that first interested you. An assertive diagonal, for example, may compete with a quiet moment. Try reducing its emphasis or leaving it out, then judge which version better communicates your intention.
Treat leading lines as possibilities to explore. Their contribution depends on the scene, your framing and what you want the photograph to express.
How to use leading lines in photography
Start with what interests you in the scene. Then explore how your position, framing and lens choice affect the pathways within it. Compare the results against what you want the photograph to communicate.
Explore your viewpoint
Try moving sideways or changing camera height. A lower viewpoint may make a nearby path more prominent; a higher one may reveal its relationship to the surrounding landscape. Notice what changes elsewhere in the frame as well as in the line itself.
Consider convergence and curves
Converging lines can suggest depth, while a winding path or river may connect different areas of the scene. Compare how much of the line to include and where it sits relative to other elements. Choose the arrangement that supports the feeling or relationship you noticed.
Choose how much emphasis to give the line
Filling more of the frame with a line can make its shape a major part of the photograph. Including more surrounding space may give it a quieter role. Try both when practical, especially if a prominent pathway begins to compete with what originally drew your attention.
Use lens choice with a purpose
A wide-angle lens includes a broader view and allows you to work close to foreground elements. From that position, nearby lines may appear much larger relative to distant features. A longer lens from farther away offers a different arrangement. Compare the whole composition, including what each choice leaves out.
Assess several pathways together
Multiple lines can create rhythm, connections or tension. They can also compete in ways you did not intend. Compare a frame containing several pathways with one that gives a single line more space. Judge what each version expresses.
Decide whether foreground detail helps
A nearby element can establish scale or connect foreground and distance. Include it when that relationship contributes. Open space may already give the scene the atmosphere you want; explore this further in Lesson 30 · Negative Space .
For more on deciding what earns a place in the frame, read Your Photographs Have Too Much in Them .
Practice: compare two versions
Photograph the same scene with a strong pathway, then make another version with that line reduced or excluded. Change your viewpoint or framing as needed.
Compare the feeling, depth, context and relationships in the two images. Which better expresses your intention? Explain what the line contributes and what changes when it becomes less prominent.
Want stronger compositions with leading lines?
Fix flat compositions fast. Get hands-on guidance — viewpoint, lens choice and subject placement — so your lines lead to impact.
Creating mood and atmosphere
The direction and shape of a line can contribute to how a photograph feels. Its effect comes from the whole scene, including the light, subject, surrounding space and your framing.
Horizontal lines
A horizon or a series of horizontal layers may suggest calm and space. A strong horizontal boundary can also feel restrictive or divide two areas. Consider how much space you leave above and below it, and what that arrangement expresses.
Vertical lines
Trees, pillars and buildings can suggest height, structure or repetition. Closely spaced verticals might feel enclosing, while isolated ones may emphasise the space around them. Their spacing and relationship to other elements help determine the mood.
Diagonal lines
A diagonal may introduce movement, distance or tension. Notice whether that energy suits what interested you. Changing your position can alter its angle and prominence without tilting the whole photograph.
Curved lines
A winding path, river or curved edge may suggest flow or gradual movement through a scene. A tight bend can create a different feeling from a broad, gentle curve. Consider how the shape works with the light and surrounding space.
When reviewing your images, describe the feeling first, then consider which choices contribute to it. Improving your photography composition includes learning to recognise these relationships and comparing alternative treatments.
Avoiding distracting lines
A line becomes distracting when its presence weakens what you want the photograph to communicate. Look at its effect within the whole frame before deciding whether to change it.
Notice unintended overlaps
A background branch, post or strong edge may appear to pass through a person's head or merge with another important shape. A small change of position can separate them. Keep an overlap when the connection or tension it creates is part of your intention.
Compare the strength of competing elements
A bright road marking or high-contrast edge may attract more attention than you expected. Consider whether that emphasis helps the image. Try changing your viewpoint or framing to reduce it, then compare what happens to the other relationships.
Check where lines meet the boundaries
Notice lines touching corners, cutting across edges or continuing beyond the frame. These can suggest movement or a larger scene outside the photograph. Adjust them when their effect interrupts what matters, rather than treating every exit as a mistake.
Review changes in context
Moving higher, lower or sideways changes more than the line you are trying to improve. It can alter the background, the apparent relationship between subjects and the amount of surrounding space. Assess the whole photograph after each adjustment.
These decisions connect directly to Lesson 27 · Framing : notice what you include, exclude and place together, then judge whether those choices support your intention.
Telling a story with leading lines
A visual pathway can suggest a relationship between people, places or different parts of a scene. Begin with what that relationship means to you, then consider how the line helps express it.
Connect a subject with its surroundings
A path beside a lone walker may suggest a journey, while a fence between two people may suggest separation. The line contributes through its relationship with the subject and the surrounding space. It does not have to point directly towards the subject to add meaning.
Consider what continues beyond the frame
A road disappearing around a bend or a railway continuing beyond an edge can leave part of the scene unresolved. That uncertainty may invite curiosity. Include it when it supports what you want to communicate; change the framing when it introduces an unwanted distraction.
Use depth and direction with purpose
Converging lines may emphasise distance, while a crossing line may divide the scene or interrupt a sense of movement. Decide whether those effects contribute to the story. Viewers may notice different connections, so a line cannot guarantee a particular route through the photograph or a single interpretation.
Compare what each version suggests
Make one photograph that emphasises the pathway and another that gives it less prominence. Does the subject feel more connected, isolated, enclosed or free to move? Describe what changes, then choose the version that best expresses your intention.
Explore how context, moments and relationships contribute to meaning in Lesson 28 · Storytelling .
Want stronger leading-line compositions?
Fix flat compositions fast. In 30 minutes we’ll use your images to master leading lines—viewpoint, lens choice and subject placement.
Prefer a text link? Download the PDF
Breaking the Rules Creatively
While leading lines are a valuable compositional tool, it's important to remember that photography is an art form. Photographers should feel free to experiment and break the traditional rules creatively:
Unconventional placement: Instead of always placing the subject at the end of leading lines, try positioning it at unexpected points along the line for a more intriguing composition.
Multiple leading lines: Experiment with using several leading lines that guide the eye to different parts of the image, creating a more complex and engaging composition.
Intersecting lines: Skillfully applied intersecting lines can frame things deliberately in interesting ways, ramping up tension in a shot or adding an element of confusion when desired.
Playing with perspective: Try taking the same shot from different heights, experimenting with how the leading lines affect the composition at different positions.
Light and shadow: Use light to create interesting shadows that can serve as leading lines, adding depth and intrigue to the image.
Remember, while compositional techniques like leading lines can be helpful, they should not be seen as inflexible rules. Photography is a creative endeavour, and the most compelling images often come from pushing boundaries and thinking outside the box. As photographer Bruce Barnbaum suggests, it's important to approach these techniques as ideas or concepts rather than strict rules, allowing for greater creative freedom and expression in your photography.
- Do the lines point to the subject (not out of frame)?
- Low viewpoint or wider lens to exaggerate perspective?
- Clean edges—no bright lines touching the frame border?
- Secondary lines supporting, not competing?
Download the 1-Page Field Checklist PDF for Leading Lines
Conclusion: give the pathway a purpose
Leading lines can connect elements, suggest depth, divide a scene or contribute to its mood. Their value comes from what they add to the photograph you want to make. A line does not need to end at a subject, and continuing beyond the frame can be a deliberate choice.
This lesson belongs to Intention within the Photography Composition Framework : What am I trying to communicate? Follow the same process throughout the series: See → Feel → Technique. Notice the scene, recognise your response, then choose how strongly to emphasise a pathway.
Compare photographs with the line prominent, reduced or excluded. Consider what happens to the feeling, space and relationships in each version. Learning to explain those differences will help you improve your photography composition and make more deliberate choices.
I teach these decisions through practical work on my outdoor workshops, in 1:1 sessions and during my photography evening classes . We look at what interested you in the scene and how your choices help the photograph express it.
Leading lines in photography: frequently asked questions
What are leading lines in photography?
Leading lines are lines within a photograph that can suggest direction, connect elements or create a sense of depth. They may draw attention towards a subject or encourage exploration of the wider scene. Their effect depends on the whole composition and how the viewer responds to it.
What are examples of leading lines?
Roads, rivers, footpaths, fences, shorelines, shadows and building edges can all form leading lines. For example, a winding path may connect a nearby walker with distant hills. Consider what the line contributes to the scene before deciding how prominently to include it.
What are the main types of leading lines?
Common types include horizontal, vertical, diagonal, curved and converging lines. A photograph can also contain implied pathways, such as repeated shapes or a person's gaze. These categories describe possibilities; the light, subject and surrounding space influence what each pathway communicates.
How do you use leading lines in a photograph?
Begin with what interests you in the scene. Look for lines that connect, separate or emphasise its elements, then compare viewpoints and framing. Make one version with the pathway prominent and another with it reduced. Choose the photograph that best expresses your intention.
Do leading lines have to end at the subject?
No. A subject near the end of a line can create a clear connection, but it can also sit beside or partway along the line. A pathway may suggest distance, movement or a relationship between several elements without ending at a single subject.
Can leading lines go out of the frame?
Yes. A line continuing beyond the frame can suggest movement or a larger world outside the photograph. Change it when it creates an unwanted distraction. Judge its contribution to the whole image rather than treating every line that crosses an edge as a mistake.
Do you need a wide-angle lens for leading lines?
No. Leading lines can be photographed with a phone or different camera lenses. A wide-angle lens lets you include more of the scene and work close to a foreground line. Camera position affects perspective, so compare how the line relates to the background from different positions.
What is the difference between leading lines and visual pathways?
Leading lines are one kind of visual pathway. I use visual pathways as a broader term that includes lines, changes in light, repeated shapes, gestures and gaze. These can suggest connections within a photograph without forming a continuous line or guaranteeing where someone will look.
Continue learning
Next lesson: 30 · Negative Space
Consider what the space around your subject contributes and how leaving something out can support your intention.
Continue to Lesson 30 · Negative Space →
Related reading
- What is composition in photography? — explore how the elements within a photograph work together.
- Lesson 27 · Framing — revisit what you include, exclude and place together.
- Photography Composition Framework — return to the four connected themes and See → Feel → Technique.
Personal support
Discuss your photographs and the choices behind them through 1-to-1 online Zoom lessons .