
Dog Photography for Owners: A Practical UK Guide 2026
Dog Photography for Owners: A Practical UK Guide 2026
Table of Contents Show
The vast majority of dog photographs taken in the UK are taken by dog owners with phones, at the wrong angle, in the wrong light, with the dog bored or distracted, after the moment has passed. The photograph of your dog you want — the one with character, presence, and proper light — isn't out of reach. It mostly requires changing four things: the camera angle, the light, the timing, and your relationship with the dog during the shoot. None of those four needs new equipment.
This guide is for owners photographing their own dog, not for aspiring pro pet photographers. The approach borrows from my bird photography guide for the autofocus and shutter discipline, my natural light photography tips for the lighting framework, and my portrait photography tips for the composition fundamentals — but applied specifically to a non-cooperative four-legged subject in your back garden, on a UK dog walk, or at the beach. If you have a phone or a basic camera and a dog, you have everything you need to start.
Why most dog photographs fail
The failures are nearly always one of five problems, and they're remarkably consistent across phone shooters and DSLR shooters alike:
The angle is too high. Standing photograph of a dog at your feet looks down on the dog, distorts the head into a cone, and makes the eyes small. The fix is free — kneel, sit, or lie down. Get the lens at or below dog eye level. Almost every great dog photograph in the world is shot from this angle.
The light is too hard. Bright midday sun creates harsh contrast on fur, blown highlights on white markings, blocked shadows under the muzzle, and a squinting dog. Soft cloudy light or the first/last hour of the day is friendlier in every way.
The shutter is too slow. Dogs move constantly even when "still". Anything below 1/250 second on a head shot, or 1/1000 on action, gives you motion blur on the eyes and you can't recover sharp eyes in post.
The dog is bored. Asking a dog to sit and stay for ten minutes while you fiddle with the camera produces a flat, switched-off frame. The dog's energy and personality are the entire point — preserve them by being quick.
The background is busy. The cluttered kitchen, the lead trailing into frame, the recycling bin, the picnic table behind. Backgrounds matter as much for dogs as they do for human portraits — maybe more, because there's no clothing to anchor the eye.
Fix any two of those five and your dog photography improves dramatically. Fix all five and you're producing genuine portrait work.
Camera setup for dog photography
The settings layer is straightforward. The dog-specific adjustments to a standard portrait setup are a faster shutter, single-point autofocus on the eye, and a wider aperture than you'd use for a human face — because dogs move more.
For a deeper look at autofocus modes, see my focus modes and tracking practice assignment; for shutter speed and motion freezing principles, see the shutter speed practice assignment. The summary table below covers the working starting points for each of the five everyday scenarios.
Working camera settings for dog photography — the practical starting points before you adjust for your specific dog, light, and lens. Use these to set up the camera before your dog is in the frame, not after.
The five dog photography scenarios every owner faces
Every photograph an owner takes of their own dog falls into one of five recurring scenarios. Each has its own decisions about lens, aperture, shutter, and what the dog should be doing. Pick the scenario before you pick up the camera, not the other way round.
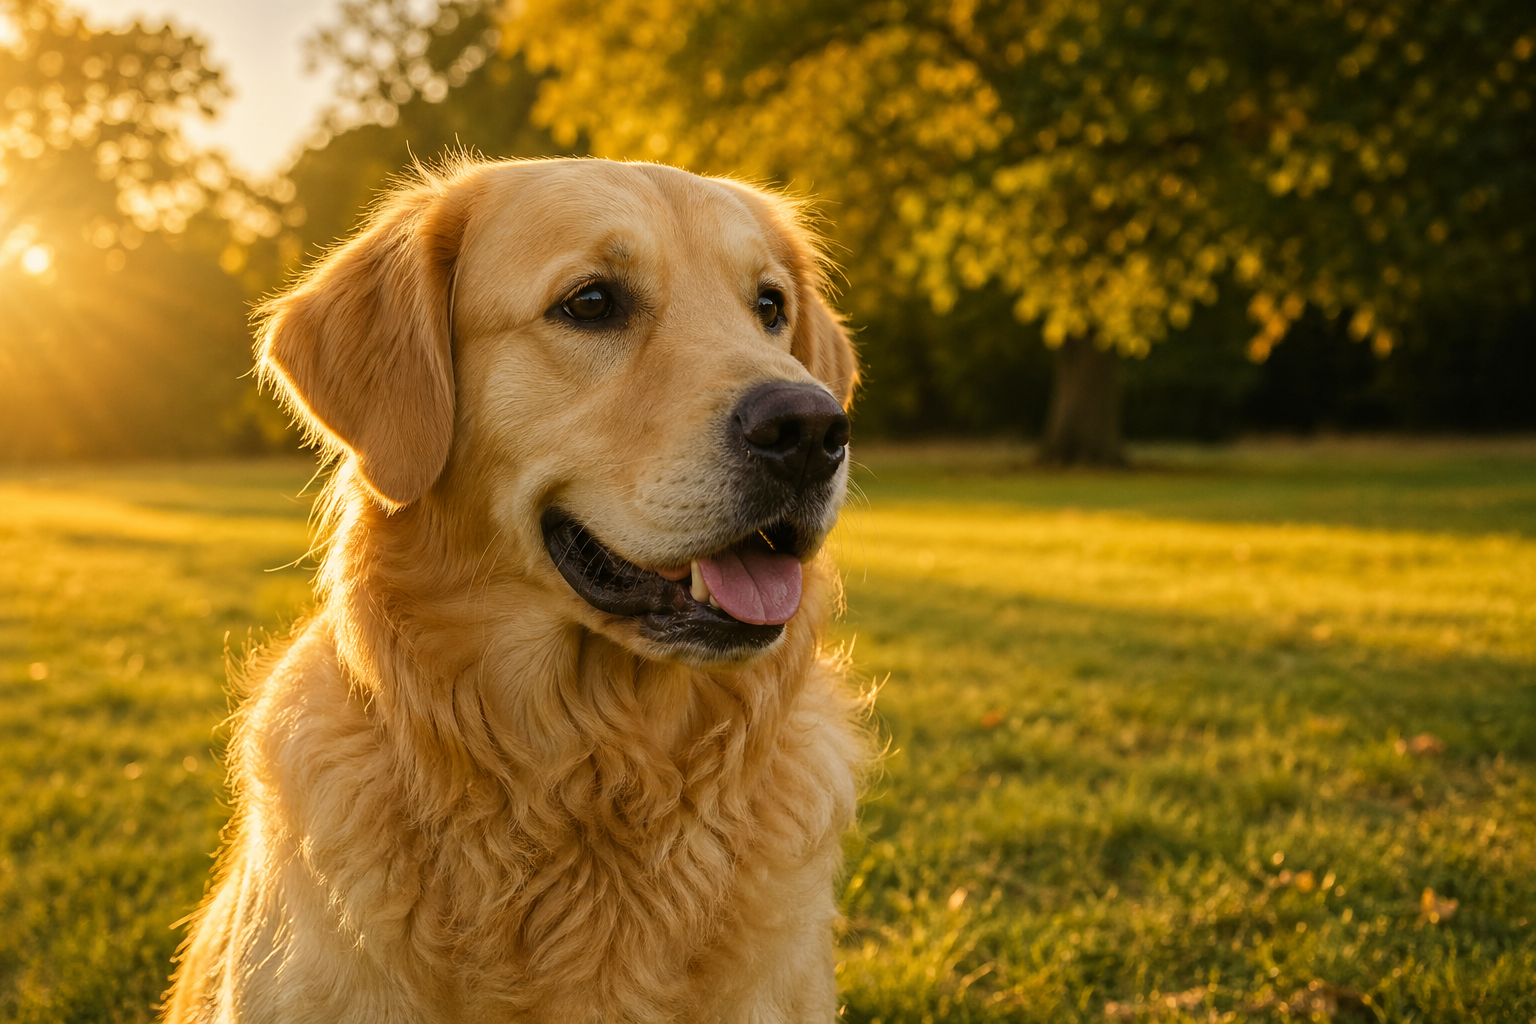
Garden portrait. Dog still, head and shoulders or full body, soft natural light. The training shot — easiest for both of you, builds the dog's tolerance of the camera, gets you a wall-print every visit.
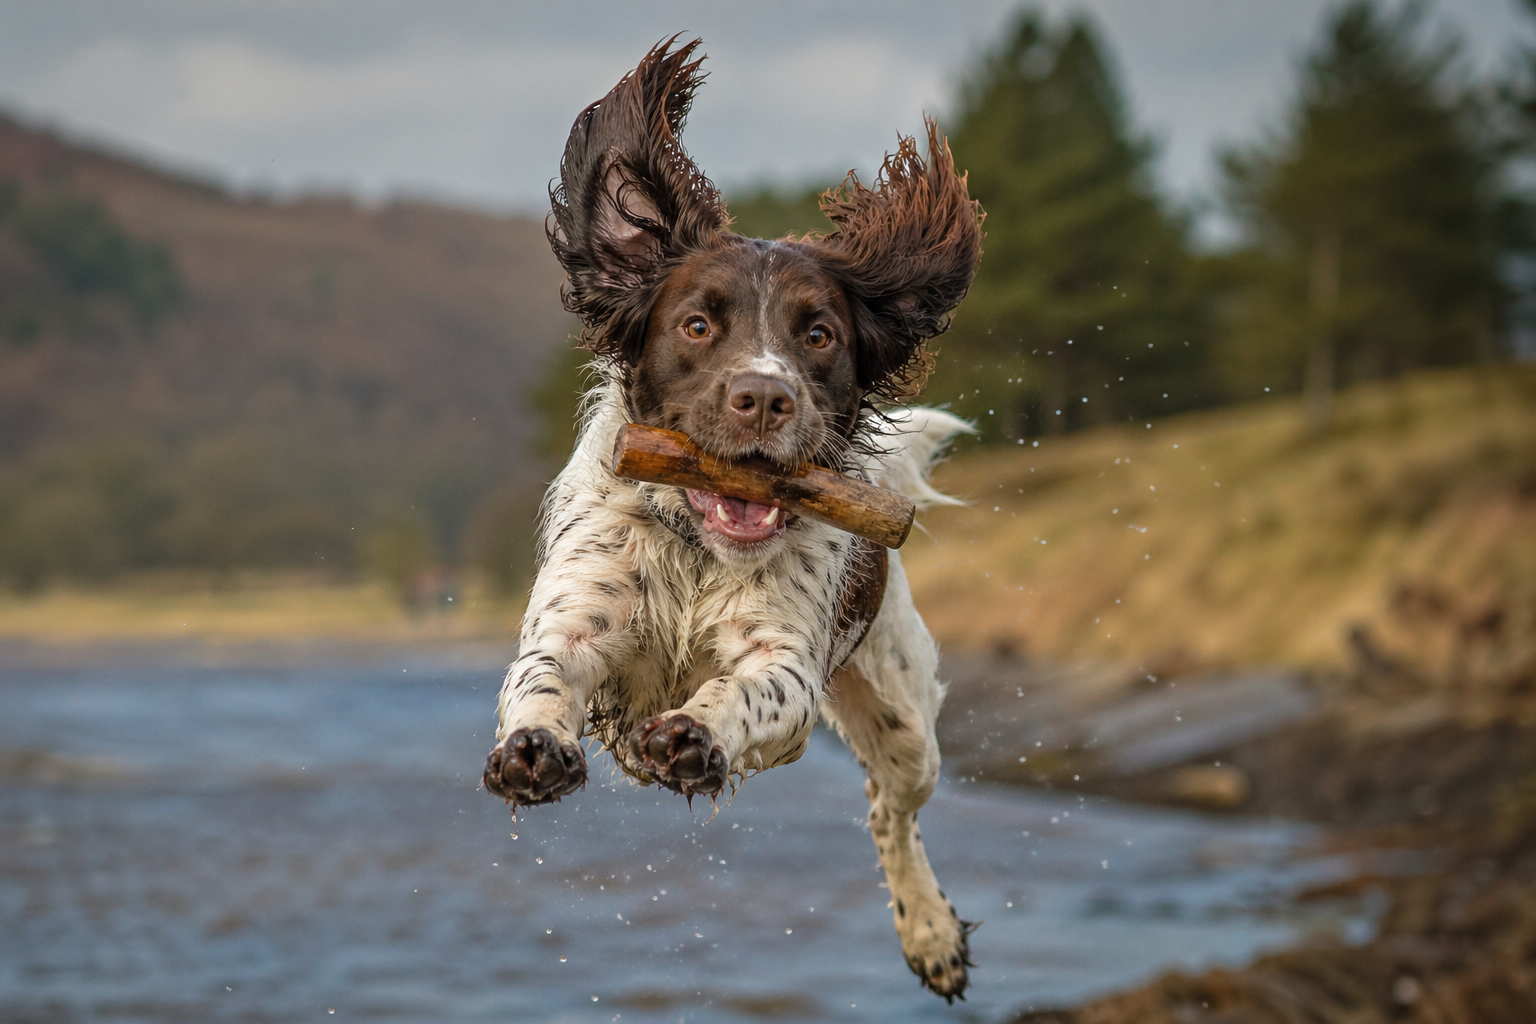
Walkies action. Running, jumping, splashing, frisbee — dog in motion, you panning. The dynamic shot — captures personality and energy, technically harder because of focus and shutter demands.
Indoor light. Window light, dog by a sofa or fireplace, soft contemplative mood. The mood piece — slowest of the five, often the most "portrait-feeling", forgiving in post.
Beach or water. Dog on sand, in waves, splashing, retrieving. UK-specific challenges — wind, salt spray, low tide / high tide access, fast-changing light. The big sky shot — wide composition, environmental context, sense of place.
With the family. Dog with one or more humans — group portrait, walking shot, sofa pile-on. The hardest of the five because you have to manage attention and focus across multiple subjects of different heights.
The five everyday dog photography scenarios — what each one demands of lens, light, and approach. Pick which one you're shooting before you leave the house.
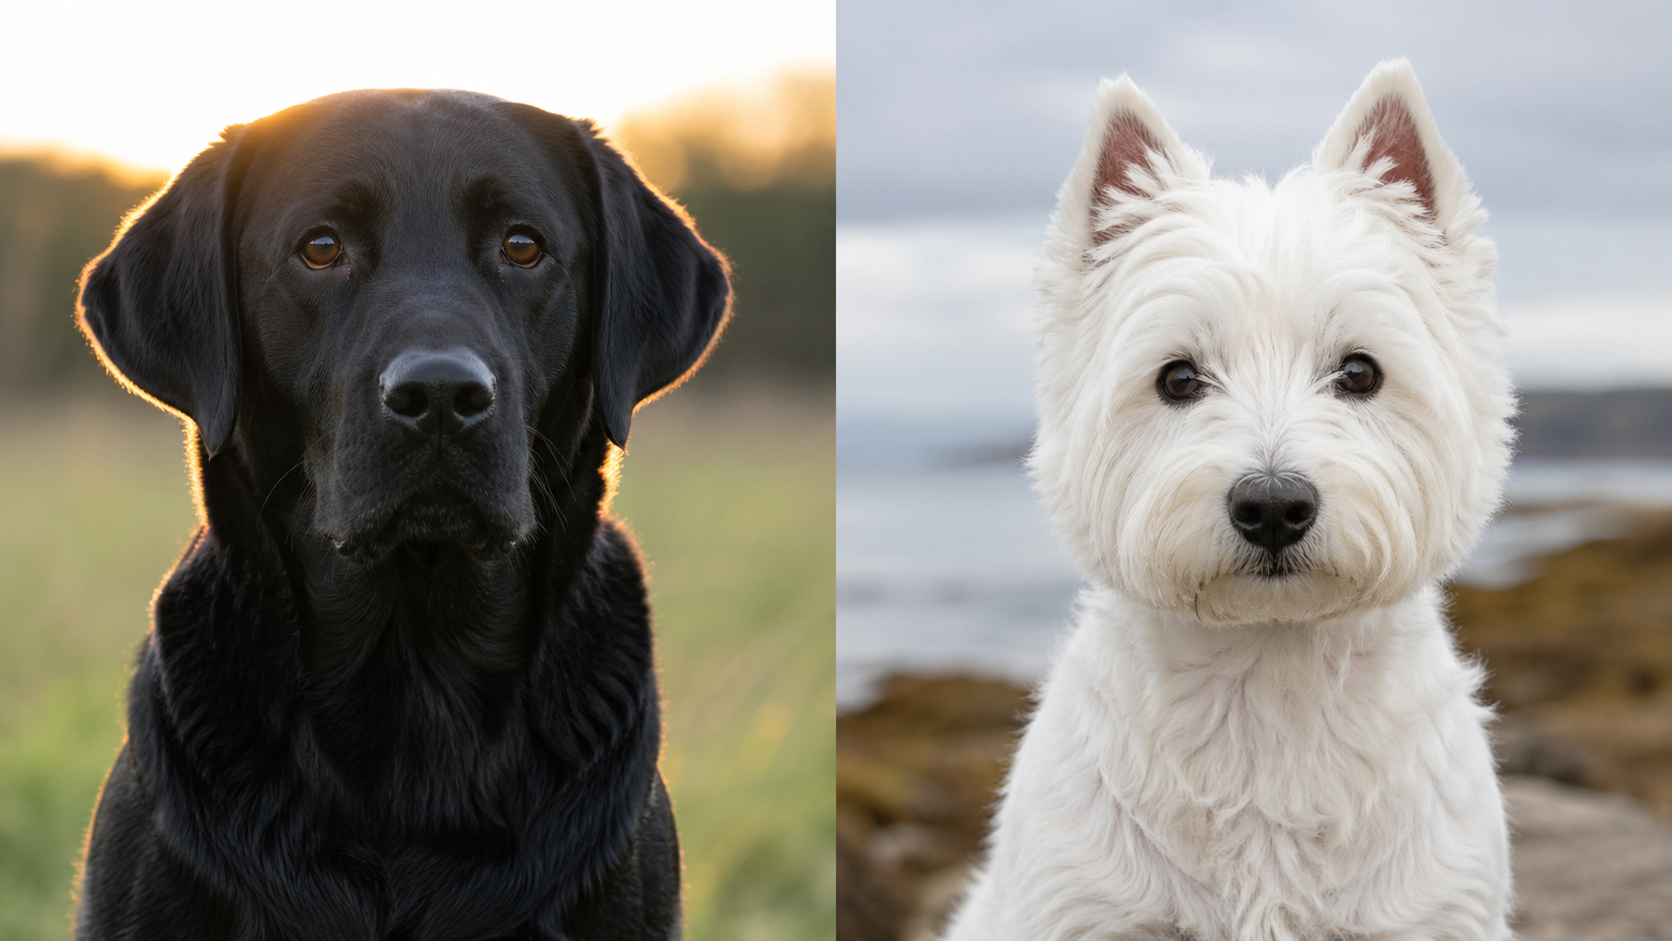
The black-dog and white-dog problems
Two coat colours need explicit technique adjustments because the camera's exposure system can't handle them well by default.
Black dogs. Black labs, cockers, schnauzers, poodles — the camera underexposes the scene because it tries to push the dog towards mid-grey. Result: a black dog is fine but the background is over-exposed and the dog has no detail in the coat. Fix: dial in +1 exposure compensation in Aperture Priority, or just expose for the dog and let the background go bright. Backlight the dog rather than front-light it — the rim of light around the silhouette gives shape and separation. Black dogs are reportedly harder to rehome from rescue centres because they're harder to photograph, so getting this right has welfare value.
White dogs. Westies, Maltese, Samoyeds, white Labs and Golden Retrievers under sun — the camera over-exposes the scene because it tries to push the dog down towards mid-grey. Result: blown white fur with no texture, eyes lost in shadow. Fix: dial in -1 exposure compensation, or expose for the highlights and let the rest fall. Avoid bright sun completely with white dogs — they read much better in overcast light or open shade.
The dog photography shoot workflow
The workflow that produces keepers without stressing the dog is short, organised, and ends before the dog gets bored. Treating a photo session as something separate from a normal walk or play time is what kills both the photography and the relationship.
See a UK dog photographer at work
The video below — "Dog Photography | Stunning Dog Portraits — Settings, Tips, Edit!" by Jess McGovern on the That Tog Spot channel — is a 17-minute walk-through filmed in a UK back garden with a border collie as the subject. Jess is a multi-award-winning UK dog and horse photographer; her settings, eye-level approach and edit demonstrate the working process owners can copy directly.
Reading dog body language for the keeper frame
The technical settings are the easy half of dog photography. The harder half — the half nobody teaches — is recognising when the dog is in a state that produces a strong photograph. Three signals to watch for:
Soft eye, mouth slightly open. The "happy and present" look. This is the keeper expression. Eyes alert but soft, mouth relaxed and slightly open (not panting hard), ears forward but not pinned. Most strong dog portraits land in this state.
Hard stare, mouth closed. The "hyper-focused" look. Useful for action shots (dog staring at a thrown ball, watching another dog) but reads as tense in a still portrait. Read what the dog is staring at — is it a treat in your hand? A squirrel? A noise? — because the photograph needs to make sense of the focus.
Whale eye, lip lick, head turn away. The "I'm uncomfortable" signals. Stop shooting. The dog is telling you they've had enough. Pushing through these signals produces flat, unhappy frames and damages the dog's tolerance of the camera for next time.
The advanced move is to learn your specific dog's "I'm about to do something interesting" cue — the body shift before the leap, the ear-tilt before the bark, the head-drop before the play-bow. That moment, frozen at 1/1000 second, is the photograph that ends up framed.
Common mistakes
Bribing with food held above the camera. Dog looks up, ears pin back, head tilts unflatteringly. Hold the treat at lens height and to the side; release the dog to take it after the frame.
Asking the dog to "stay" for ten minutes. Boring and unfair. Set up the shot, get the dog there, take three frames in 30 seconds, release. Repeat in five minutes. Three short rounds of three frames produces more keepers than one long round of fifty frames.
Shooting only at sunset. Overcast bright is the friendliest light for dog photography by a long way — even illumination, no harsh shadows, no squinting, all colours read true. Don't wait for golden hour at the cost of overcast bright.
Using a wide-angle lens up close. Distorts the dog's snout into a cartoon. Use a 50mm or longer for portraits; the longer the focal length, the more flattering the head proportions. 85mm or 100mm is the sweet spot for static dog portraits.
Shooting from above. Already covered, but worth repeating because it's the single biggest mistake. Knees, sit, lie down. Always.
Letting the lead/leash trail into frame. Train someone (or yourself) to hold the lead behind the dog, off-frame. Or remove the lead entirely if it's safe to do so. Removing it in post is possible but tedious.
Dog photography FAQ
Key takeaways
Lens at or below dog eye-level — kneel, sit, or lie. The single biggest improvement you can make.
Soft light beats hard light — overcast bright, first or last hour, or open shade. Avoid bright midday sun.
Faster shutter than you think — 1/250 minimum for a head shot, 1/1000 for action. Dogs always move more than you think.
Single-point AF on the dog's near eye — eye-detect AF is brilliant on modern cameras but the eye still needs to be sharp; check the playback.
Black dogs need +1 exposure compensation; white dogs need -1. The camera's meter is wrong for both extremes by default.
Three short rounds of three frames beats one long marathon. Watch the dog's body language and stop before they tell you twice.
The five scenarios are different problems — garden portrait, walkies action, indoor light, beach/water, family group. Pick one before you pick up the camera.
Continue learning

Conclusion and summary
Dog photography rewards owners who treat their dog as a partner in the photograph rather than a prop. The settings layer is small and easily learned — single-point autofocus on the eye, faster shutter than you'd use for a human, exposure compensation for black or white coats, soft natural light. The harder layer, the one that separates ordinary frames from keepers, is reading the dog: knowing when they're "on", knowing when they've had enough, and ending the session before the dog stops enjoying it. The photograph that ends up framed isn't usually the one you set up; it's the one you noticed in the half-second between set-ups, when the dog was just being themselves.
The framework to internalise: kneel for the angle; soft light for the look; fast shutter for the eyes; single-point autofocus for the focus; +1 or -1 exposure compensation for the extreme coats; one of the five scenarios per session; three short rounds of three frames; watch the body language. None of those needs new equipment. All of them apply equally to a phone, a basic mirrorless, or a pro DSLR. The best photograph of your dog you'll ever take is probably the next one you take, if you change those four things — angle, light, timing, relationship.
If you'd like targeted help with photographing your specific dog, my private photography lessons can be booked as a one-to-one session in Coventry or as an online Zoom mentoring call. Bring your camera, bring photographs you've already taken of your dog, and we'll work through the specific settings and approach for your camera, your dog, and your typical shooting scenarios. For everything else, the framework above plus your nearest park at 8am on an overcast morning is more than enough to come home with frames you'll actually want to print.