
Long Exposure Seascapes: A UK Coastal Photography Guide
Long Exposure Seascapes: A UK Coastal Photography Guide
Table of Contents Show
The UK coastline is one of the best long-exposure seascape training grounds in the world — 11,000 miles of shoreline, enormous tidal range, predictable light windows, and a geological diversity (folded sandstone, granite stacks, shingle, estuary mud, chalk, limestone) that means every region offers a different problem to solve. What separates the holiday-snap long exposure from a print-wall photograph isn't the camera or even the filter choice. It's the decisions made before the shutter opens: which tide, which light, which shot type, which safety call.
This guide is the intermediate decision layer — the companion to my beginner long-exposure how-to (which covers the gear, settings and technique), my ND filter usage article, and my Hartland Quay coastal workshop blog. Read those for the technique and the location story. This article is about the decisions you make on the day: how to read the tide, which of the five seascape shot types to pursue, and how to stay safe on a UK shoreline that kills several photographers every year through misjudged tides and sneaker waves.
Why UK seascapes are their own subject
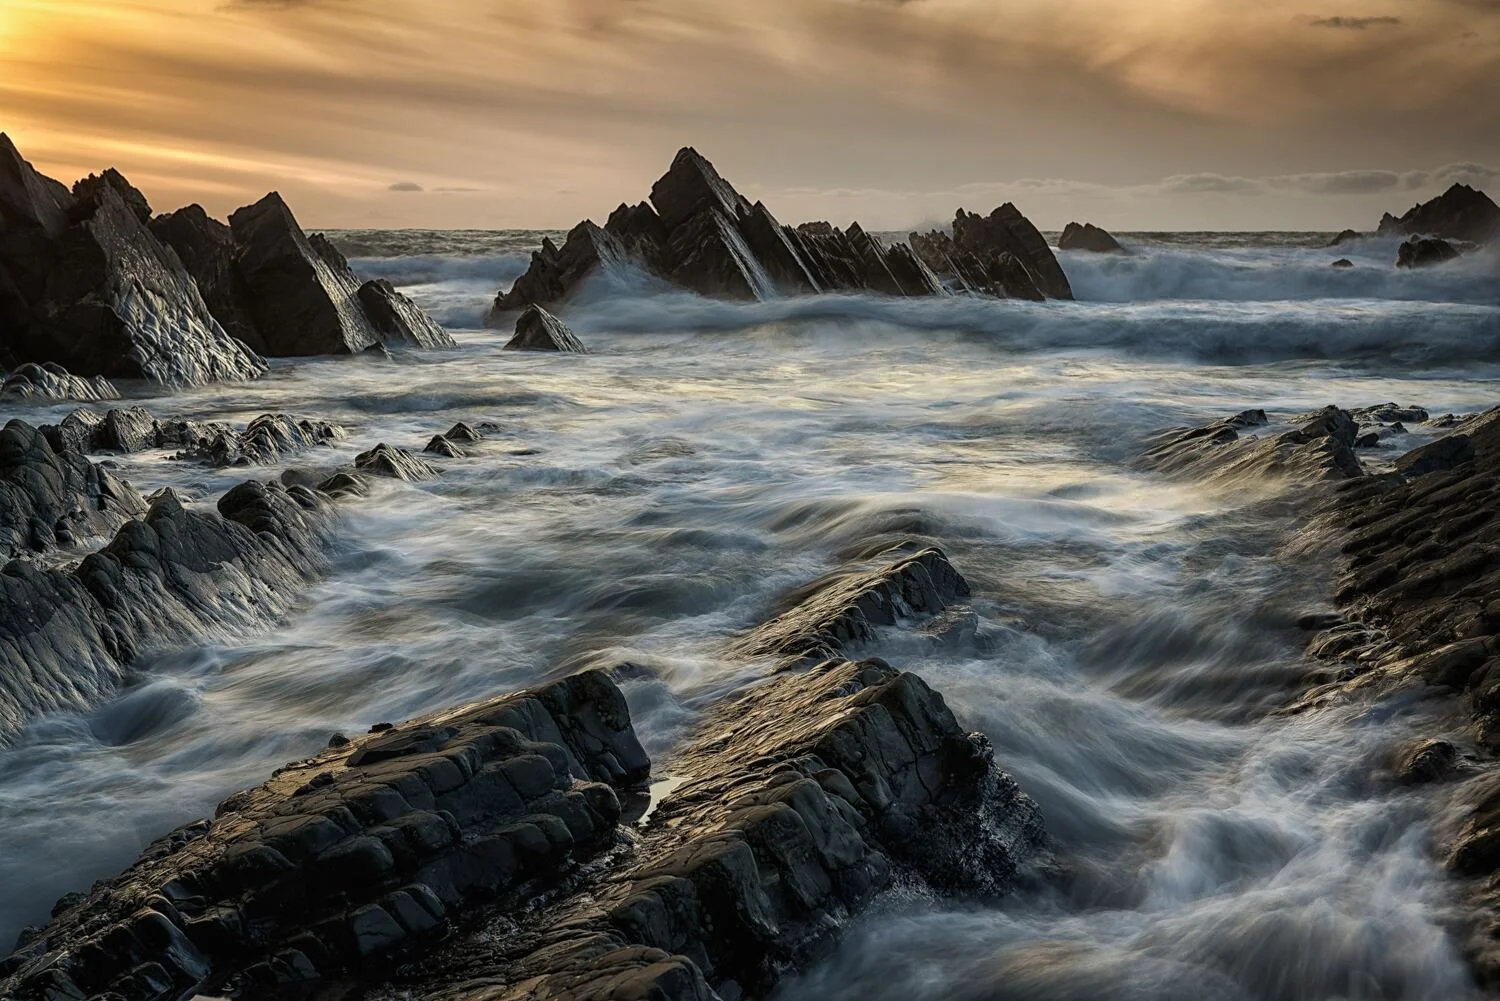
Inland long exposure — a waterfall, a river, a misty lake — is a controlled subject. The water moves in one direction, at one speed, with predictable lighting. Seascape long exposure is the opposite: the water direction, speed and scale change minute by minute with the tide, the wind direction and the wave period. Getting a clean shot means reading the whole system rather than following a recipe.
The UK specifically offers two rare combinations: enormous tidal range (up to 14 metres in the Bristol Channel) which means the same beach becomes four different beaches through the day; and reliably overcast or diffused skies, which give the soft directional light that seascapes need. The trade-off is weather volatility and proper safety risk — UK coastal photography kills more people than any other form of landscape photography. Both the opportunity and the danger scale with how well you read the conditions.
Reading the tide: high, low, rising, falling
The tide is a tool, not a condition. Each of the four tide states does something different for a seascape photograph, and the best shoots treat tide reading as the first decision of the day — before composition, before exposure, before filter choice.
Low tide exposes foreground. Rocks, pools, sand ripples, stranded seaweed, shipwreck remains — anything usually underwater becomes available as foreground interest. Best for detail and texture work.
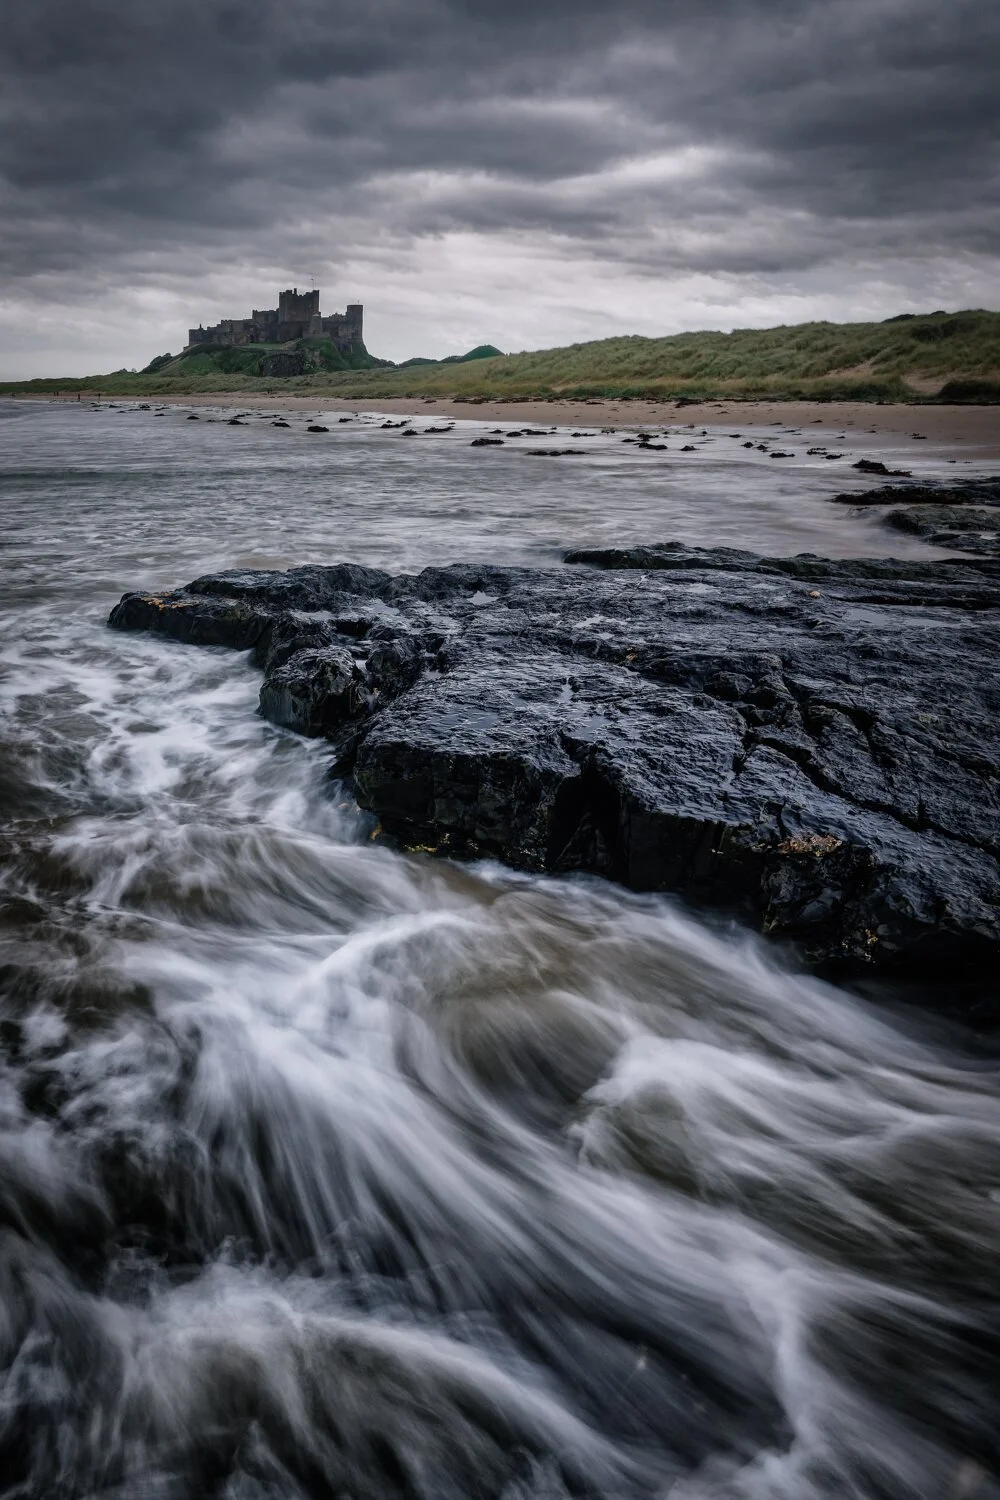
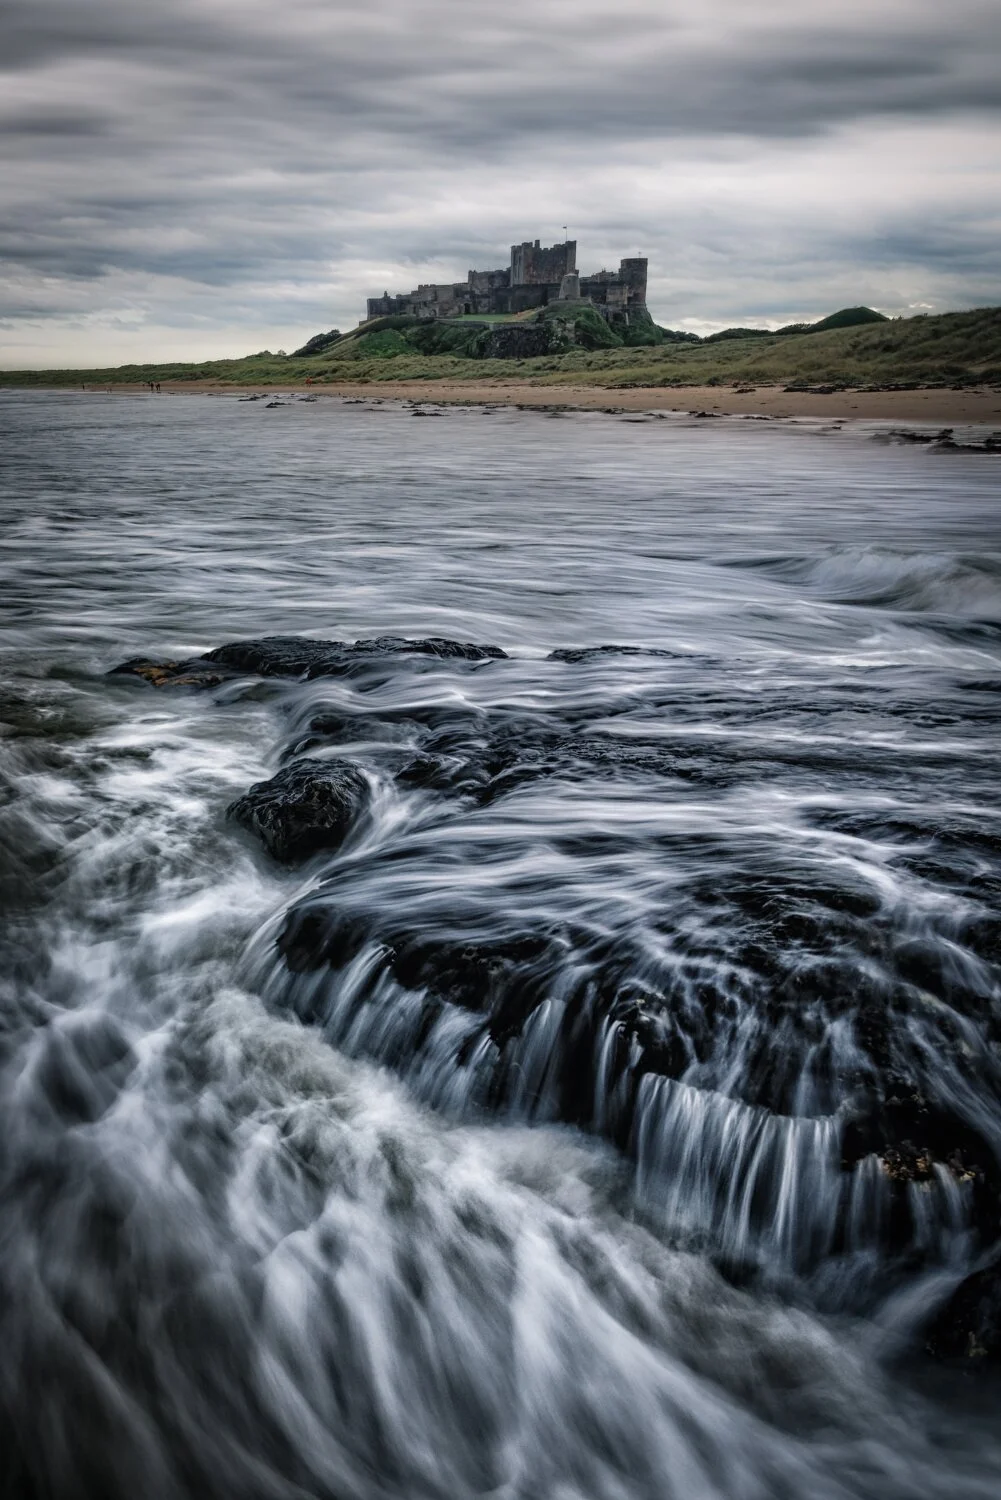
Rising tide creates drama. Water arriving onto a foreground you can still stand on gives the most powerful long-exposure wave-motion shots. This is the most productive window but also the most dangerous.
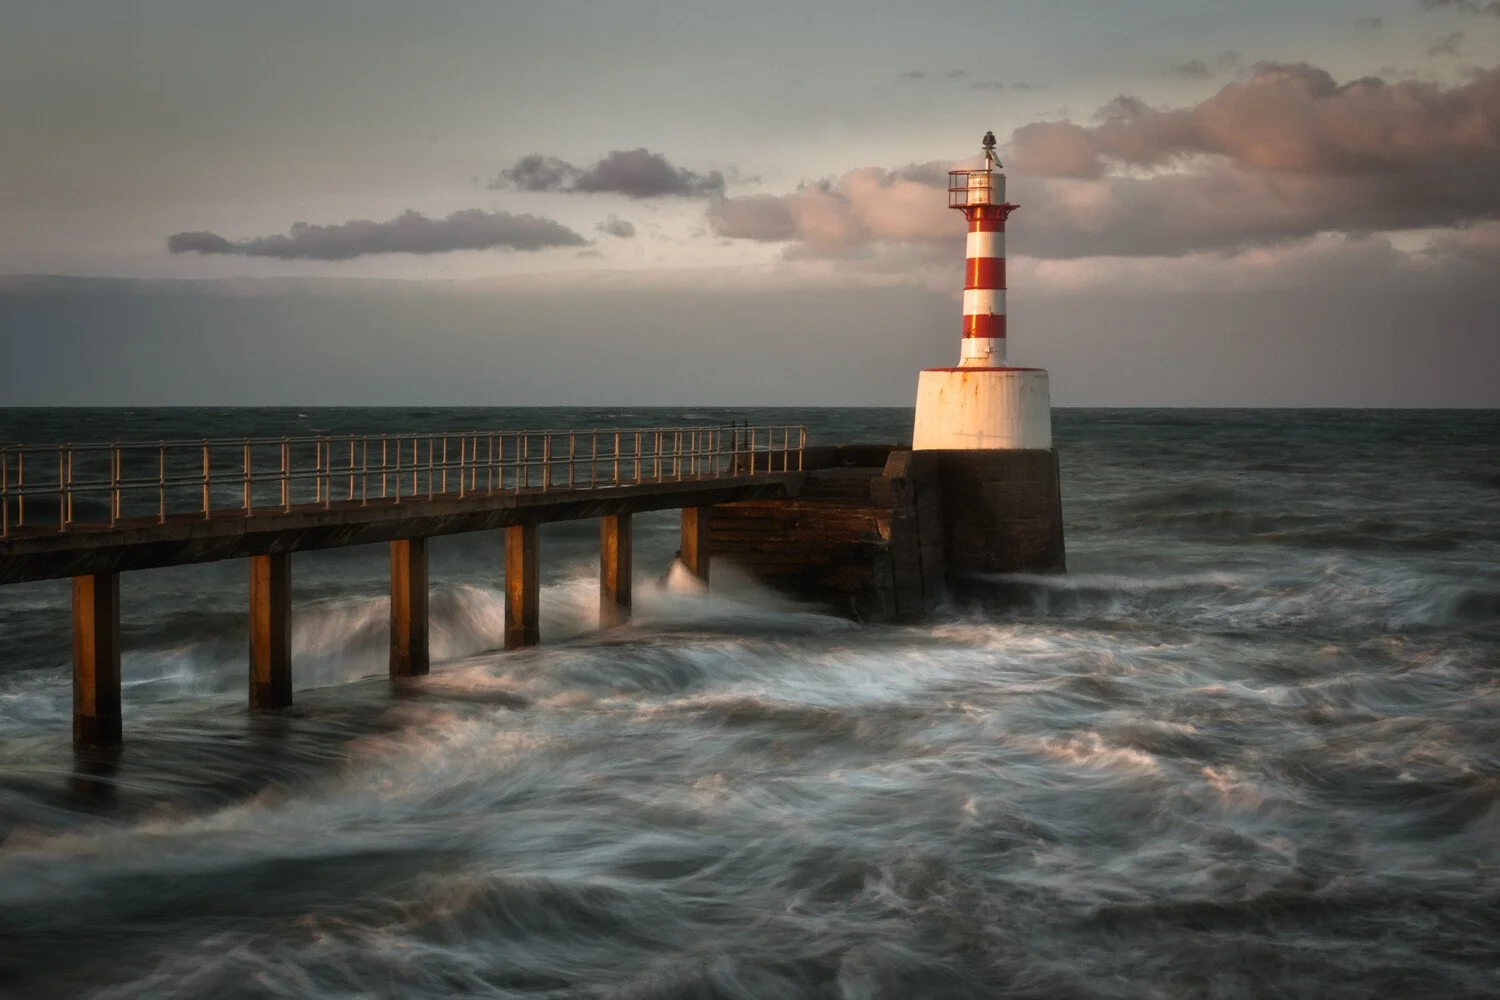
High tide simplifies. Foreground disappears, leaving cleaner minimalist compositions of stacks, headlands, piers and breakwaters. Ideal for the "minimalist single subject" shot type.
Falling tide reveals. As water retreats it leaves wet sand, receding wave patterns, and brief access to features covered at high tide. Less dramatic than rising but safer and often prettier.
The practical rule: check the tide table the night before, pick one specific tide state as your target, arrive 90 minutes earlier than you think you need, and leave well before the opposite tide state arrives. For Hartland Quay, Burnham-on-Sea, Northumberland and Exmoor locations where I run workshops, the tide window is often only 90 to 120 minutes of real shooting.
Tide state × shot type matrix — which tide window gives you which kind of photograph. Plan your arrival around the row that matches what you actually want.
The five seascape shot types
Every strong long-exposure seascape photograph fits one of five shot types. The decision of which you're after — made before you leave the car — drives every subsequent choice of lens, filter strength, tripod position and composition. Most failed seascape shoots are the result of trying all five in one session and committing to none.
The glassy mirror. Very long exposure (60–240 seconds) that smooths water into an almost reflective surface. Needs high tide, calm sea, a 10-stop ND, and a strong anchor subject (stack, pier, single boat). The shot that made long exposure famous.
The streaking wave motion. Shorter exposure (0.5–4 seconds) that captures the visible trail of a receding wave on wet rock or sand. This is the "dragon's tail" or "tentacle" shot — dynamic, directional, needs rising or falling tide and a 3–6 stop ND.
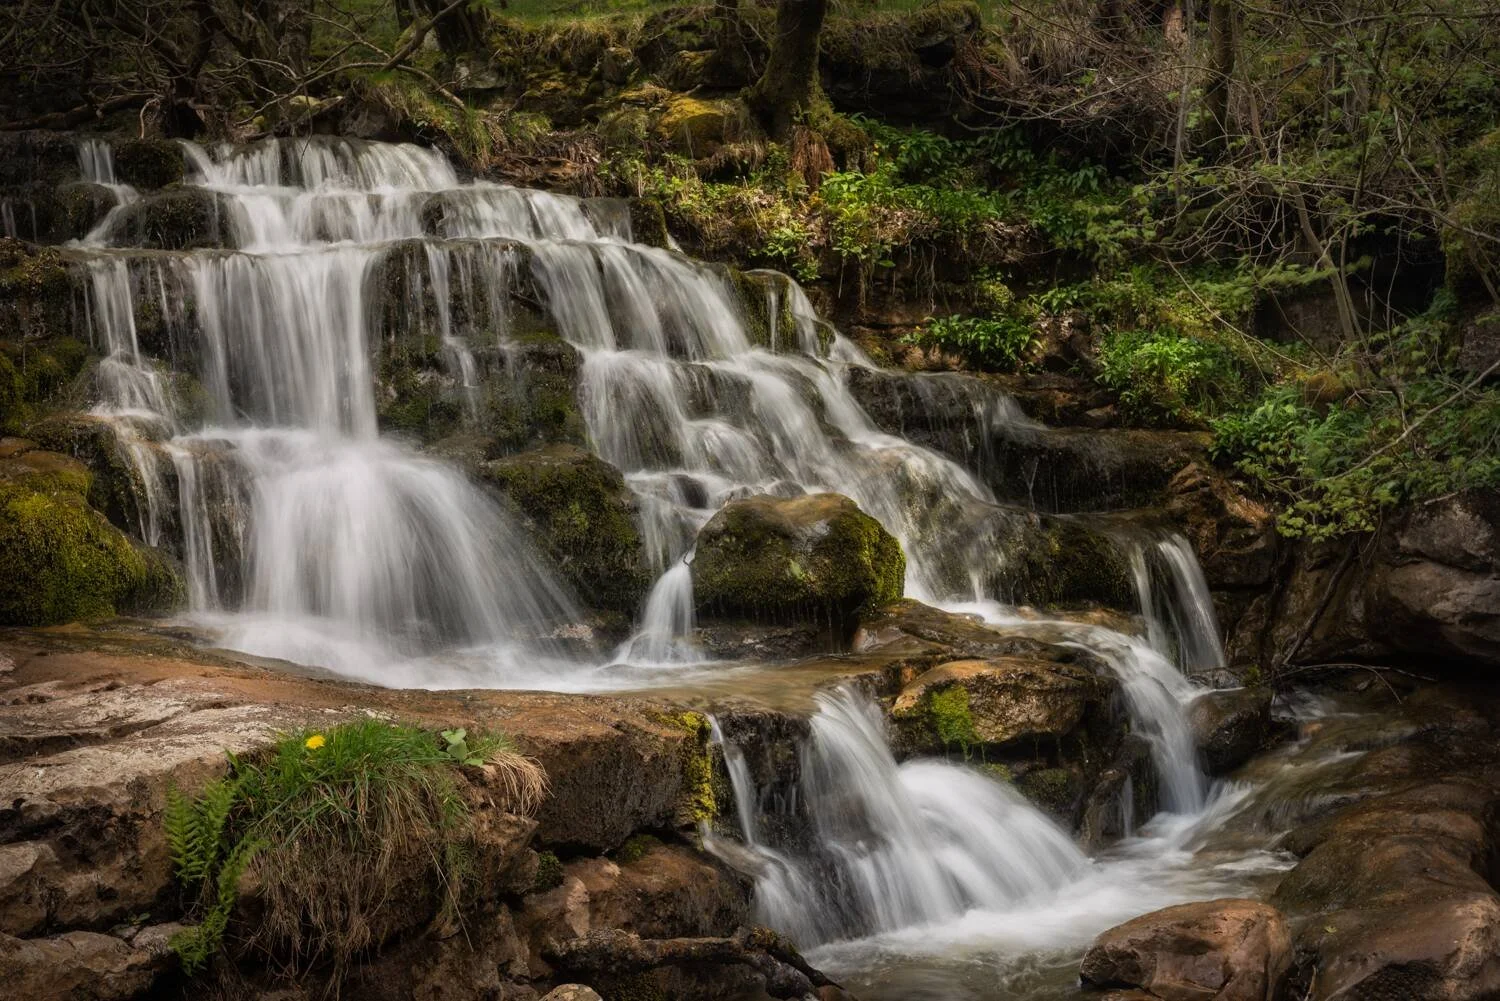
The milky smooth. Mid-length exposure (10–30 seconds) that sits between the two extremes — not glassy, not streaking, just soft and textural. The most versatile and the easiest to get right. Works with 6-stop ND in most light.
The silhouette with motion. Sunrise or sunset, subject (stack, lone figure, lighthouse, wreck) rendered as near-black against smoothed water and a coloured sky. Exposure typically 5–30 seconds, with graduated ND or bracketing to hold the sky.
The rock-texture detail. Close-in shot of foreground rocks with water moving around them at exposure times showing texture in the water without total blur (1/2 to 2 seconds). Mid-telephoto lens, low ND or no ND needed. An underappreciated shot type — works on almost any coast.
Seascape settings by shot type — starting points, not absolute rules. Bracket around these values for the specific scene but use these to make the filter and shutter decision before you leave the car.
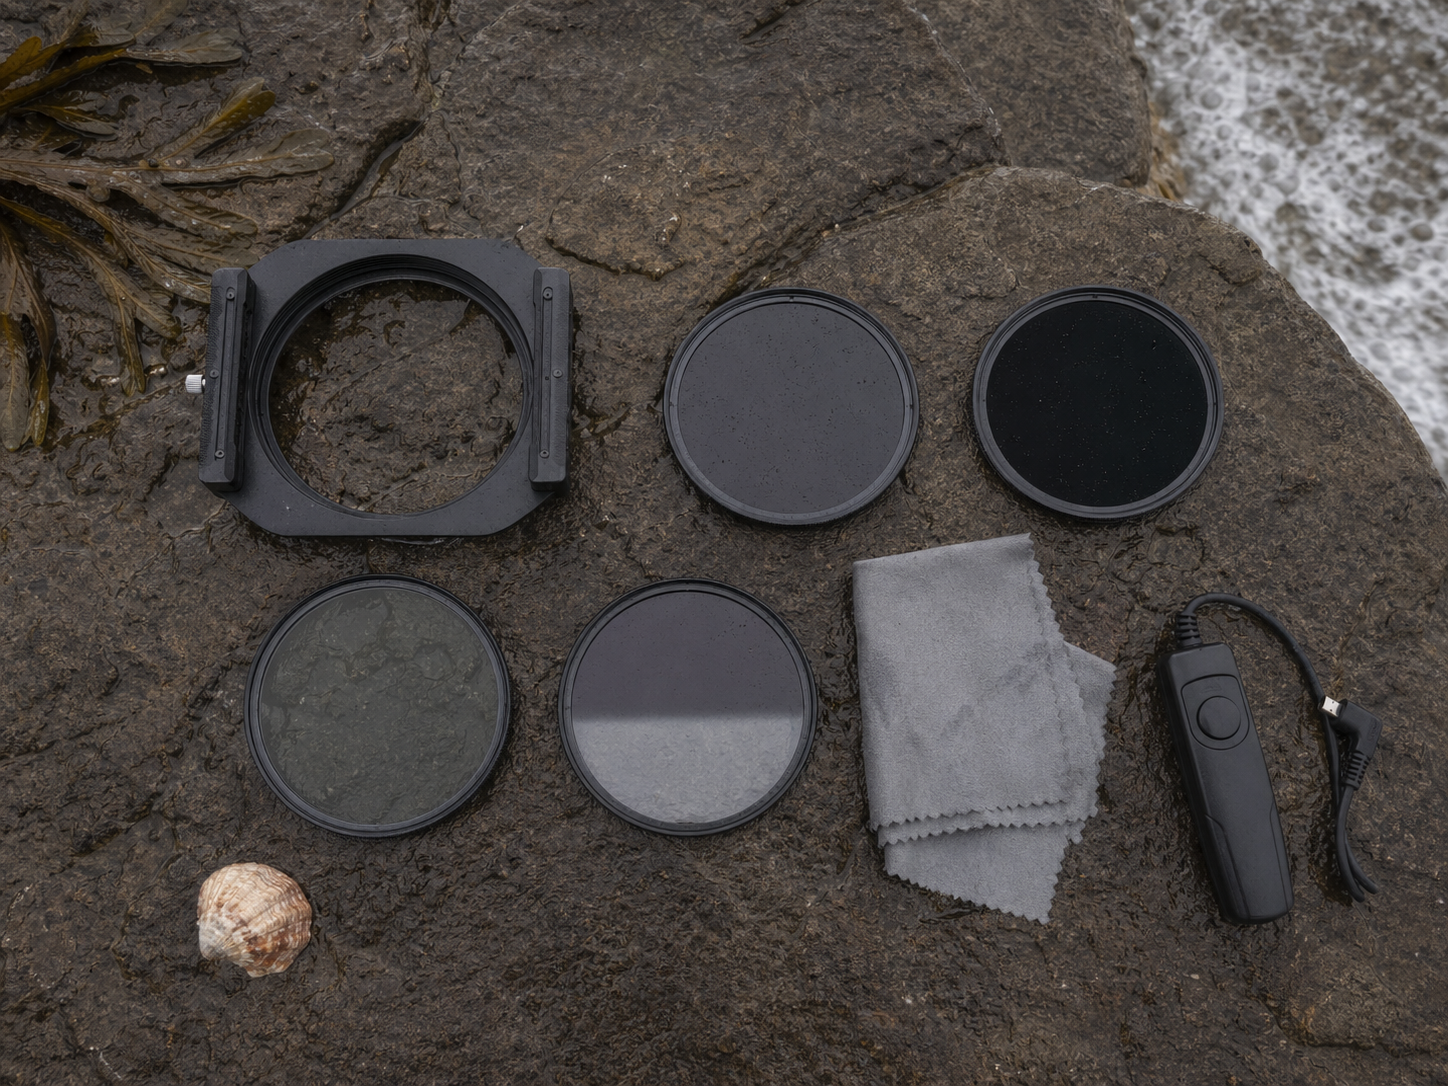
ND filter choices: three filters, not ten
Your filter cabinet doesn't need to be deep — three ND filters cover 95% of seascape situations. For the underlying theory and filter mechanics, see my ND filter usage article and the ND/GND mastery assignment. The short practical summary for seascapes:
3-stop ND for streaking wave motion at bright hours and rock-texture detail shots. Extends shutter from 1/60 to 1/8 — perfect for visible wave trails.
6-stop ND for the milky smooth shot type at most hours of the day. The workhorse filter — Mads Peter Iversen and many UK seascape shooters call this their most-used.
10-stop ND for the glassy mirror at bright hours, or for daytime exposures beyond 30 seconds. Combined with a 3-stop grad ND for sunrise/sunset silhouette work.
If you're a Kase or Haida user, see my Kase filters piece for my current system and my filter reference for a complete rundown. Stacking a 6-stop with a polariser is the single most productive combination I use on UK seascapes — reduces glare off wet rock and extends exposure into the milky-smooth window without going to a 10-stop.
The coastal shoot workflow
A successful seascape shoot is a process, not a burst of inspiration. The photographers who come home with keepers every time follow some version of the workflow below — tide checked, kit packed, arrival time calibrated to the tide, shot type chosen, safety call made, first frame only after all of those are nailed.
See a UK seascape photographer at work
The video below — "Landscape Photography Tips & Techniques: Seascapes" by Thomas Heaton on the Thomas Heaton channel — is shot on the Northumberland coast, which is one of the most productive seascape training grounds in the UK and where I also run coastal workshops. Thomas works through composition, lens choice, long-exposure decision-making and filter use on a genuine working shoot. About 13 minutes and worth every one of them before your first serious UK seascape session.
Coastal safety — the part nobody writes about
More people die photographing the UK coast each year than in any other form of landscape photography. Almost every incident traces back to three identifiable mistakes. If you internalise these before your first seascape shoot you will outlive the odds by a decade.
Never turn your back on the sea. Sneaker waves — large waves that break well above the apparent waterline — are the single biggest killer on UK coasts. They arrive roughly every 100 waves and can be double the height of the preceding wave. If you're setting up with the sea behind you, you're gambling. Face the sea, or position a spotter, or shoot only at falling tide.
Check the tide times twice. Rising tide cuts off photographers on every UK coast every year. At Hartland Quay, Birling Gap, Stackpole and the Lulworth area, the beach at low tide becomes uncrossable at high tide within two hours. Use a proper tide table (Admiralty Easytide, Tide Times UK app) and add a safety margin of one hour minimum.
Wet rock kills. Sandstone, limestone and kelp-covered granite are as slippery as wet ice. Boots with moulded rubber compound (Vibram Megagrip or equivalent), walking poles, and a habit of testing every step before weighting it. No photograph is worth a broken ankle five miles from a road with the tide coming in.
If you're new to UK seascape photography, a workshop at a proven location with a guide who knows the tide patterns is the shortest path to safe competence. My Devon Hartland Quay weekend workshop, coastal Northumberland workshop, and Burnham-on-Sea long exposure workshop all include the tide reading and safety decisions that you're otherwise learning alone.
Common long exposure seascape mistakes
Committing to one exposure length. The same scene can be five different photographs at five different exposure times. Bracket shutter speeds (2s, 8s, 30s, 120s) before picking a final frame — the one that works is rarely the one you expected.
Ignoring the sky. A long exposure brings the water's dynamic range down, making the sky relatively brighter. Graduated ND or a second exposure for the sky is almost always needed. The biggest amateur tell is a blown-out sky above a perfectly smoothed sea.
Forgetting the polariser. Seascape glare off wet rock and water surface destroys colour and contrast. A polariser removes it — even if you don't need the extra shutter time it gives you, you need the glare reduction.
Shooting only at sunset. Blue hour (the 30 minutes after sunset and before sunrise) often produces better seascape colour than the sun-on-horizon hour — softer tonal separation, less harsh contrast, and the sea reads cleaner in long exposure. Don't pack up when the sun sets; stay another 40 minutes.
Not planning the tide. Arriving at low tide when you want a glassy mirror, or high tide when you want rock-texture detail, means no amount of ND strength or composition skill recovers the shoot. Tide plan first, everything else after.
Long exposure seascapes FAQ
Key takeaways
Tide state is the first decision, not exposure settings. Low tide for foreground, rising for drama, high for minimalism, falling for texture.
Pick one of the five shot types per session — glassy mirror, streaking wave, milky smooth, silhouette, or rock-texture. Trying all five gets you none.
Three ND filters cover 95% of situations — 3-stop, 6-stop, 10-stop — plus a polariser. Don't over-buy.
Sky is the failure point. Graduated ND or bracketing for sky is almost always needed.
Safety is learned first, photography second. Face the sea, check the tide twice, respect wet rock. No photograph is worth a broken ankle.
Blue hour often beats golden hour for seascape long exposure. Stay 40 minutes past sunset.
Continue learning
Conclusion and summary
UK seascape long exposure rewards decisions, not reflexes. The enormous tidal range and diverse coastal geology of the British Isles give seascape photographers options no other country offers — but they also demand more planning, more safety awareness, and more willingness to commit to one shot type at a time. The photographers who come home with prints they're proud of are the ones who read the tide the night before, arrive knowing what they're after, match the filter to the shot rather than the shot to the filter, and walk away when conditions change rather than forcing a frame that isn't there.
The field-guide framework to internalise: tide state is the first decision; shot type is the second; filter and exposure length follow naturally once those two are set. Five shot types cover the genre (glassy mirror, streaking wave, milky smooth, silhouette, rock-texture detail). Three ND filters plus a polariser cover 95% of situations. Blue hour is often better than golden hour. Safety — especially sneaker waves, rising-tide cut-off, and wet rock — is not optional and is the reason working with a guide on an unfamiliar coast repays its cost many times over.
If you'd rather learn this framework on an actual UK coastline with live tide conditions and a guide who knows the safe ground, my Hartland Quay weekend workshops run in February and September, my Northumberland coastal workshops run through the year, and my Burnham-on-Sea long exposure sessions are single-day introductions. Groups stay small (four to six photographers) and the tide reading is taught on location, where it sticks. For everything else, your nearest coastline, a tide app, and the five-shot-type framework above is more than enough to come home from your next seascape session with a handful of frames that stand up to looking at a year later.