
Food Photography at Home: A Practical UK DIY Guide
Table of Contents Show
Food Photography at Home: A Practical UK DIY Guide
Food photography is the genre where the gap between "good phone snap" and "looks professional" is the smallest you'll encounter — and the easiest to close. A window, a £15 piece of white foam board, and twenty minutes of patience will get you 90% of the way there. The remaining 10% is understanding why some food photographs stop you scrolling and others don't.
This guide covers the kit that actually matters, how to read window light in a British house, the five angles every food photographer should know, the small styling changes that lift a shot from flat to appetising, and the editing workflow that finishes the image without making it look fake.
Why home food photography is different from restaurant or commercial work
Professional food photographers working on cookbook or advertising shoots use controlled studio lighting, a stylist, and ingredients that have been cooked specifically to photograph — often using tricks that make the food inedible. That's not useful for you.
Home food photography is about capturing food you actually cooked, in the kitchen you actually have, quickly enough that it's still fresh when it goes on the plate. That has three practical implications: work with what you've got, shoot fast, and don't over-style. Food that looks too arranged reads as fake to modern viewers — the trend is toward images that look like the food was about to be eaten.
The kit you actually need
You can shoot strong home food photography with surprisingly little kit. The key upgrade order, if you're building up from zero, is: tripod first, camera body second, lens third, reflector last.
Home food photography kit tiers — the realistic setups from phone-only to full-frame. Pick the level that matches the investment you want to make.
A tripod matters more than most beginners realise. Window light is often dim, and a tripod lets you use a slow shutter speed at low ISO — which gives you cleaner files and sharper detail. For overhead shots especially, a tripod with a horizontal centre column is transformative.
The lens choice for food photography is narrower than for most genres. A 50mm or a 35mm prime lens (or the equivalent focal length on a zoom) covers nearly every food shot worth taking. Very wide lenses distort food unnaturally, and long telephotos compress the frame in ways that feel flat. If you already own a "nifty fifty" (50mm f/1.8), you have a perfectly good food photography lens.
Reading window light in a British house
The single most important skill in home food photography isn't camera technique — it's knowing which window in your house gives you the best light, and at what time of day.
North-facing windows are the jackpot. They never get direct sun, so the light is soft and consistent all day. Almost every professional food photographer who shoots natural light prefers a north-facing window. If you have one in your kitchen or dining area, use it.
East-facing windows give beautiful warm light early in the morning but go dim and flat after about 10am.
West-facing windows are the mirror of east — flat in the morning, warm and directional in late afternoon.
South-facing windows are the trickiest. Harsh direct sun on food creates ugly shadows and blown highlights. The fix is to diffuse the light — tape a piece of white baking paper or a sheer curtain across the window. Suddenly the worst window in the house becomes the most reliable.
Turn off every other light in the room while you shoot. Mixing daylight with warm tungsten lamps produces colour-cast photographs that are painful to fix in editing.
The five angles every food photographer should know
Food photography is dominated by five angles, and picking the right one for the dish matters more than almost anything else.
The five food photography angles — when to use each, and the dishes they suit. Picking the right angle is more impactful than any camera setting.
Overhead (90°) is the workhorse of Instagram food photography. Perfect for flat dishes — pizzas, salads, tacos, grain bowls, traybakes, charcuterie boards. Anything where the top of the plate is the story.
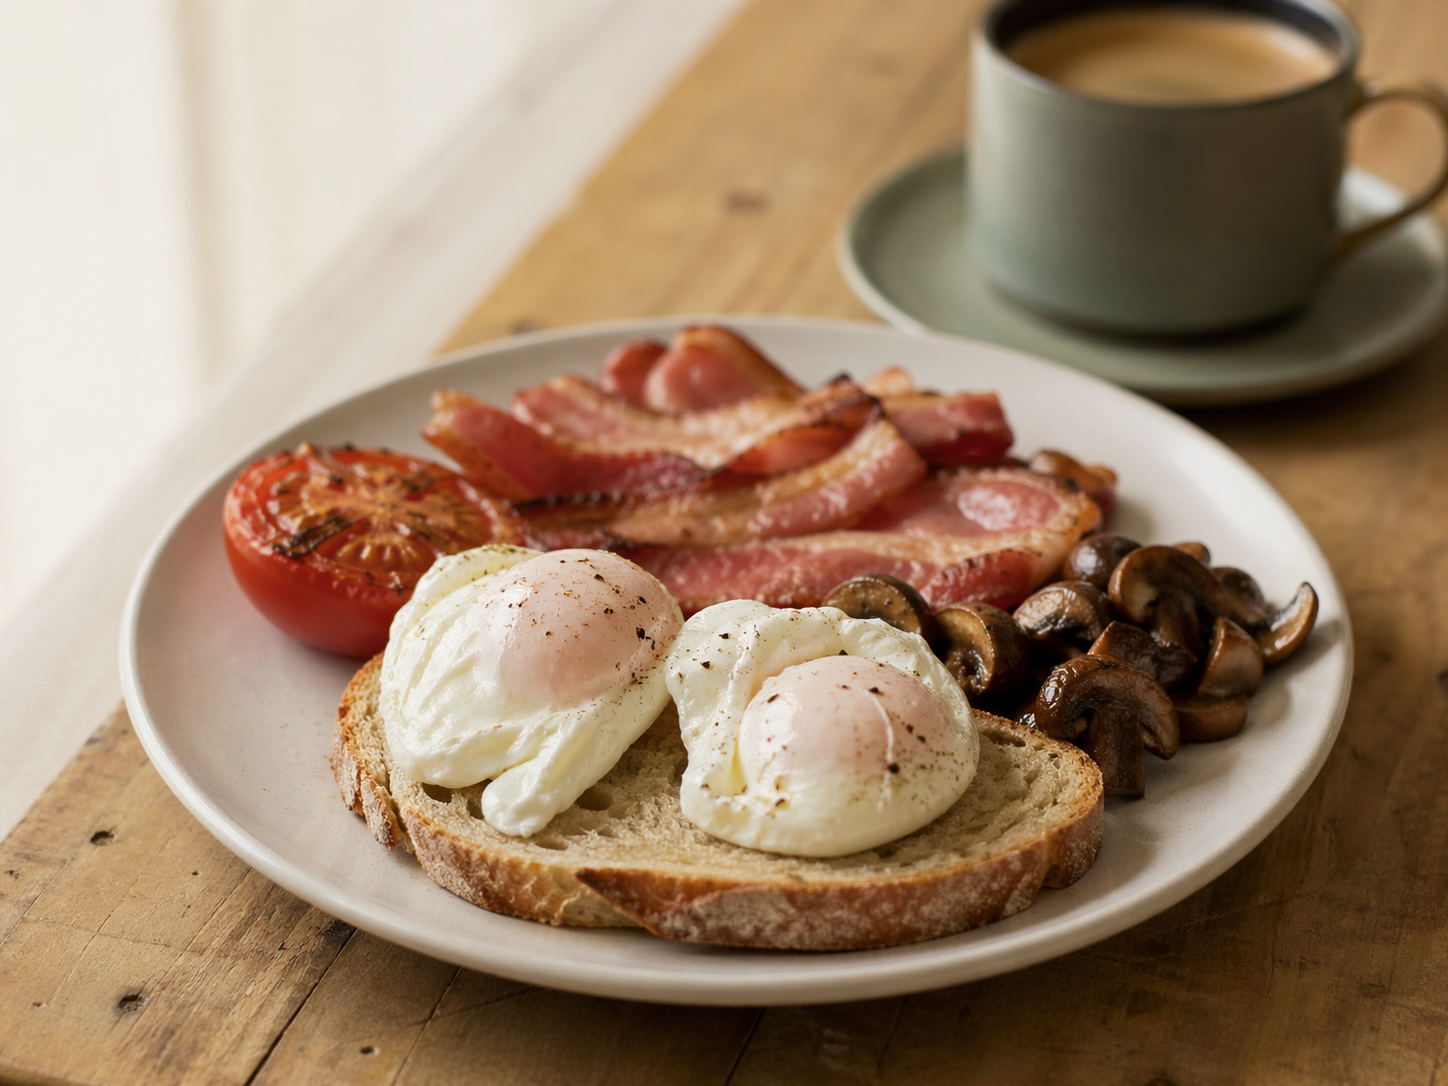
Three-quarter (45°) is the most natural, because it's roughly how the dish looks when you're about to eat it. Works for almost any plated meal. This is the angle to default to if you're unsure.
Straight-on (0°) works for tall food with architectural interest — burgers, layered cakes, stacked pancakes, cocktails. Everything else looks short and disappointing from this angle.
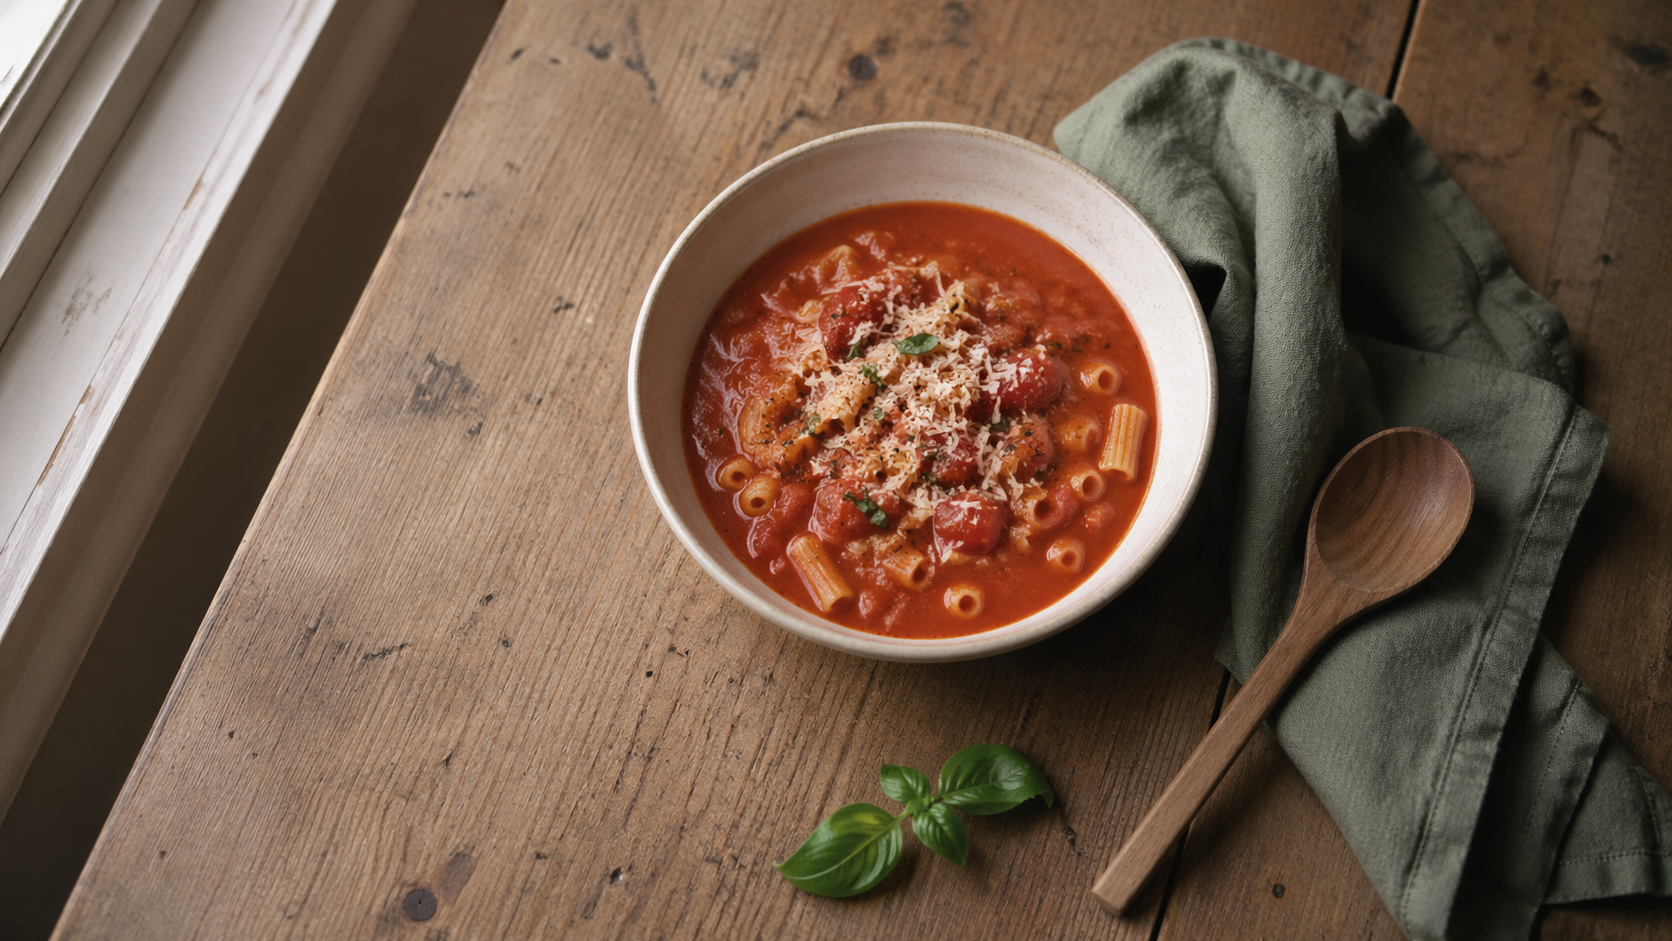
High angle (60–70°) is a softer cousin of overhead — shows the top of the dish but also some side depth. Excellent for bowls of soup, stews, and curries where you want to hint at texture and steam.
Low (15°) is rarely right but occasionally magical — for a dramatic cake or pie with stacked layers, or a slice of something with filling spilling out. Use sparingly.
The practical advice: take the same dish from three angles and compare them later. Your instinct for which angle works for which food will develop faster than you expect.
Styling without overdoing it
Over-styled food photographs are the quickest way to look amateur in the current aesthetic. The look that works now is lived-in — food that appears about to be eaten, not arranged for a photograph.
Three practical styling principles:
One imperfection per frame. A smudge of sauce on the rim. A napkin slightly skewed. Crumbs. These small imperfections signal "this is real food" — perfectly styled plates look artificial.
Negative space matters. Don't fill every corner of the frame with props, garnish, and backdrop. A simple plate on a simple surface with a generous amount of empty space around it reads as confident. Cluttered frames read as nervous.
Colour discipline. Pick two or three colours and stick to them. A warm dish works against warm surfaces (dark wood, linen, copper). A cool dish works against cool surfaces (marble, white tile, pewter). Mixing hot and cold colour schemes makes food look unappetising.
Camera settings for home food photography
Home food photography settings are forgiving compared to sports or wildlife work. A few fundamentals cover almost every situation.
Aperture: f/2.8 to f/5.6 for three-quarter shots where you want the background soft. f/5.6 to f/8 for overhead shots where the whole plate needs to be sharp. Anything smaller than f/8 isn't necessary and gives you slower shutter speeds for no gain.
Shutter speed: On a tripod, whatever the exposure wants — don't be afraid of 1/15s or slower. Handheld, 1/125s is the safe minimum for a 50mm lens.
ISO: Base ISO on a tripod. Rise to 800 or 1600 handheld if needed — modern cameras handle it cleanly.
White balance: Cloudy or Daylight preset will beat Auto for food. Auto white balance fights with food colours — warm dishes go cold, cold dishes go warm. Set a preset and correct in editing if needed.
Focus: Single-point autofocus placed on the most important feature — usually the food itself, not the prop. For overhead, pick a focal point in the centre of the dish.
The video above, "12 Food Photography Tips for Beginners" from Two Loves Studio on YouTube, is a brisk practical tour of the techniques most home food photographers skip. Worth a coffee break's watching before your next shoot.
Common mistakes in home food photography
Five mistakes appear in most amateur food photography and are easy to fix once you know to look for them.
1. Mixing light sources. Shooting near a window with the kitchen overhead light on produces a mixed-temperature photograph that looks wrong in a way viewers can't articulate. Kill every bulb and work with window light alone.
2. Photographing food too soon. Hot food gives off steam that reads as haze in photographs. Let the dish sit for 60 seconds before you shoot — the steam drops, the colours settle, the shot gets cleaner. Ice cream and melty food are the exception — shoot the second it's on the plate.
3. Shooting into the light. Backlight for food is glorious, side-light is safe, front-light is boring. Directly into the window is rarely the answer. Try 90° side-light first.
4. Over-saturating in editing. Saturated reds and yellows look delicious on your phone and horrible in print or on a desktop screen. Edit on the screen your audience will view the image on, and pull saturation back 10% from where it feels "right".
5. Using the wrong plate. White plates are a safe default but match the dish — a delicate pale soup looks better on a pale ceramic bowl than a stark white one. Dark plates make food look rich. Glass plates are usually a mistake.
Editing workflow
A quick food photography edit takes three to five minutes and makes a visible difference. The basics in order:
Correct white balance — slightly warmer than you think, usually.
Small exposure lift (+0.2 to +0.5) to brighten the dish.
Lift shadows a touch so dark corners have detail without going flat.
Pull back highlights gently so bright whites retain texture.
Tiny bump in contrast for separation.
Minor crop to tidy the frame — don't re-compose in post.
Saturation: leave alone. Vibrance: +5 if needed.
Lightroom, Capture One, Darktable (free), or Lightroom Mobile on a phone all handle this workflow comfortably. A preset for your regular window light is worth building once you know your kitchen — it'll save hours over a year.
Ready to go further
Home food photography is one of those skills that rewards consistent small practice more than intensive study. Cooking dinner anyway? Photograph it. If you want to push further — perhaps toward selling food images, food blogging, or just doing this better — here are some useful next steps.