
Macro Photography for Beginners: A UK Starter's Guide
Table of Contents Show
Macro Photography for Beginners: A UK Starter's Guide

Macro photography is the genre most beginners fall into by accident and then can't stop. The appeal is obvious: you can shoot it year-round, you don't need to travel, and a garden, local park, or kitchen windowsill will keep you busy for months. The catch is that almost none of the general photography advice you've read applies at macro distances — depth of field collapses, focus becomes unreliable, and your own breathing is enough to ruin a shot.
This guide covers the kit that actually works for UK subjects, the camera settings that give you a fighting chance of sharpness, the subjects to start with, and the common mistakes that quietly waste rolls of frames.
What counts as macro photography
Strictly, macro means a reproduction ratio of 1:1 or greater — the subject is projected onto the camera sensor at life size or larger. In practical terms, any lens that can focus close enough to fill the frame with something the size of a 10p coin is doing the job most beginners want to do.
You will see lenses labelled "macro" that only manage 1:2 (half life size) or 1:3. These are genuinely useful and much cheaper than dedicated 1:1 macro lenses, but you will run into the limit on very small subjects like ladybirds or the detail inside a small flower. For UK wildlife — butterflies, bees, dragonflies, spiders — a true 1:1 lens pays for itself within a season.
The kit that actually matters
Macro is one of the few genres where lens choice matters far more than the camera body. A mid-range camera with a good macro lens will beat a flagship body with a kit lens every time.
Macro photography kit options — the four realistic starting points, from cheapest to most capable. The magnification figure matters more than the price: 1:1 is true macro, anything less is close-up.
If you're starting from zero, the honest recommendation is a 90mm or 100mm macro lens. The working distance (how far the lens sits from the subject at 1:1) is around 15cm, which lets you photograph an insect without scaring it away. A 50mm or 60mm macro is cheaper but needs you to be within about 5cm of the subject, which is impossible for most living things.
A tripod is essential for static subjects (flowers, water droplets, indoor setups) and a complete liability for moving ones. For garden insects, handheld with a fast shutter speed and a good light source is the realistic approach.
Camera settings that give you a fighting chance
Three settings dominate whether a macro shot works: aperture, shutter speed, and focusing method. Everything else is detail.
Macro camera settings by subject — starting points, not rules. Adjust for your specific light, lens, and subject behaviour.
Aperture at macro distances is a compromise. At f/2.8, only a sliver of the subject will be sharp — useful for artistic shots, frustrating for documentary ones. At f/16, diffraction softens the image noticeably. The sweet spot for most macro work is f/8 to f/11, which gives enough depth of field to get a bee's eye and thorax sharp in the same frame without destroying image quality.
Shutter speed for handheld macro needs to be much faster than the usual rules suggest. The traditional "1/focal length" rule breaks down at macro distances because tiny movements of the camera get magnified enormously at 1:1. For a 100mm macro handheld at life-size magnification, 1/500s is a sensible floor, and 1/1000s is safer.
Focus is where most beginners lose their shots. Autofocus hunts at macro distances, especially in low light. For static subjects, switch to manual focus, set the magnification you want, then rock gently back and forth with your body until the subject comes into focus, and fire. For moving subjects, use single-point autofocus with the point pre-placed on the eye, and accept a lower hit rate.
The best UK macro subjects by season
One of the reasons macro photography works so well in the UK is that there's always something worth shooting.
Spring (March–May). Hoverflies warming up on leaves are ideal practice — slow, patient, and beautifully marked. Bluebells and wood anemones give you a carpet of colour at the exact macro scale. Newly-emerged butterflies (brimstones, peacocks) are cold in early morning and easier to approach.
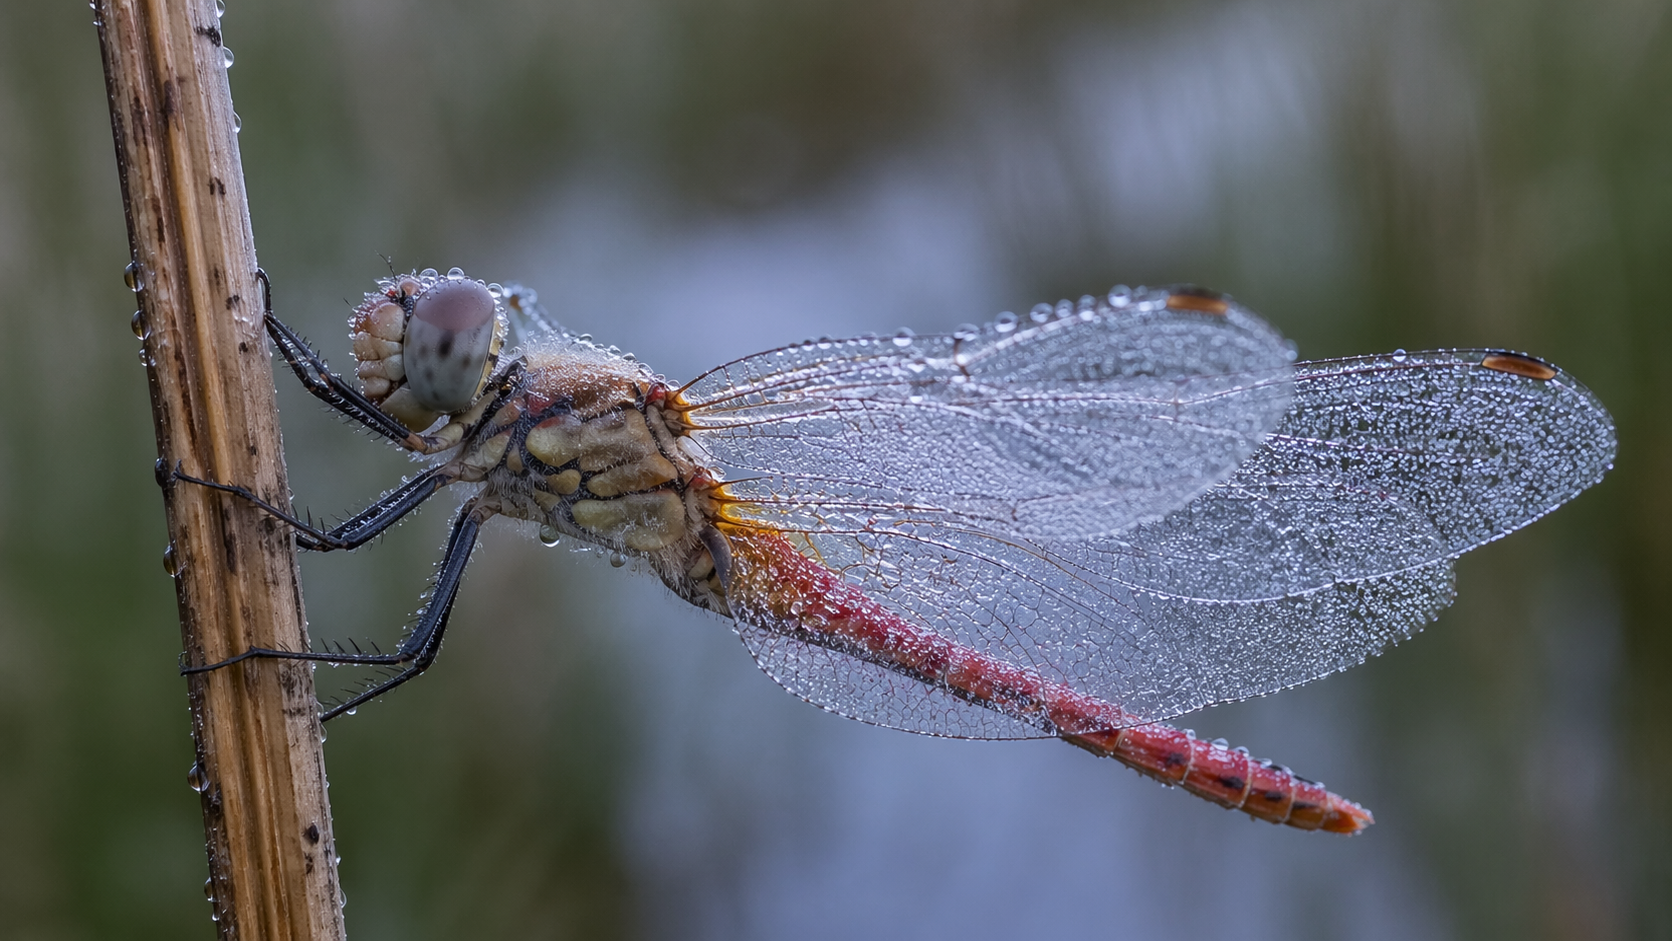
Summer (June–August). The peak season. Dragonflies at any canal or pond, damselflies on reeds, bumblebees on lavender, peacock and red admiral butterflies on buddleia, spiders with fresh webs at sunrise. Morning light between 6am and 9am gives you the best light and the calmest insects.
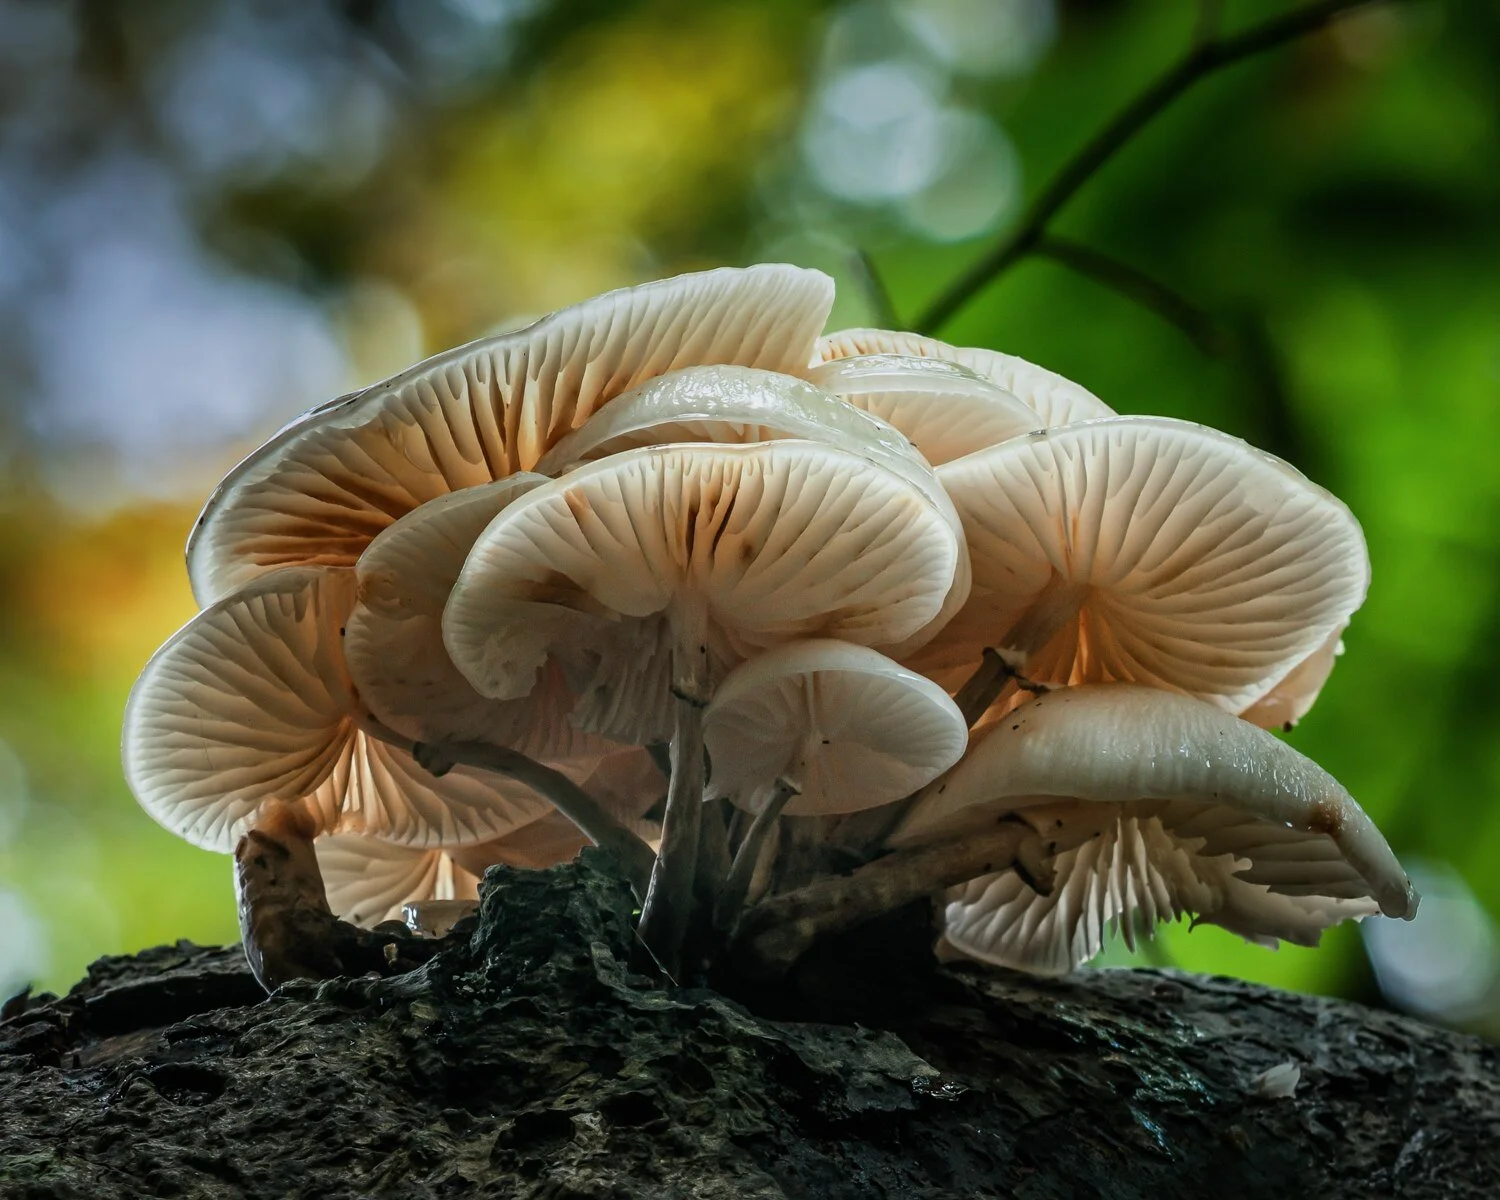
Autumn (September–November). Spiders and webs — especially orb weavers — are at their best. Fungi emerge after wet spells. Seed heads and berries make strong graphic compositions.
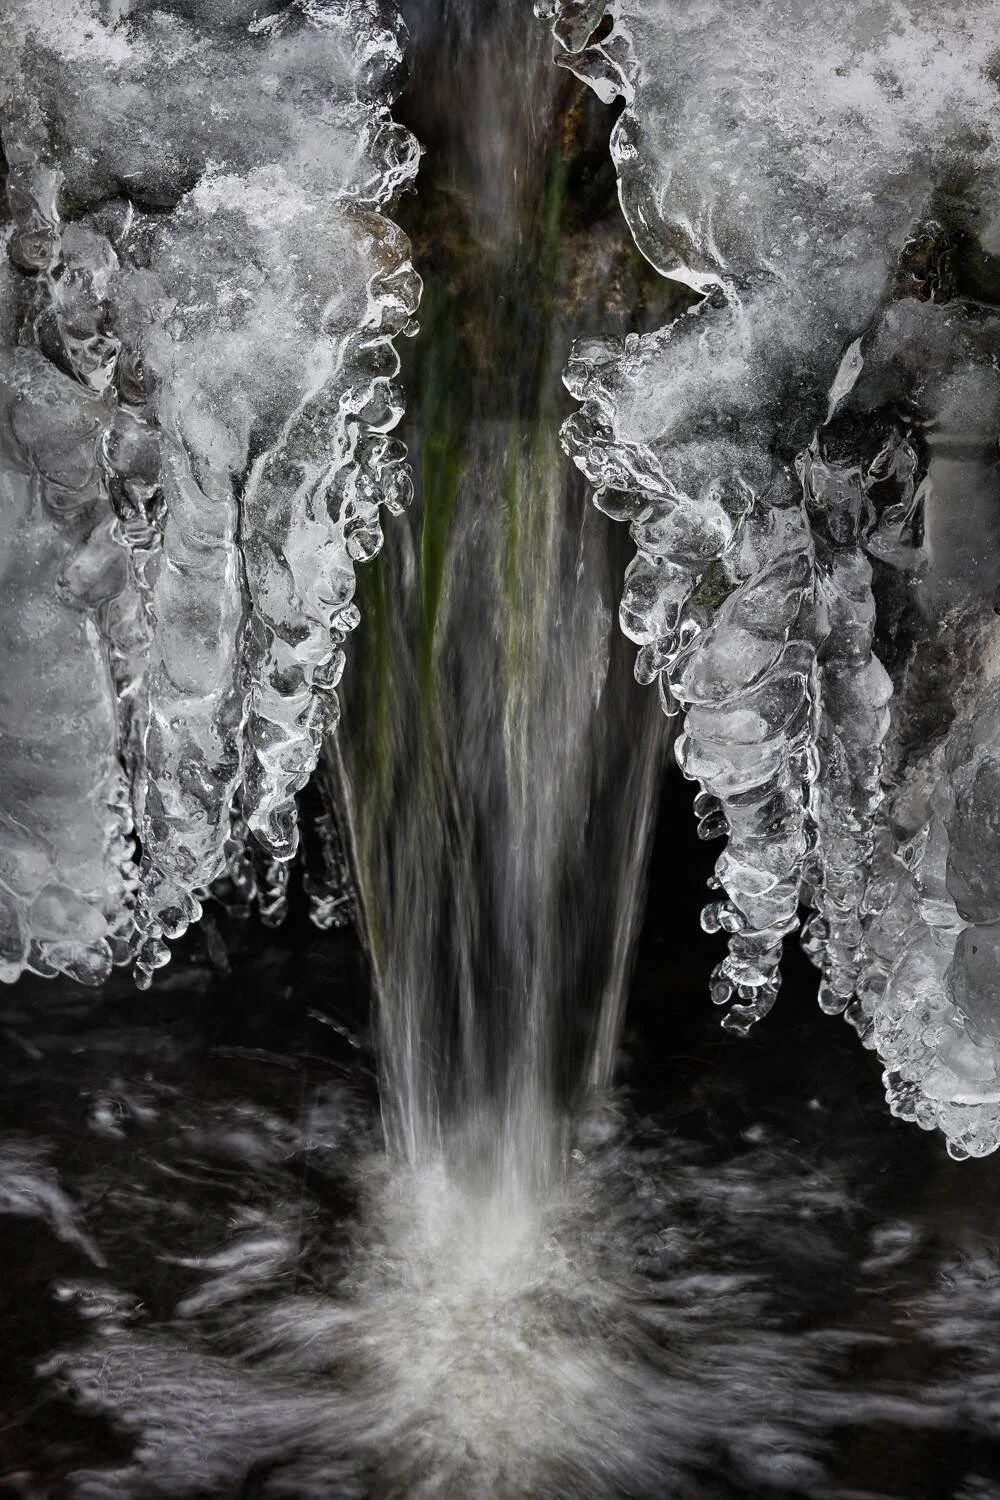
Winter (December–February). Indoor macro season. Frosted leaves on cold mornings, water droplets, feathers, textures, and kitchen subjects all keep the habit going.
Lighting: natural or flash
Most beginners shoot macro with natural light, and for good reason — it's free, it's available, and it matches how the human eye sees the subject. The two practical problems are that natural light is often too dim at small apertures, and that direct sunlight creates harsh shadows.
The cheap fix is a small white reflector held near the subject to bounce light into the shadow side. A piece of A4 paper folded in half works perfectly. For dim-light situations, raising ISO to 800 or 1600 is almost always a better call than opening the aperture and losing depth of field.
Flash — specifically a small off-camera flash or a dedicated macro twin flash — transforms macro photography once you're past the beginner stage. It freezes motion, gives you the small aperture you need, and lets you shoot at any time of day. But it's a learning curve in itself. Start with natural light, get your first hundred keepers, then invest in flash when the limitations of natural light become obvious.
The video above, "Macro Photography for Beginners – Complete Tutorial" by Micael Widell on YouTube, is a thorough walkthrough of insect macro in particular. Widell shoots in Sweden, but the approach translates directly to UK gardens and hedgerows. Worth an hour of your time before your first proper macro outing.
Common mistakes that ruin macro shots
Five mistakes account for most of the rejected frames I see from students starting out.
1. Shutter speed too slow. 1/125s feels fast handheld, but at 1:1 magnification it's not — every tiny tremor is magnified. If your handheld macro is soft and you can't work out why, the shutter speed is almost always the answer.
2. Aperture too wide. Shooting at f/2.8 on a 100mm macro lens gives you a few millimetres of depth of field. Lovely for abstract flower details. Useless when you wanted the whole bee in focus.
3. Chasing the subject. Approaching a butterfly quickly is the fastest way to lose it. Move at the speed of a slow walk, pause every metre, and let the subject acclimatise.
4. Ignoring the background. A sharp subject against a busy, bright background is a weak photograph. Check what's behind your subject before you shoot — shift your position by a pace until the background is clean.
5. Relying on autofocus. At macro distances, autofocus is unreliable even on modern cameras. For static subjects, manual focus plus body-rock is more accurate and faster.
Editing macro photographs
Macro images usually need less editing than people expect. The essentials are:
Set white balance — cool daylight often warms up slightly, insects especially benefit from a touch of warmth.
Small contrast lift to separate the subject from the background.
Selective sharpening on the eyes or main feature — not global sharpening, which over-sharpens backgrounds.
Minor crop to tidy the frame. Aggressive cropping loses resolution fast — compose in camera if you can.
Noise reduction if shot at ISO 800 or above, but gentle — heavy noise reduction smears insect detail.
Lightroom, Capture One, or free tools like Darktable all handle macro processing well. Avoid heavy-handed saturation — oversaturated colours are the signature of a beginner edit and instantly date the image.
Ready to go further
Macro photography is a genre that rewards patience and repetition. Your first hundred keepers will teach you more than any tutorial. If you want to speed up the learning curve, or find a group to practice with, here are some useful next steps.