
UK Woodland Photography: A Year-Round Practical Guide
UK Woodland Photography: A Year-Round Practical Guide
Table of Contents Show
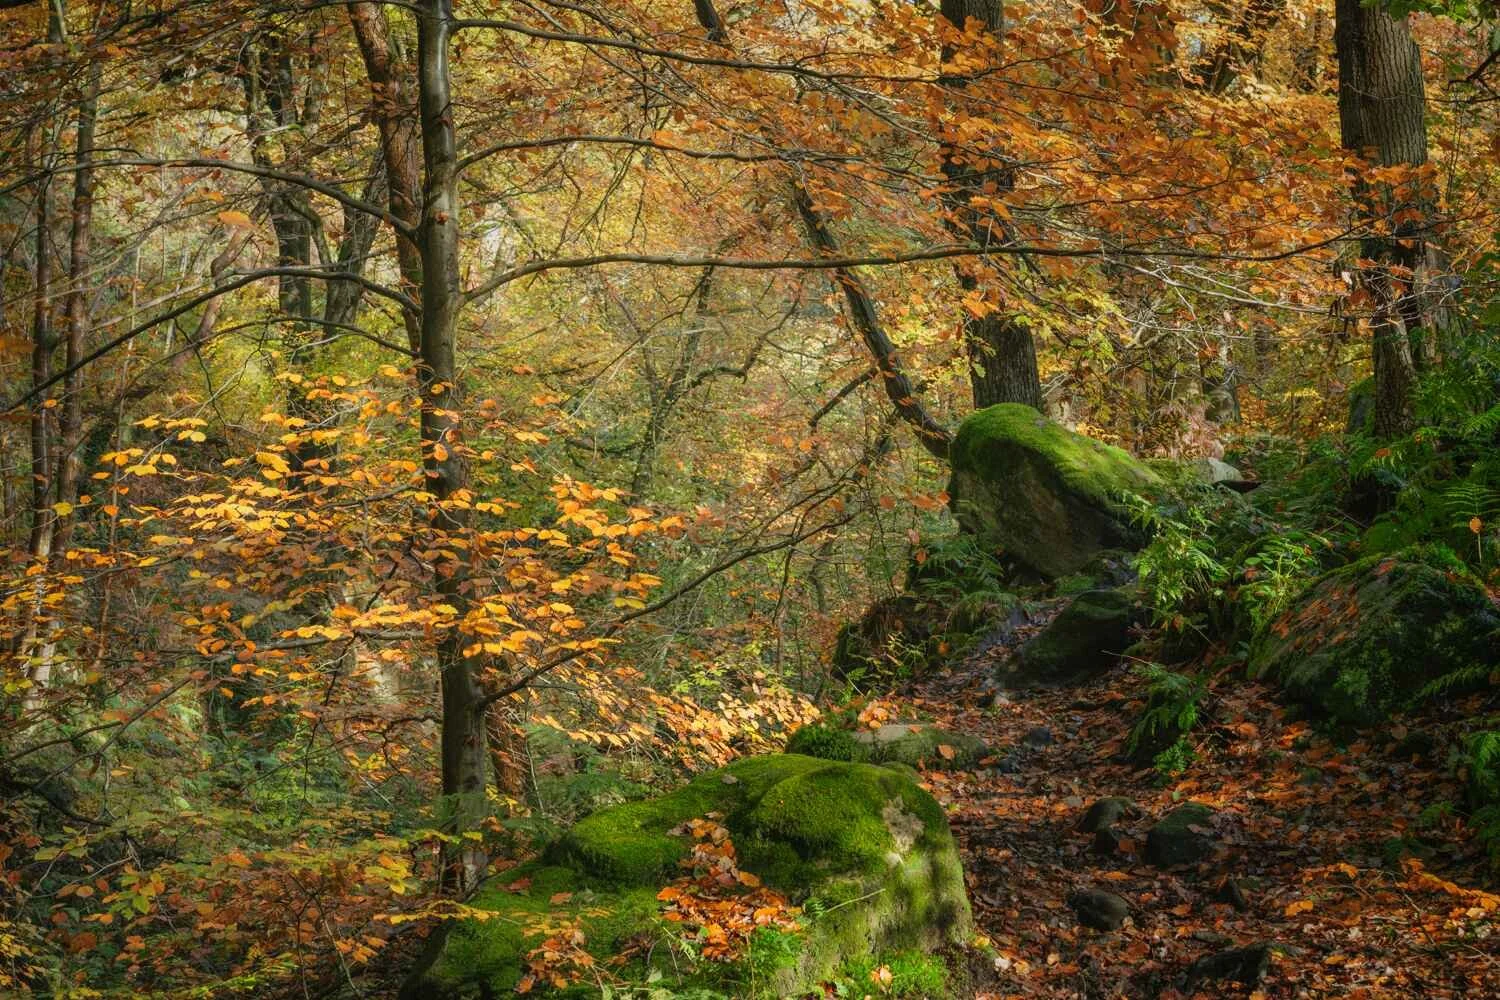
Woodland is the opposite of grand landscape photography. Grand landscape rewards the wide vista, the dramatic light, the sweep of mountain or coast. Woodland refuses to give you any of that. The frame is full of competing detail. The light is rarely directional in the obvious way. There's no horizon, often no sky, and almost always more visual chaos than the scene seems to deserve. The genre's central challenge is exactly the opposite of grand landscape's: instead of finding the spectacular, you have to find the simple within the complex. Tame the chaos. Reduce. Subtract. Find the photograph hiding inside the woods.
This is why most amateur woodland photographs struggle. The instinct from grand landscape work — wide-angle, take it all in, capture the scale — produces flat, busy, directionless images in woodland. The genre demands a different mindset and a different toolkit. This guide is the year-round wild UK woodland decision framework, sitting alongside my UK bluebell photography guide (spring-specific) and my autumn arboretum and garden photography guide (autumn cultivated). Where those two articles cover specific seasonal events in woodland, this article is the underlying framework that applies to any UK wild woodland in any month — from misty November dawn to dry July afternoon, from oak and beech in the Midlands to silver birch in Wales.
Across more than twenty years of teaching photography, my Secrets of Woodland Photography workshop has been one of my most consistently booked offerings. Woodland is the genre I teach most often and most deeply, with regular workshop walks across Warwickshire, Coventry, Solihull, Nant Mill, and the Dartmoor woodlands. The framework below is what I've refined across those sessions — the four shot types, the light framework, the composition discipline, the seasonal calendar, the standard settings.
Why woodland photography is its own discipline
Three things make woodland fundamentally different from grand landscape work and worth approaching with a different toolkit:
The chaos is the subject. Most photographs work by simplification — find one strong subject, place it well, exclude distraction. Woodland makes simplification active rather than passive. There's no stripped-back natural composition the way a coastline or mountain offers; the photographer has to find the simple structure inside what is genuinely a chaotic scene. Every strong woodland frame is the result of an editorial decision to exclude nine-tenths of what's visible in front of the camera.
Light works differently. Grand landscape rewards directional golden-hour and blue-hour light. Woodland often photographs best in the conditions other genres avoid — overcast bright, mist, soft fog, light rain. Direct sun in woodland produces dappled-light disasters with blown highlights and crushed shadows; flat overcast turns those problems into opportunities. The "best light" framework is genuinely inverted.
Mist and fog are gifts, not weather to wait through. Grand landscape photographers often treat mist as an optional bonus. Woodland photographers plan their year around it. Mist simplifies the scene by hiding the busy background and turning every distance receding into clean tonal recession. Most of the strongest UK woodland frames I've seen — my own and my clients' — were made in conditions that grand landscape photographers would have stayed home through.
The framework below is built around these three constraints rather than fighting them.
The four UK wild woodland shot types
Productive UK woodland photographs almost always fit one of four shot types. Same Applied Learning shot-type framework I use elsewhere — pick one per session, commit to it, save the others for next time.
The four UK wild woodland shot types — pick one per session, commit, work it deliberately for at least 60-90 minutes before considering anything else. Different shot types reward different conditions and different lenses.
The decision of which shot type to pursue depends on the conditions on the day and the woodland you're working in. A misty November dawn in a UK oak woodland favours chaos-tamed-wide and single-tree subject; a flat-overcast spring afternoon in a beech wood favours intimate detail and abstract minimalism. The mistake to avoid is treating "woodland" as a generic genre and chasing all four shot types in a single session — the most productive sessions commit to one shot type and work it deliberately for at least 60-90 minutes before considering anything else.
The light and weather framework
Woodland's relationship with light is the inverse of grand landscape's. Working with the right conditions for the genre rather than the right conditions for landscape generally is the single biggest leverage point in moving from competent woodland frames to printable ones.
Overcast bright is your friend. A featureless white-grey overcast sky filters the sun into even, soft, directionless light that woodland thrives in. There are no harsh shadows, no blown highlights, no dappled-light disasters. Compositional balance becomes possible because there's no fighting against extreme contrast. Most of my workshop sessions are scheduled for overcast conditions deliberately — sunny days are often the worst woodland photography days.
Mist is the gift. Every woodland photographer's calendar revolves around mist. Mist simplifies the scene by hiding distant clutter and turning depth into clean tonal recession — closer trees darker, distant trees fading toward white. Negative space appears naturally where mist replaces visual chaos. UK mist months are October through February, with peak frequency typically October-November and February. Plan trips around the morning forecast — mist usually burns off within 90-120 minutes of sunrise on dry days, longer in damp valleys.
Side-lit edges work in spring and autumn. When the canopy is thin (early spring before full leaf, late autumn after most leaves have dropped, winter) low-angle morning or afternoon sun can rake across the woodland producing genuinely directional light. The photograph composes itself around the light direction. The trick is the angle of the sun rather than the time of year — late October at 9am or early March at 4pm both work; mid-summer when the canopy is full produces dappled chaos rather than clean side light.
What to avoid: bright direct sun under a full canopy. Mid-summer woodland on a clear blue-sky day is usually the worst possible condition. Blown highlights where sun pierces the canopy, crushed shadows in the dense leaf cover, dappled-light patterns that fight every composition. If you're committed to the session, retreat to the deepest darkest part of the woodland where the light is flat by virtue of the canopy density. Otherwise, leave and come back on an overcast day.
What to avoid: bright-sky patches at the top of the frame. A common woodland-photography failure mode is including small bright patches of sky between the upper foliage. These patches act as exposure-confusing distractions and typically blow to white in the final frame, pulling the eye out of the composition. The squinting test (close your eyes most of the way and look at the scene through your lashes — bright patches stand out as obvious distractions) helps catch these before pressing the shutter.
Taming the chaos — the composition discipline
Composition in woodland is fundamentally about subtraction. Six working principles that make the difference between competent woodland frames and printable ones.
Six principles for taming the chaos in UK woodland — composition by subtraction. None of these is unique to woodland, but all of them have to be applied actively rather than passively.
None of these principles is unique to woodland — leading lines, negative space, simplification by exclusion are universal compositional tools. What's specific to woodland is that they have to be applied actively rather than passively. Grand landscape often presents you with an obvious composition; woodland makes you find it. The squinting test is the single most useful diagnostic — close your eyes most of the way and look at the scene through your lashes. The bright patches you see standing out are the distractions to exclude. The dark areas of mass are the structural elements to compose around. If the squinting view doesn't show a clear photograph, the open-eyed view almost certainly won't either.
The 6-step woodland shoot workflow
The practical rhythm that turns conditions, woodland, and shot-type decision into consistent keepers across the year.
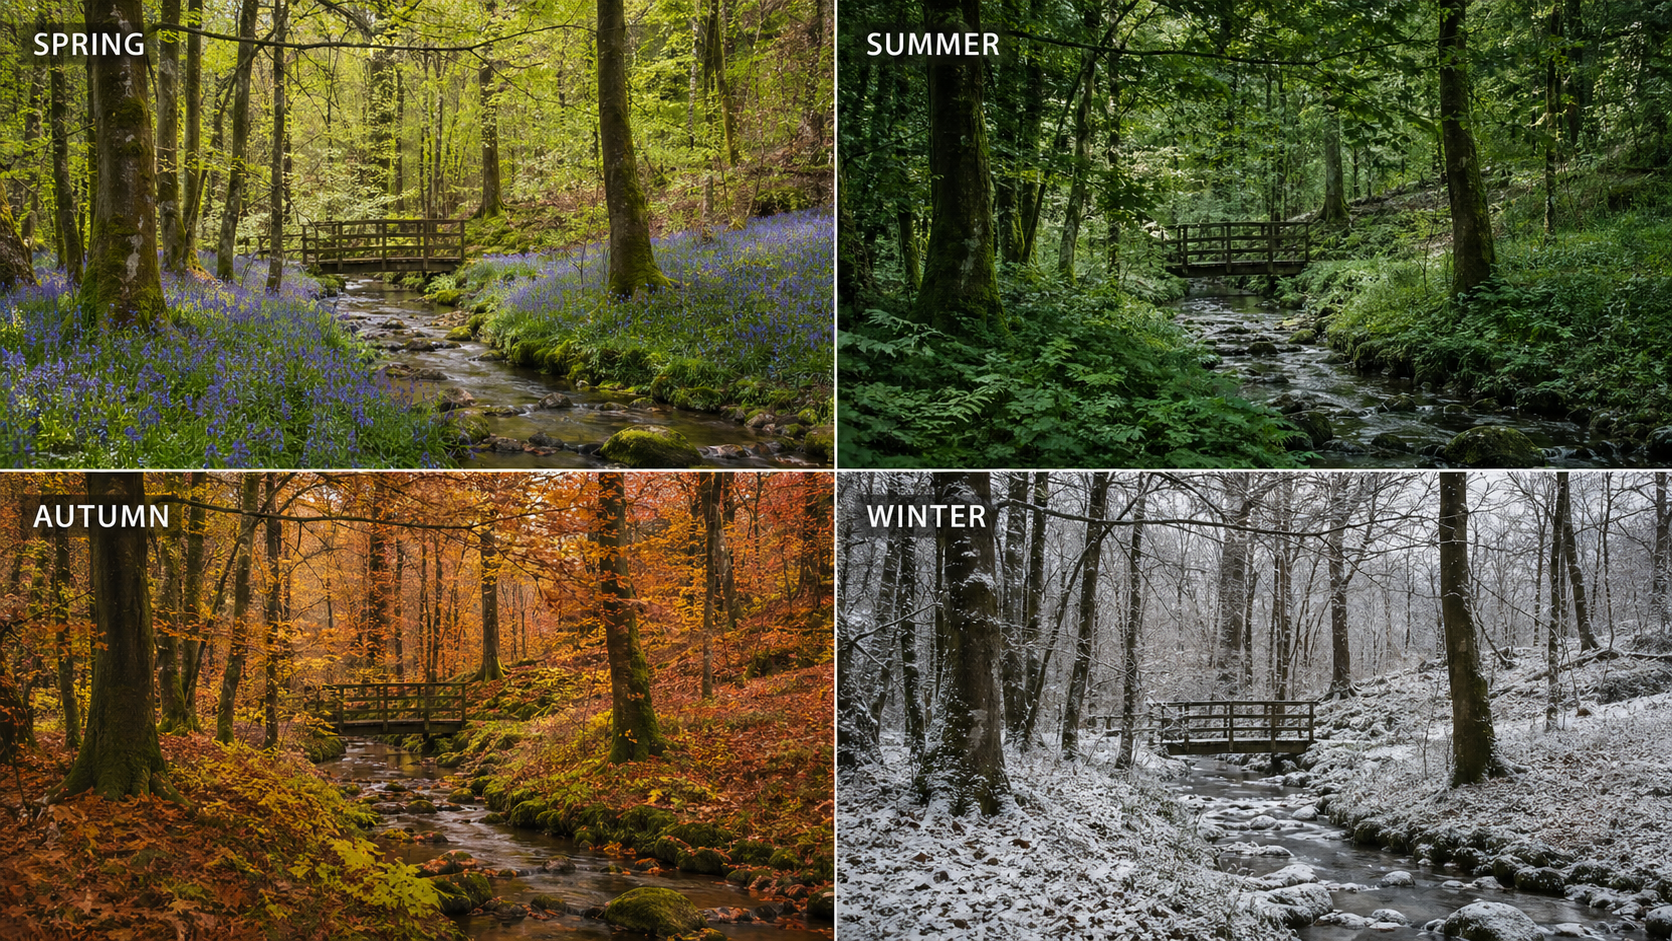
The year-round UK woodland calendar
Different shot types and conditions peak at different points in the UK woodland year. The year-round practitioner plans sessions around what each month delivers rather than chasing the same approach regardless of season. Headline timing for each month:
January. Bare-tree structure at its clearest. Mist frequent in valley locations on cold mornings. Single-tree-subject shot type peaks — every leaf is gone, the architecture of the trees is fully visible. Frost adds atmospheric texture.
February. Last of the bare-tree window before bud-break begins. Snowdrops appear in shaded woodland by mid-month. Mist still frequent. Side-lit-edges shot type works particularly well as the sun angle rises.
March. Bud-break begins; the woodland is still mostly bare but with the first hints of green. Side-lit edges work strongly with low sun angle. First frost-free mornings make tripod work easier.
April. Spring leaf emergence accelerating. Wood anemones, wild garlic carpets in damper woodland, first hints of bluebell colour in the south. Worth a separate session for spring-specific colour — see my UK bluebell photography guide for the bluebell-specific angle.
May. Peak fresh-green canopy. Bluebells across most of the UK in the first half of May. The colour intensity is at its highest annual peak. Light-quality challenge: full leaf cover means bright direct sun produces dappled-light problems; overcast days are strongly preferred.
June. Canopy fully closed. Generally the most difficult woodland month — full leaf, often bright sun, dappled-light disasters common. Best worked in deep shaded woodland on overcast days, or postponed in favour of other genres.
July. Similar to June — full canopy, often unhelpful light. Worth working only on heavily overcast days, in deep dark woodland, or for intimate detail/macro work where light is controllable.
August. First hints of the canopy beginning to thin. Late-summer light starts to slant more usefully. Final month of full green colour before autumn shift begins.
September. Early autumn colour beginning in the highest, most exposed woodland. The transition month — mostly green still with first hints of yellow and orange. Mist returns as overnight temperatures drop.
October. Peak UK autumn colour, particularly mid-to-late October across most of the country. For the cultivated arboretum and garden angle on autumn see my autumn arboretum and garden guide; the wild-woodland equivalent month is the same. Mist common.
November. The most productive UK woodland month for many practitioners. Late autumn colour transitioning to bare structure. Mist at its most reliable. Low sun angle producing strong side-lit edges. Reduced visitor numbers in popular woodlands.
December. Bare structure window opens. First frost regular. Short days but strong directional low-sun light when conditions permit. Mist remains frequent.
The pattern: avoid full mid-summer (June-July) unless conditions are heavily overcast or working intimate-detail; concentrate effort on the autumn-into-winter window (October-February) when mist is frequent and the canopy is open or absent. May through early June covers the spring colour peak. The other months reward whoever shows up consistently rather than waiting for spectacular conditions.
Settings standard for woodland
Three things hold across nearly every UK wild woodland session regardless of shot type or season:
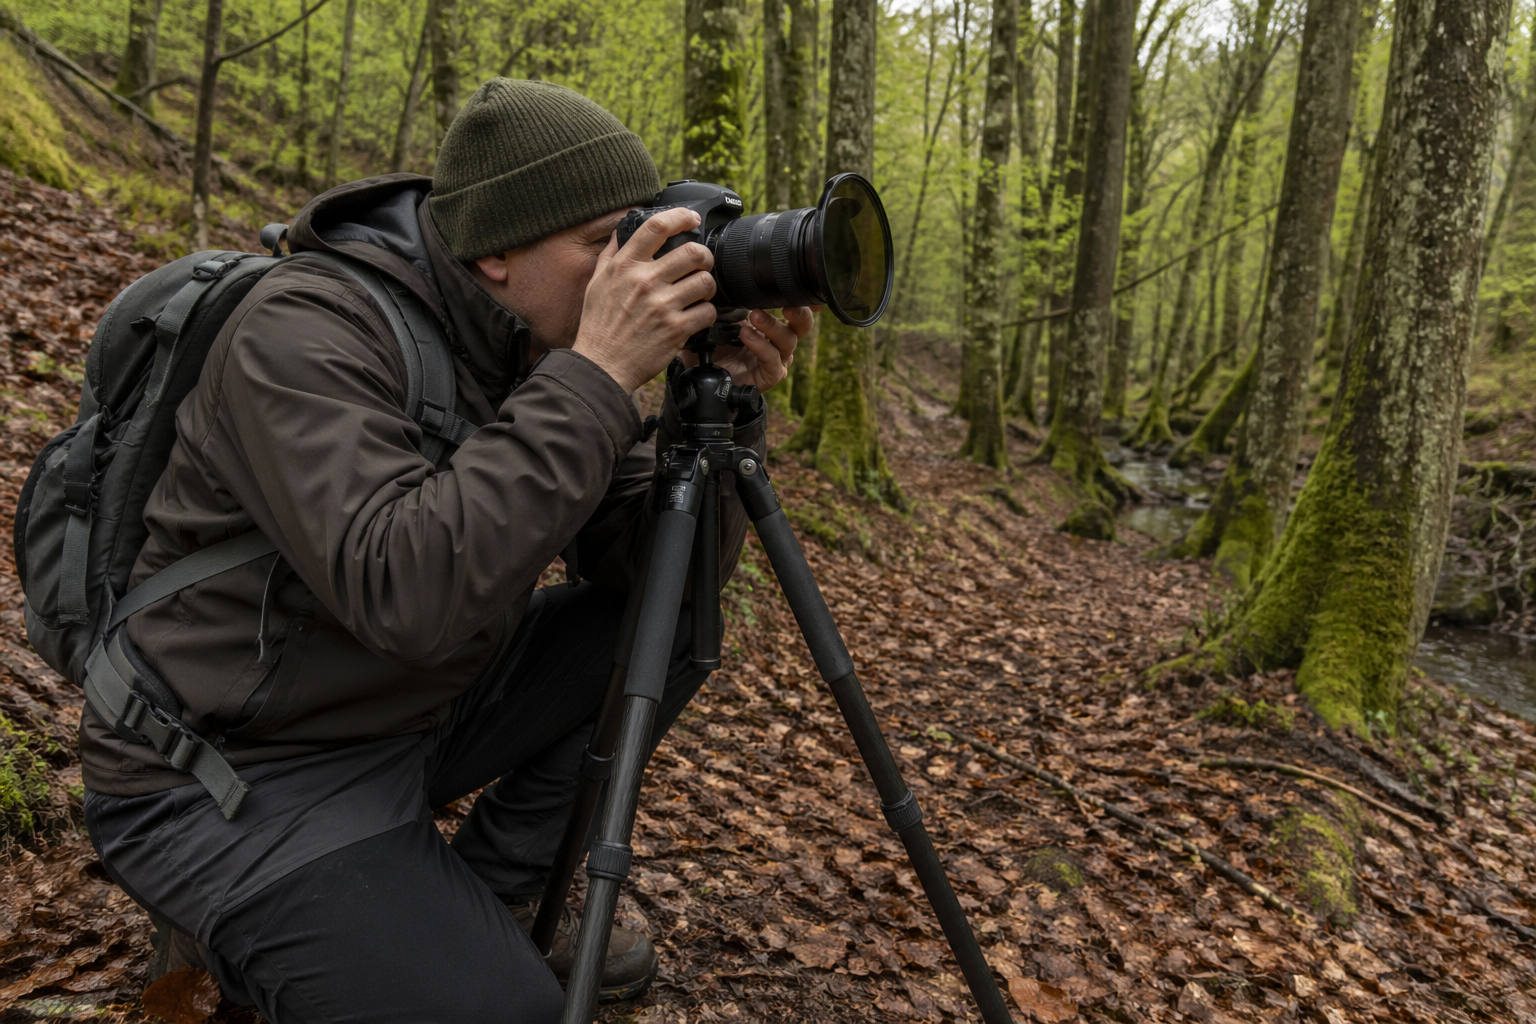
Tripod always. Woodland is rarely brightly lit, exposures are typically slow, and the discipline of working from a tripod forces you to slow down and consider composition deliberately. Even when shutter speeds are fast enough for handheld, the tripod's compositional benefit alone justifies it.
Polariser almost always. Wet leaves, damp bark, lichen, mossy surfaces all reflect non-polarised light that flattens colour and detail. A circular polariser cuts those reflections, deepening greens, saturating bark texture, and revealing detail in foliage that's otherwise lost. The single most useful filter for woodland — see my filters mastery guide. Worth a polariser even on overcast days.
f/8 to f/11 typical. Front-to-back sharpness matters in woodland; depth of field at f/8-f/11 on full-frame, slightly wider on crop sensor, gives the working sharpness range without diffraction concerns. For intimate-detail work occasionally f/4-f/5.6 to isolate a single subject — see my aperture guide for the broader principles.
A UK woodland photographer on composition
The video below — "Composition in Woodland Photography" by Simon Baxter on the Simon Baxter channel — is a 14-minute walk-through of his thinking on woodland composition specifically, filmed in his local North York Moors woodlands with his dog Meg. Simon is a North Yorkshire-based professional woodland photographer who's built a reputation as one of the world's leading practitioners of the genre, and his "no rules, just whatever makes sense to me at the time" framing is exactly the intermediate mindset this article advocates. Strongly recommended viewing alongside the framework above.
Next Video on woodland photography for a deeper dive into this fascinating and challenging genre.
Common UK woodland photography mistakes
Going on sunny days. The most common mistake. Sunny days in summer woodland produce dappled-light disasters; overcast days produce strong woodland frames. Plan sessions around the right conditions, not the convenient ones.
Including bright-sky patches at the top of the frame. Small white patches between upper leaves blow to white and pull the eye out of the composition. Either compose to exclude them entirely, or use a wide-margin original capture and crop them out in editing.
Working too wide. The instinct to "take it all in" is wrong for woodland. 24-105mm covers most of the genre; 70-200mm is often more useful than 16-35mm. Compress and isolate rather than capture and include.
Skipping the polariser. Without a polariser, wet leaves and damp bark reflect distracting highlights that flatten colour. The single most useful filter for woodland — and the one most commonly forgotten by photographers used to working in drier genres.
Not using a tripod. Even when shutter speeds permit handheld, the tripod's compositional discipline alone justifies it. Slows you down, forces deliberation, makes the squinting test natural rather than rushed.
Treating woodland as a generic genre. Different shot types reward different conditions and different lenses. Showing up with a wide-angle on a sunny day and trying to make it work is the recipe for mediocre frames.
Over-processing in editing. Woodland tonality is naturally subtle. Heavy contrast, aggressive clarity, oversaturated greens are the most common editing mistakes. Restrained editing matches the subject's natural register.
Visiting once and assuming the woodland is "done". The same woodland in October and February is two completely different photographic territories. Repeat visits across the year are how the strongest woodland portfolios are built.
UK woodland photography FAQ
Key takeaways
Woodland is the opposite of grand landscape. Subtract rather than add. Find the simple within the complex.
Pick one of the four shot types per session — chaos-tamed wide / single-tree subject / intimate detail / abstract minimalism. Don't chase all four at once.
Overcast is your friend; mist is the gift. Plan sessions around the conditions woodland thrives in, not the conditions grand landscape thrives in.
Exclude bright-sky patches from the top of the frame. The single most common compositional failure mode — small white patches that blow to white and pull the eye out.
The squinting test catches most problems. If the scene doesn't read as a photograph through closed eyes and lashes, the open-eyed version almost certainly won't either.
Tripod always, polariser almost always, f/8-f/11 typical. The standard kit and standard settings.
Plan the year around October-February for mist and bare structure, plus May for spring colour. Avoid full mid-summer unless conditions cooperate.
Repeat visits beat new locations. The same woodland in different months is two different photographic territories.
Continue learning
Conclusion and summary
UK woodland photography rewards repeat visits, the right conditions for the genre, and the editorial discipline to subtract rather than add. The technical floor is straightforward — wide-angle to short-telephoto zoom, sturdy tripod, circular polariser, base ISO RAW capture — but the working leverage is in the decisions on top. Pick one shot type per session and commit. Plan around overcast and mist rather than sunshine. Exclude bright-sky patches and dappled-light chaos. Use the squinting test before pressing the shutter. Work the year around the months that suit the genre — October-February for mist and bare structure, May for spring colour, the rest of the year for whoever shows up consistently. The photographers who consistently come home with woodland frames they're proud of are the ones who stopped trying to make grand-landscape thinking work in woodland and started thinking about subtraction instead.
The framework to internalise: woodland is its own discipline. Four shot types. Overcast and mist as the working conditions. Tripod and polariser as the standard kit. Subtract by exclusion. Repeat visits across the seasonal calendar. Same woodland, different month, completely different photograph. None of this is gear-led; all of it is decision-led. Across more than twenty years of running woodland workshops across Warwickshire, Coventry, Solihull, the Welsh borders and Dartmoor, I've watched the photographers who improve fastest in the genre share one habit: they show up consistently in the same local woodlands across the year rather than chasing exotic locations once and assuming they've understood the genre.
If you'd like to develop UK woodland photography under hands-on guidance, my Secrets of Woodland Photography workshop is the headline offering — a one-day intensive applying the framework above to specific UK woodlands at the right hours and the right conditions, suitable for any level of experience. For lower-commitment regional work, my Warwickshire woodland photography walks cover specific local Warwickshire woodlands in shorter half-day sessions, with a series of regular events at Coventry, Solihull, and Hay Woods locations. For the deepest year-round practice, both can be combined with my monthly mentoring programme for ongoing critique of work between sessions. The framework is the starting point. The woodlands are the practice. The conditions are the variable. The decisions are what produce the print.