
Bluebell Photography in the UK: A Practical Field Guide
Table of Contents Show
Every April, the UK puts on one of the great natural shows on the planet — half the world's English bluebells flower in our ancient woodlands, and they last about three weeks. The technique for photographing them isn't complicated. The decisions around the photograph — when to go, which woodland, what the light is doing, what kind of shot you want before you arrive — are what separate a portfolio image from a phone snap.
This guide is the planning and decision side of bluebell photography: the field-guide companion to my technical 10-tip article and my UK locations and family-photoshoot guide. Read those for the deep dives on technique and woodland location lists. This article covers the planning, the four shot types every bluebell photographer should master, and the decisions that make the difference between thousands of mediocre frames and a small handful of keepers.
Why bluebells are exceptional — and surprisingly hard
The English bluebell (Hyacinthoides non-scripta) only forms dense carpets in undisturbed ancient woodland with the right canopy structure. The flowering window is narrow — mid-April to early May in most of the UK, a week earlier in the south, a week later in the north. The flowers themselves shift colour as the day progresses (cooler in shade, warmer in low sun) which makes white balance trickier than most subjects. And the woodland canopy is just leafing up at the same time, so the light is changing weekly.
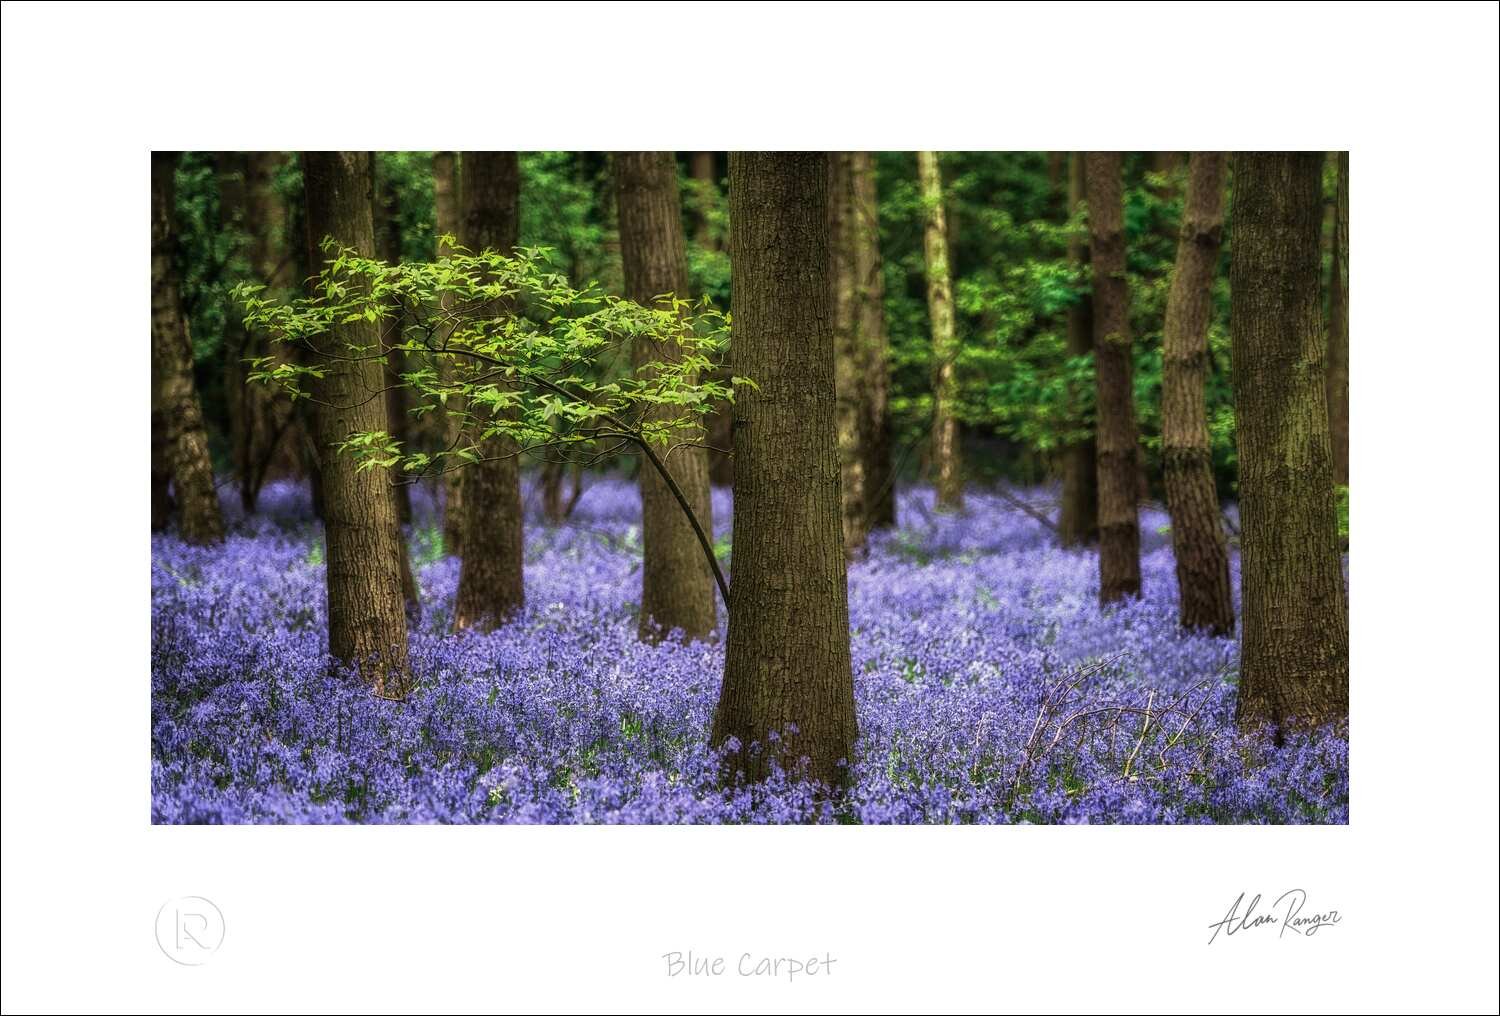
None of that is hard once you know it. The mistake most photographers make is treating the bluebells as the problem when the real problem is everything around them — the canopy, the path lines, the litter on the woodland floor, the bright sky punching through gaps. A good bluebell photograph is mostly a good background and supporting structure. The bluebells take care of themselves.
Planning the shoot: when, where, what light
Three decisions matter more than any camera setting:
When in the season. Aim for the second week of full bloom — the canopy is still partially open so light reaches the floor, but flowering is at peak density. The first week is patchy; the third week often has falling petals and bright overhead leaves.
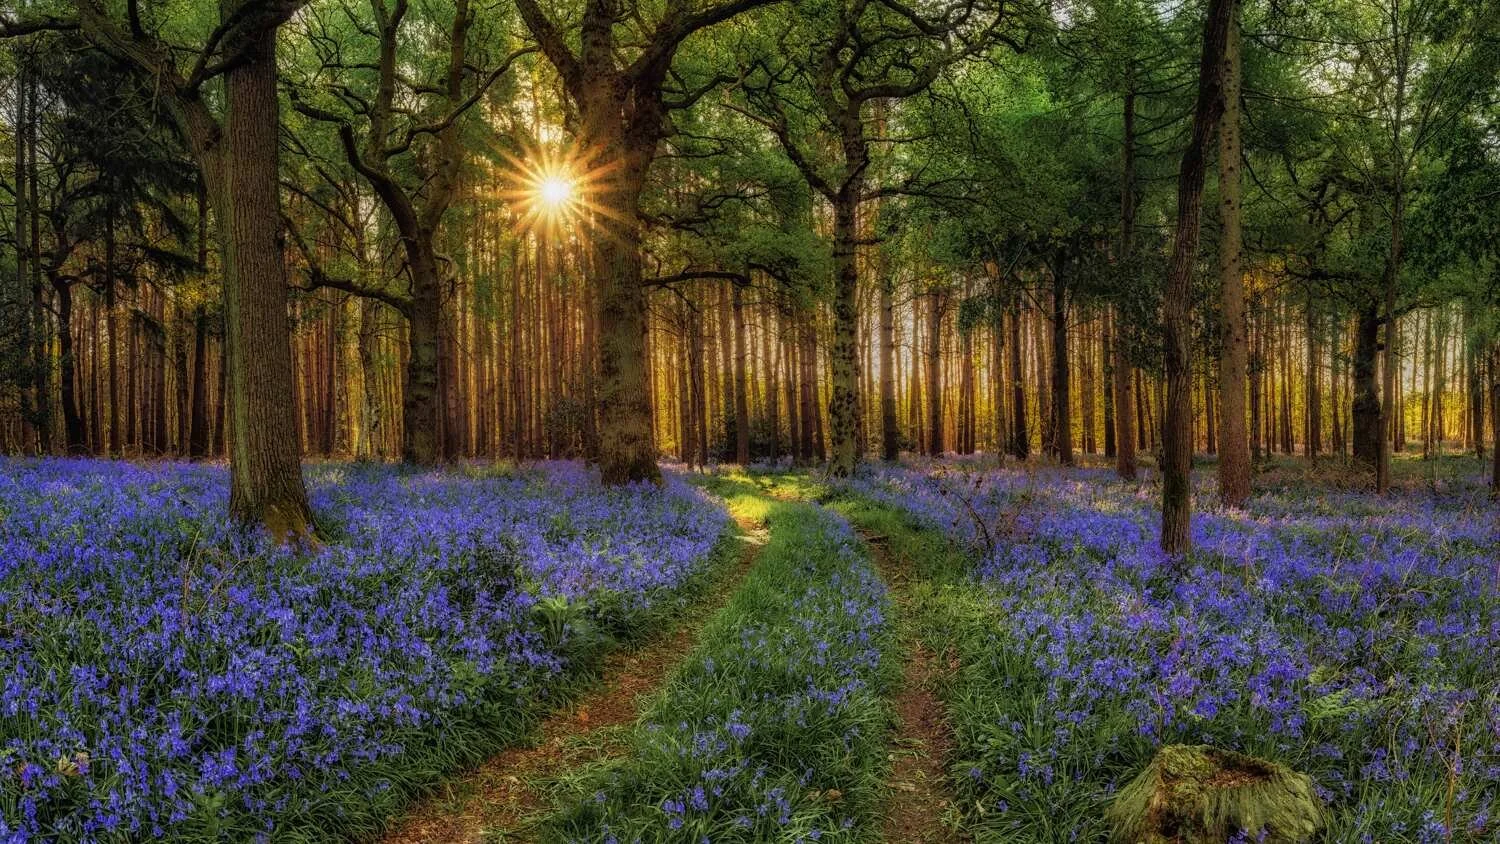
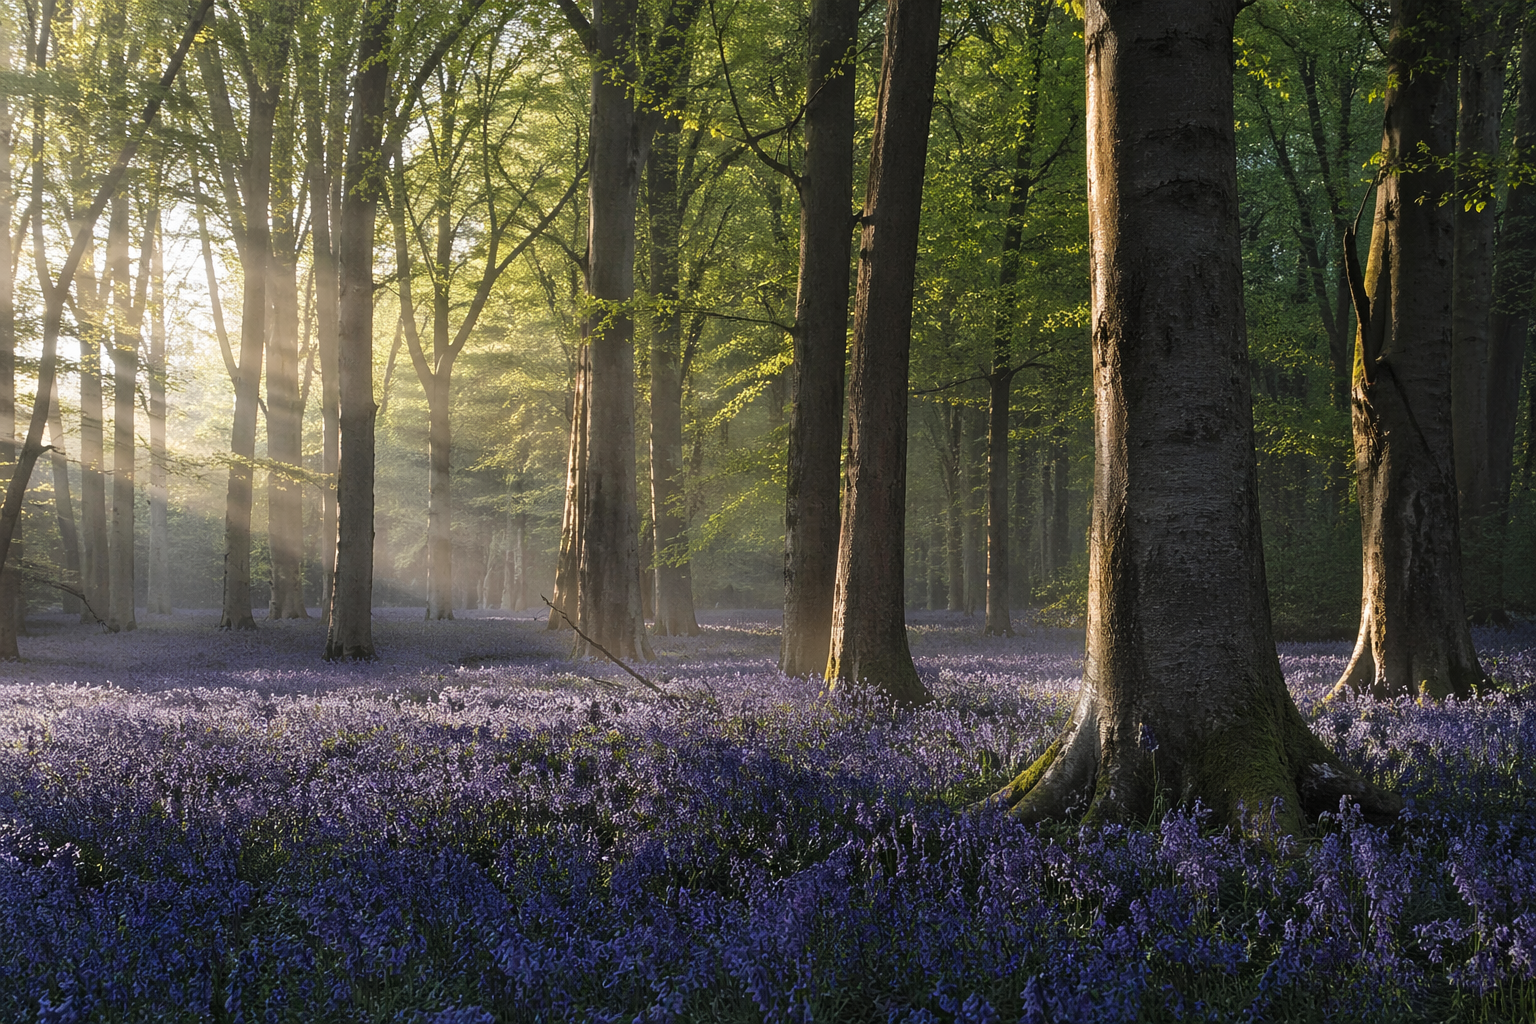
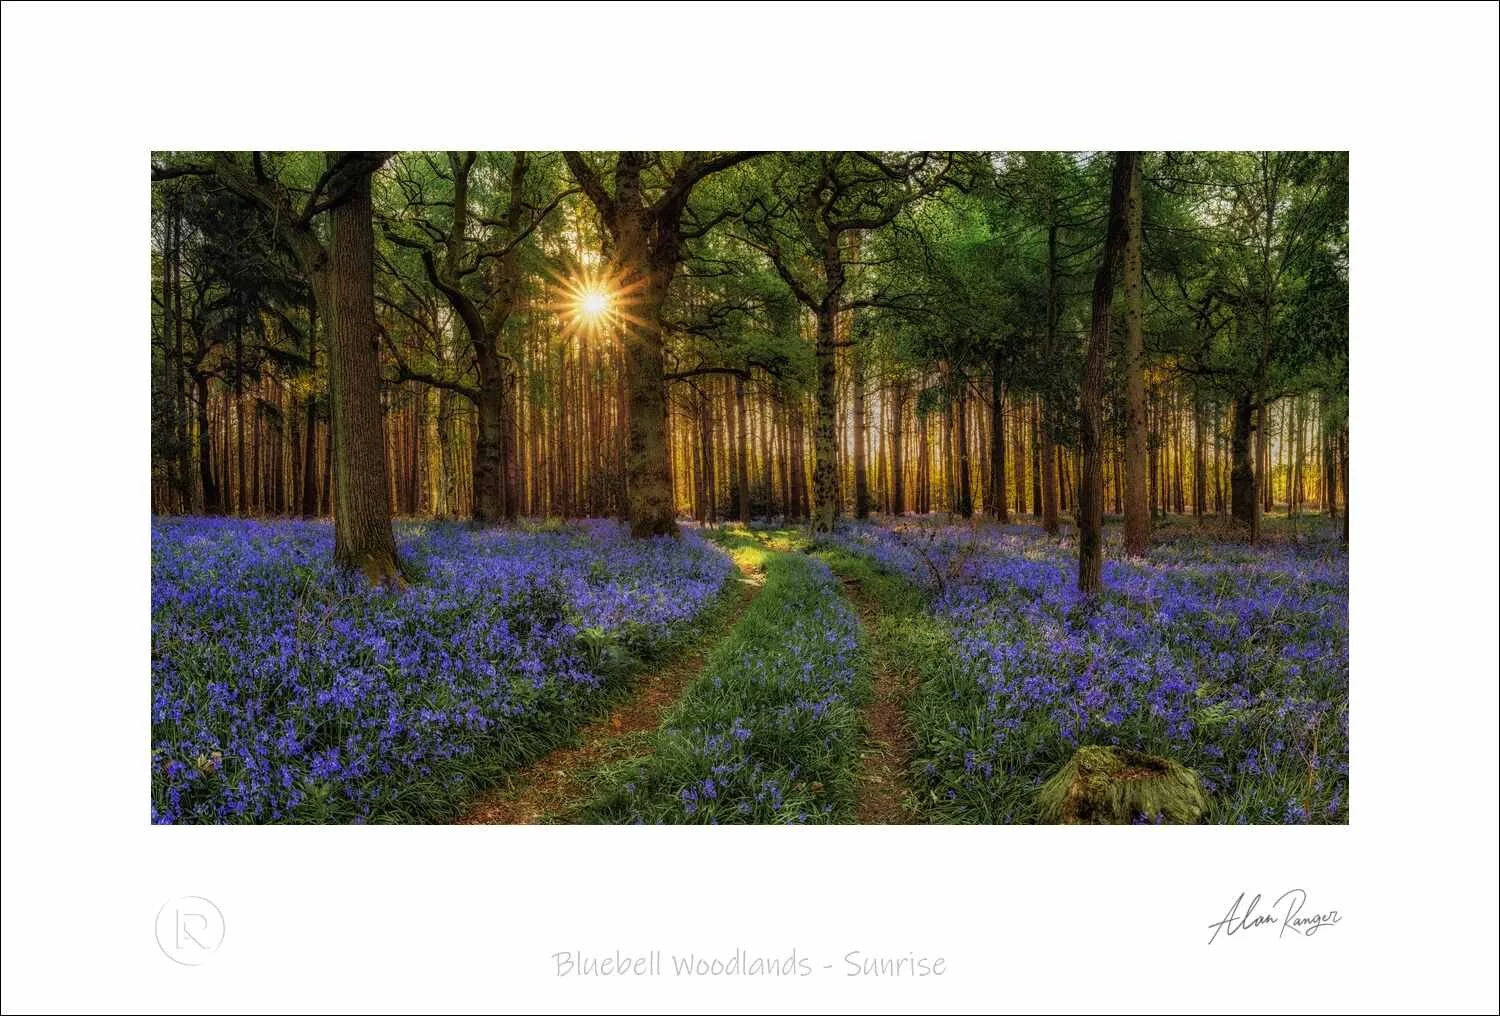
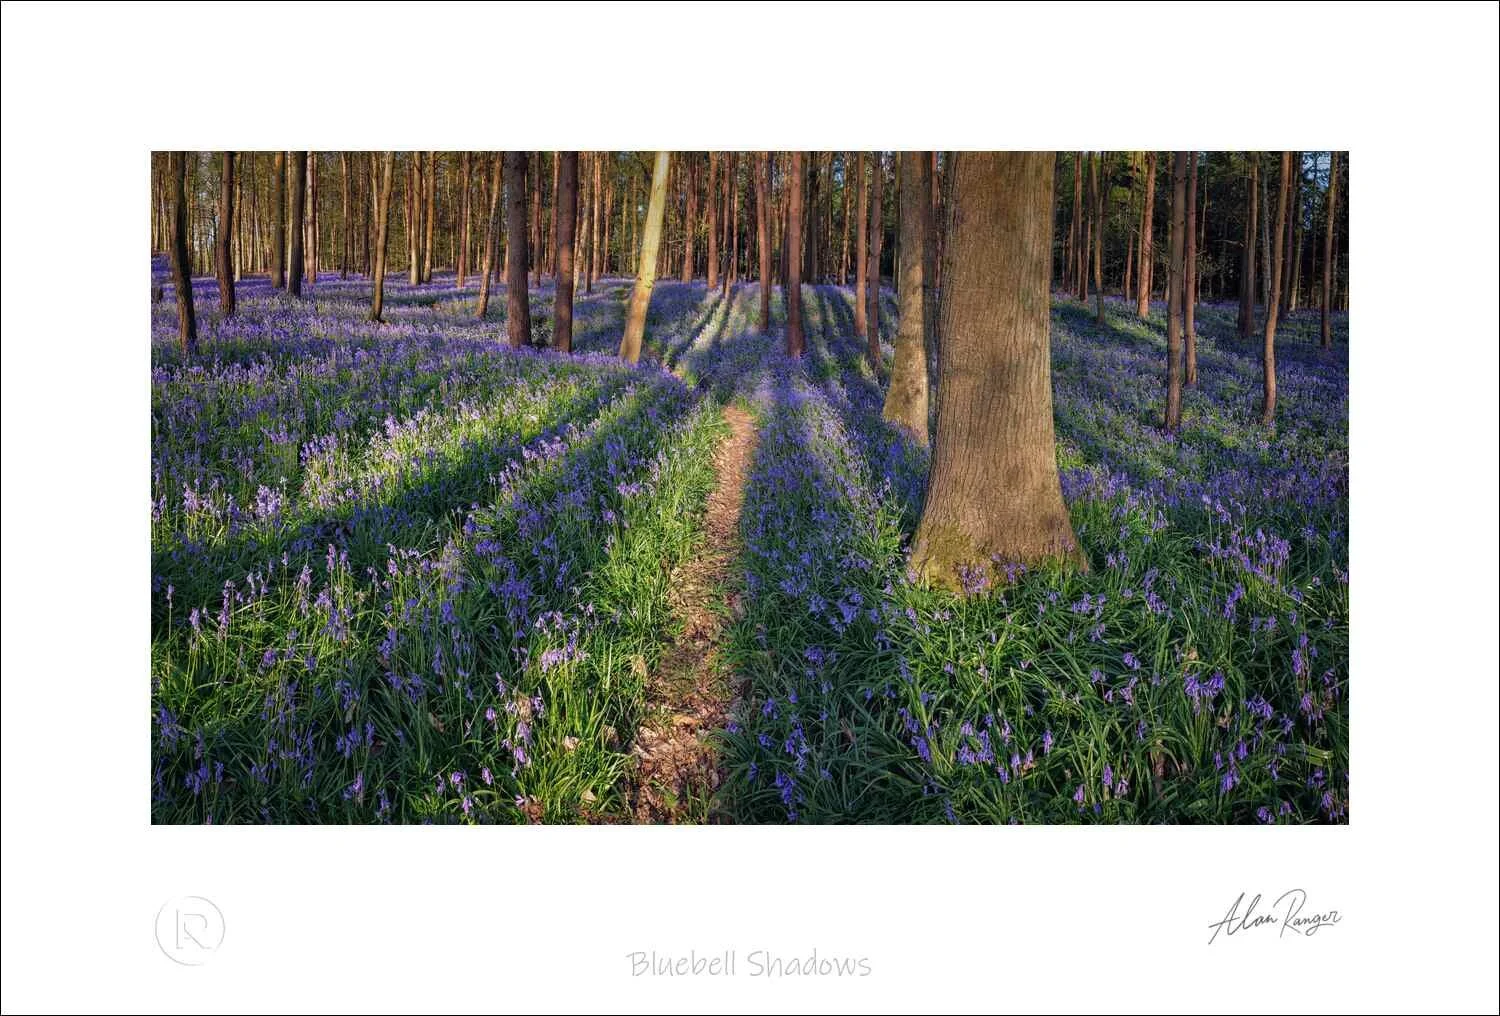
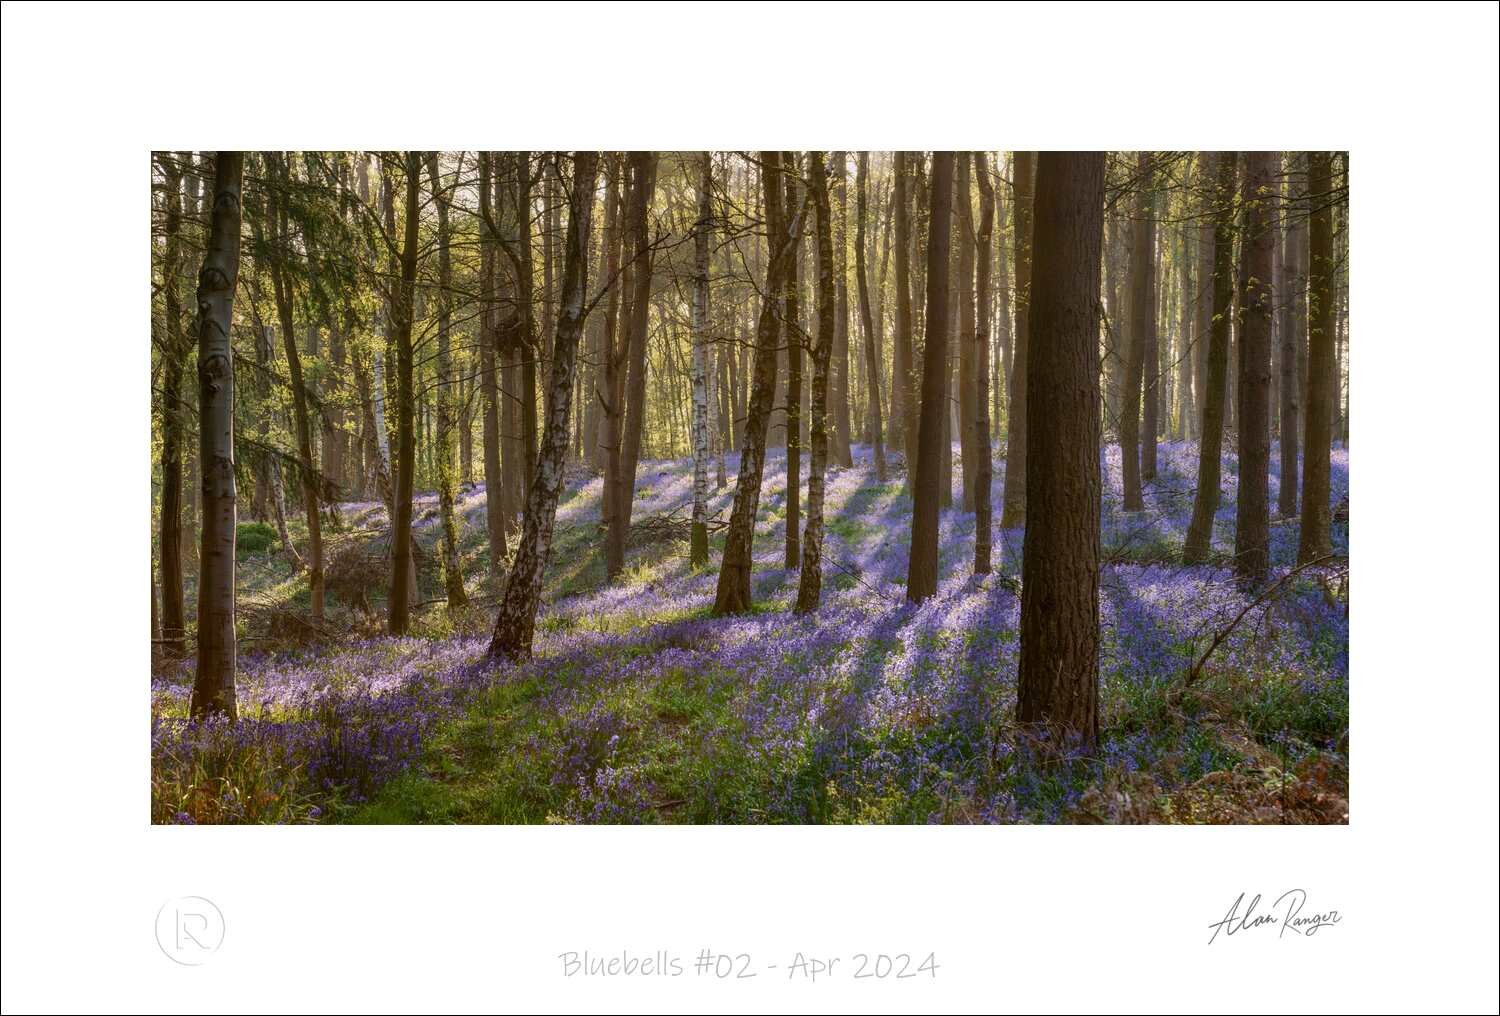
What time of day. First light (5:30–7:00am in late April) for warm directional rake-light through trunks. Overcast mid-morning for even soft colour. Avoid bright midday in any conditions — harsh shafts of sun blow out highlights and bring out the green canopy you don't want.
What weather. Overcast bright is the friendliest light by a long way — even illumination, saturated blues, no harsh contrast. Light mist is a bonus. Bright sun is workable only at the very ends of the day. Wind is the enemy — anything above a light breeze ruins the close-up shots.
For UK woodland location ideas — Borde Hill, Wakehurst, Nymans, Standen, Highgate Wood, Rode Hall, Ashridge Estate and others — see my UK bluebell woodland tips article. For private guided access in Warwickshire with exclusive arrangements I have with a local landowner, see my bluebell workshop dates — these book up months in advance because the woods are kept clear of public traffic.
Bluebell shooting conditions matrix — what each combination of timing and weather will give you. Plan your visit around the column on the right that matches what you actually want.
Kit choices: matched to the shot type
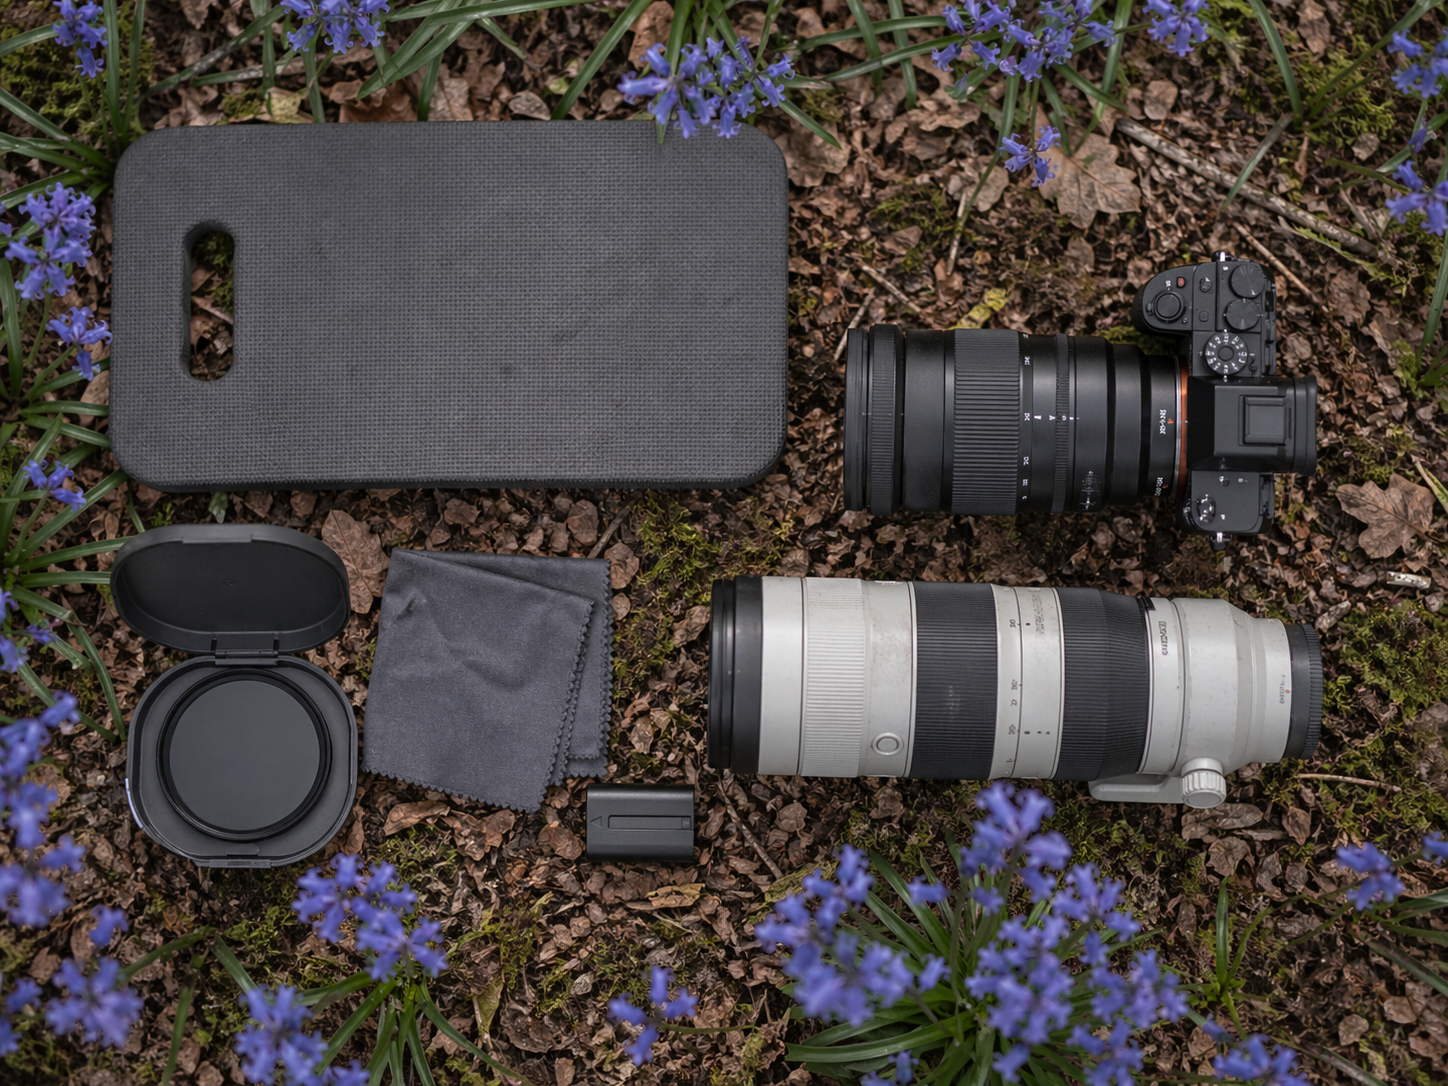
For technical kit detail (filters, tripods, remote releases, kneeling mats, weather protection), see my 10-tip technical article. The summary for this field guide: bring a body, two lenses (a 24–70mm or 24–105mm zoom plus a 70–200mm telephoto, OR a 35mm/50mm prime plus a 70–200mm), a sturdy tripod, and a polariser. A macro lens earns its place if you intend to do close-up flower work — see my macro photography guide for that approach. Spare battery, spare card, kneeling mat, lens cloth, weather cover. That's the entire kit list.
What you carry should be matched to which of the four shot types you're after that morning, not "everything in case". Carrying everything is what kills the keeper rate by hour three.
The four bluebell shots every photographer should master
Almost every strong bluebell photograph fits into one of four shot types. Decide which you're after before you arrive at the location — your composition decisions and lens choice change completely depending on which.
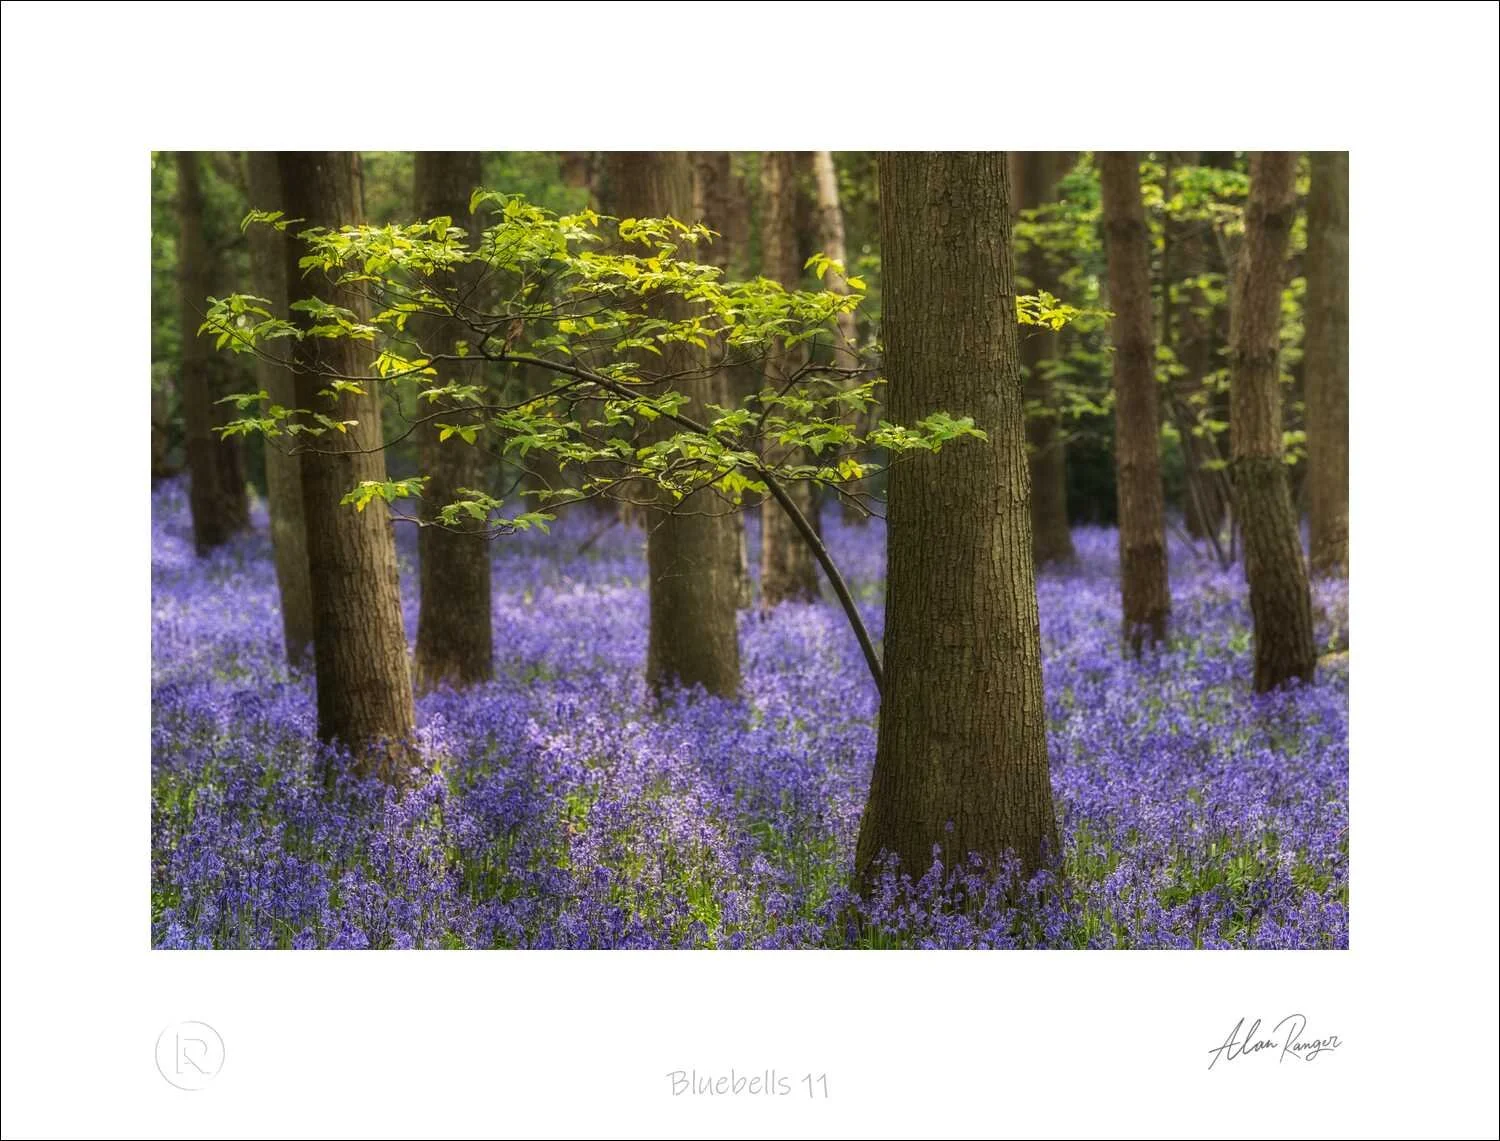
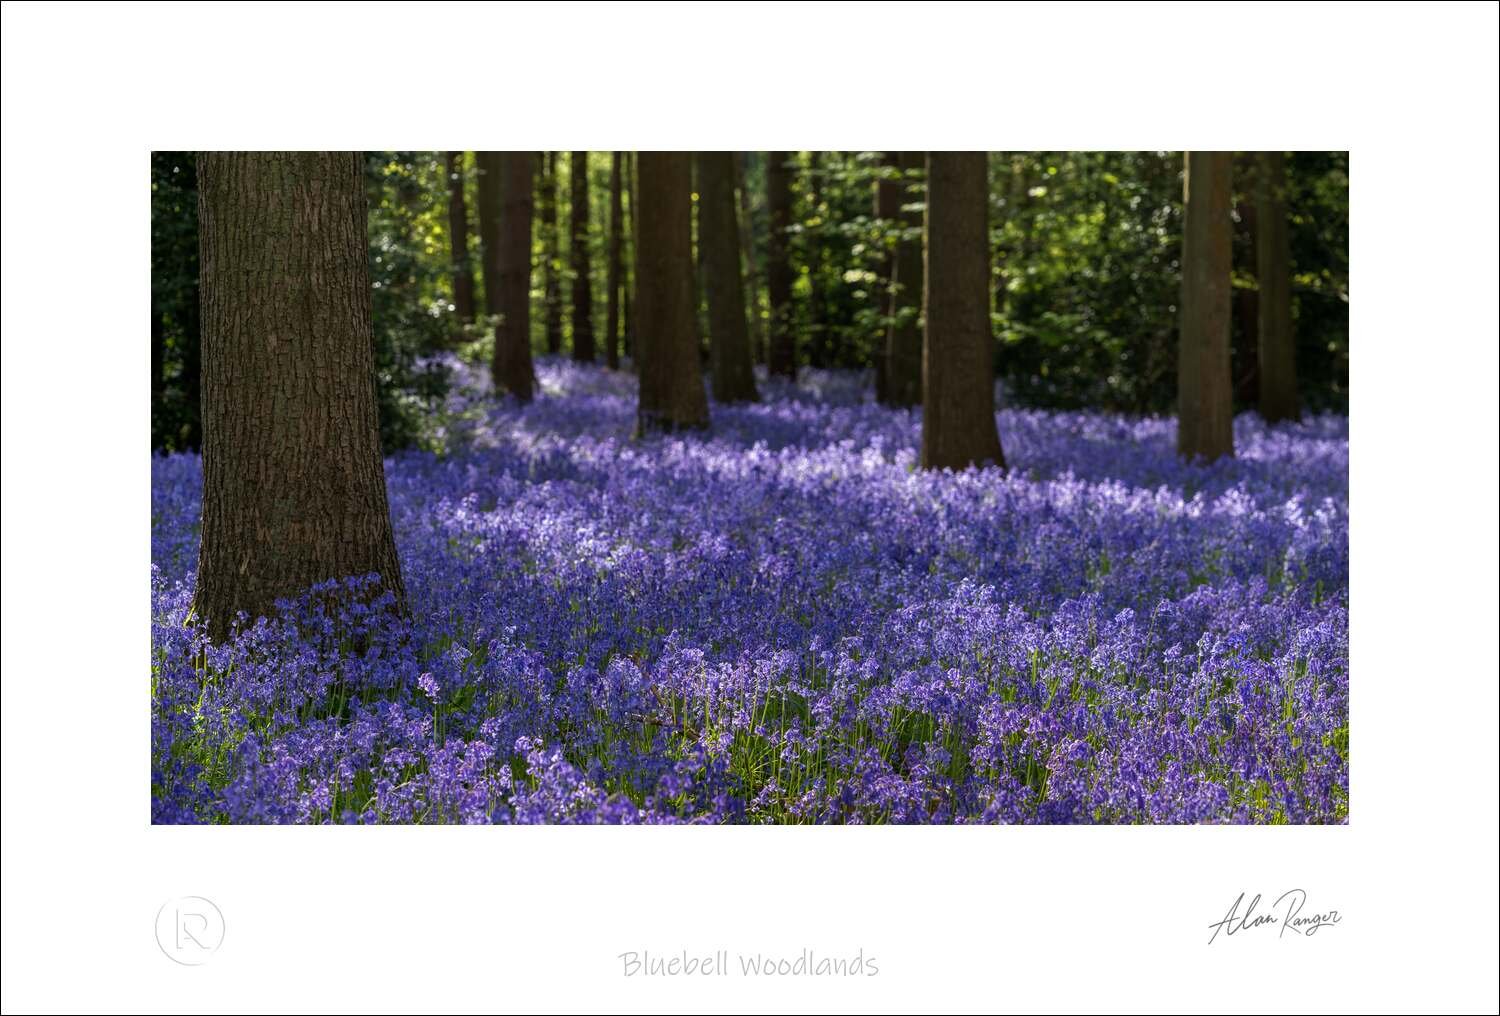
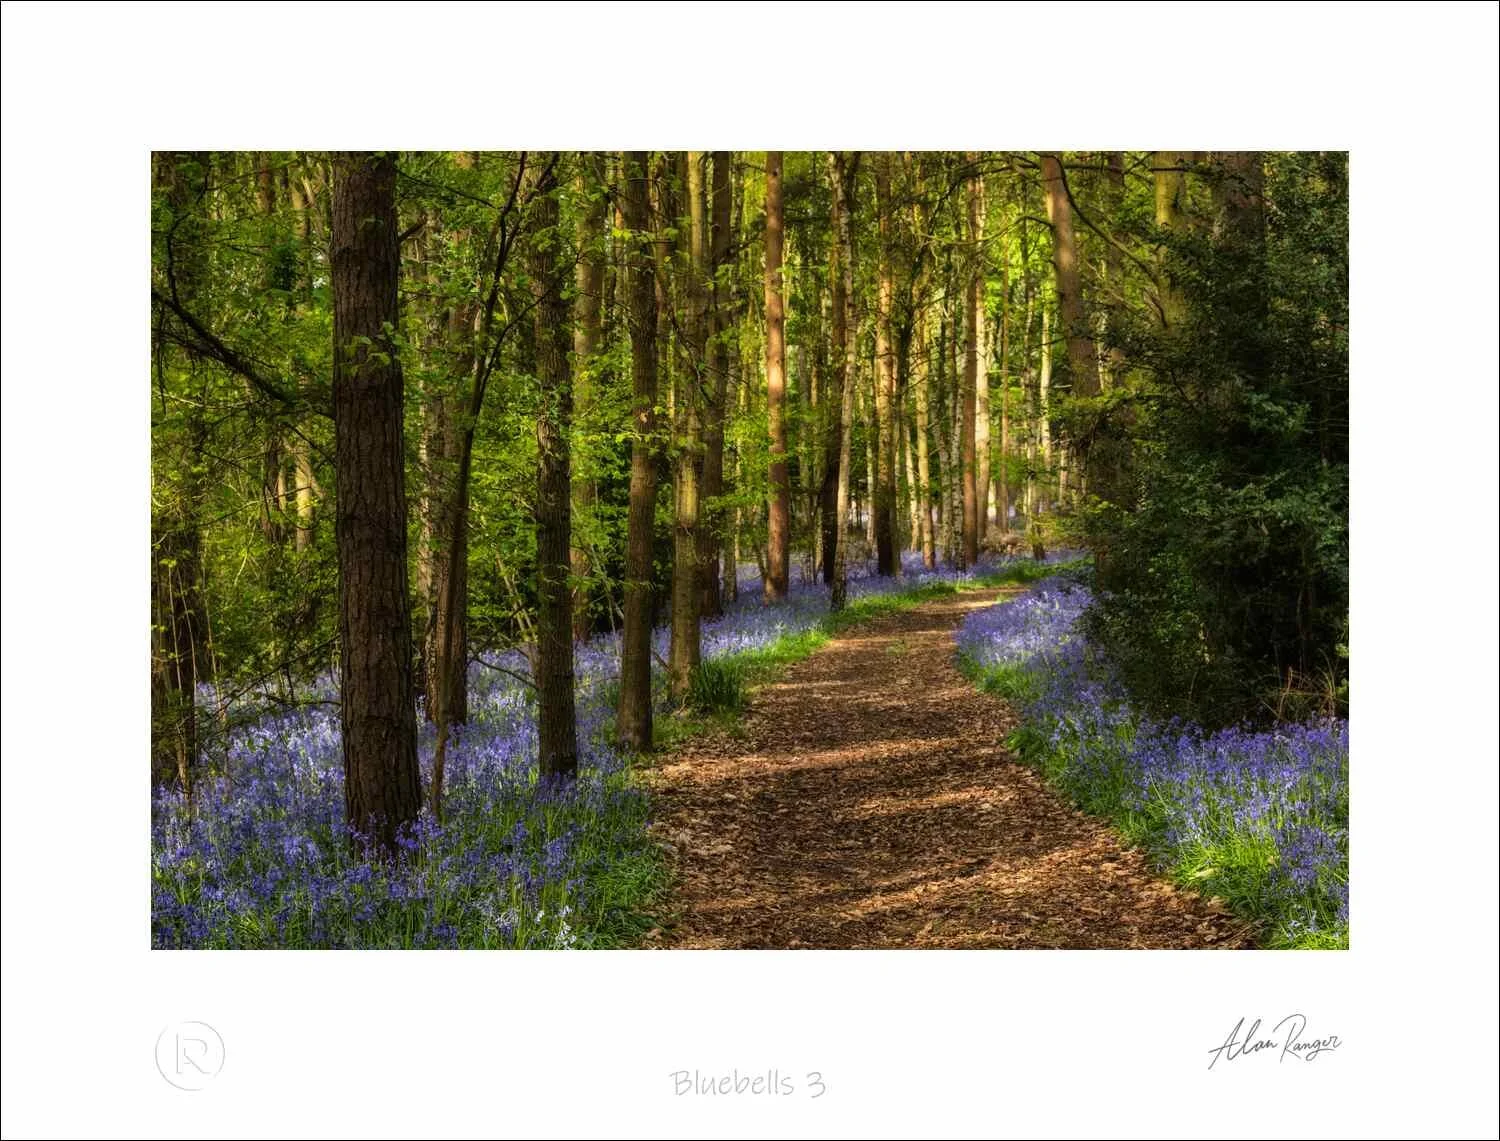
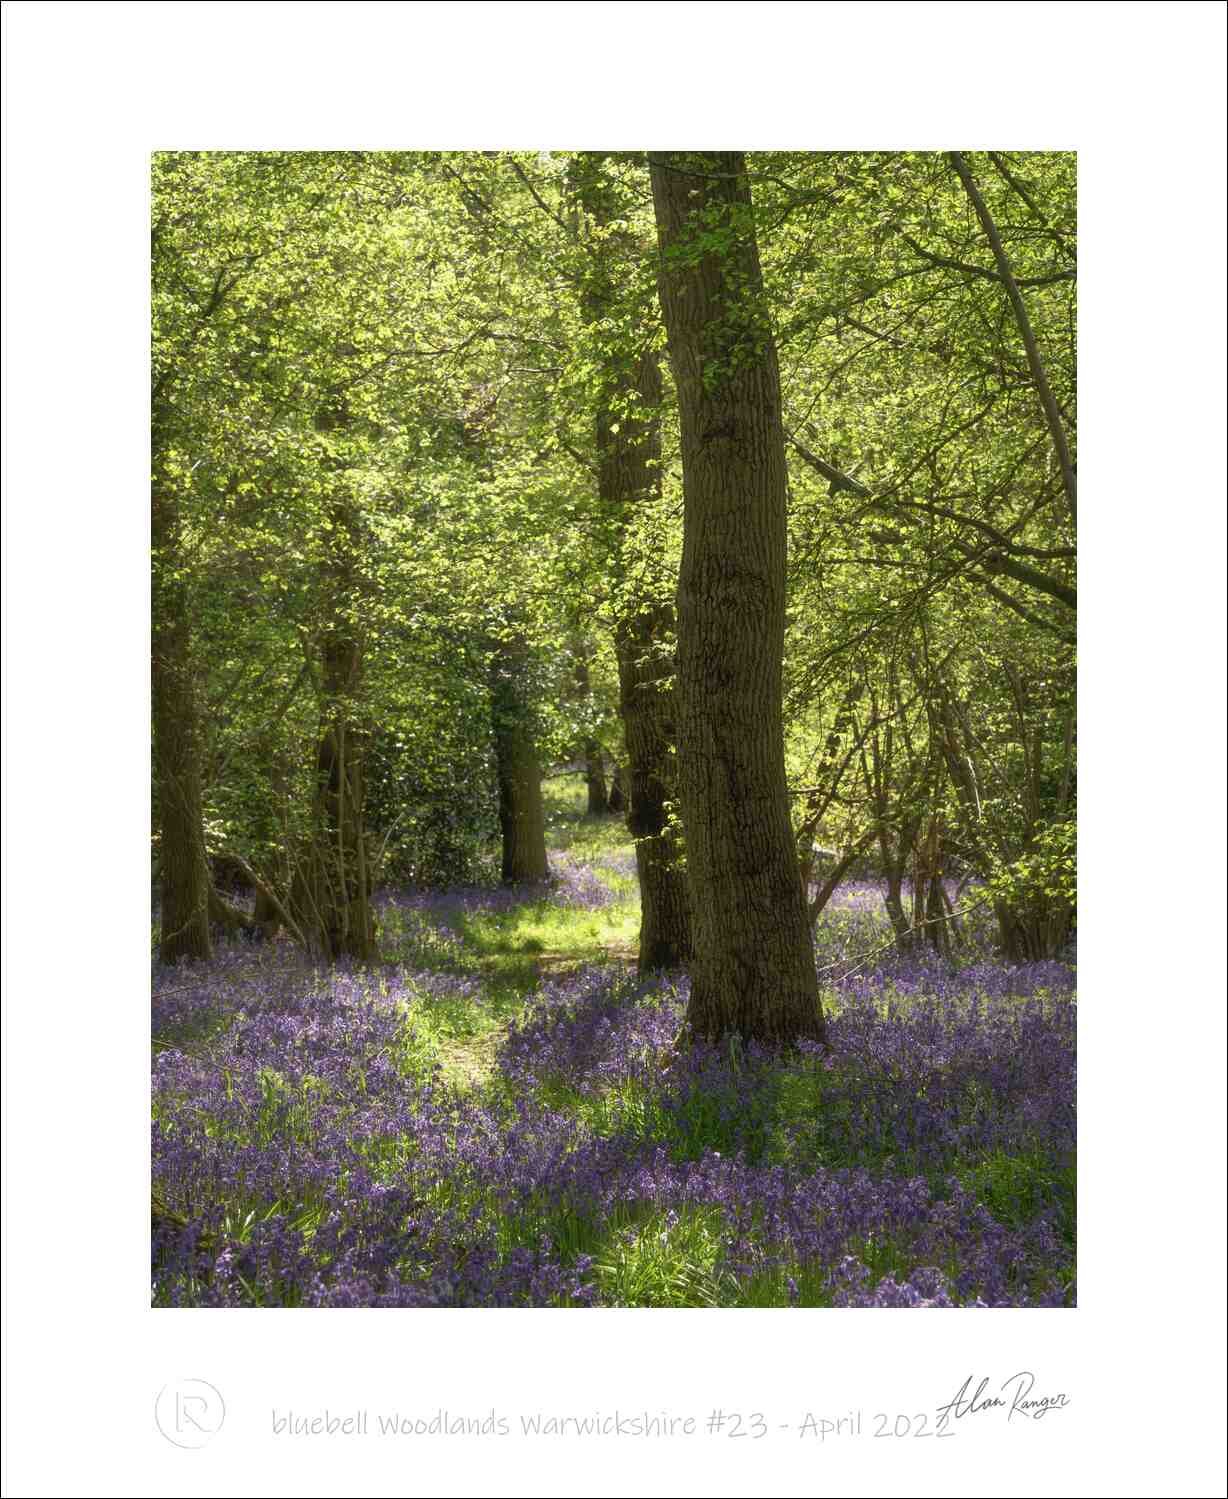
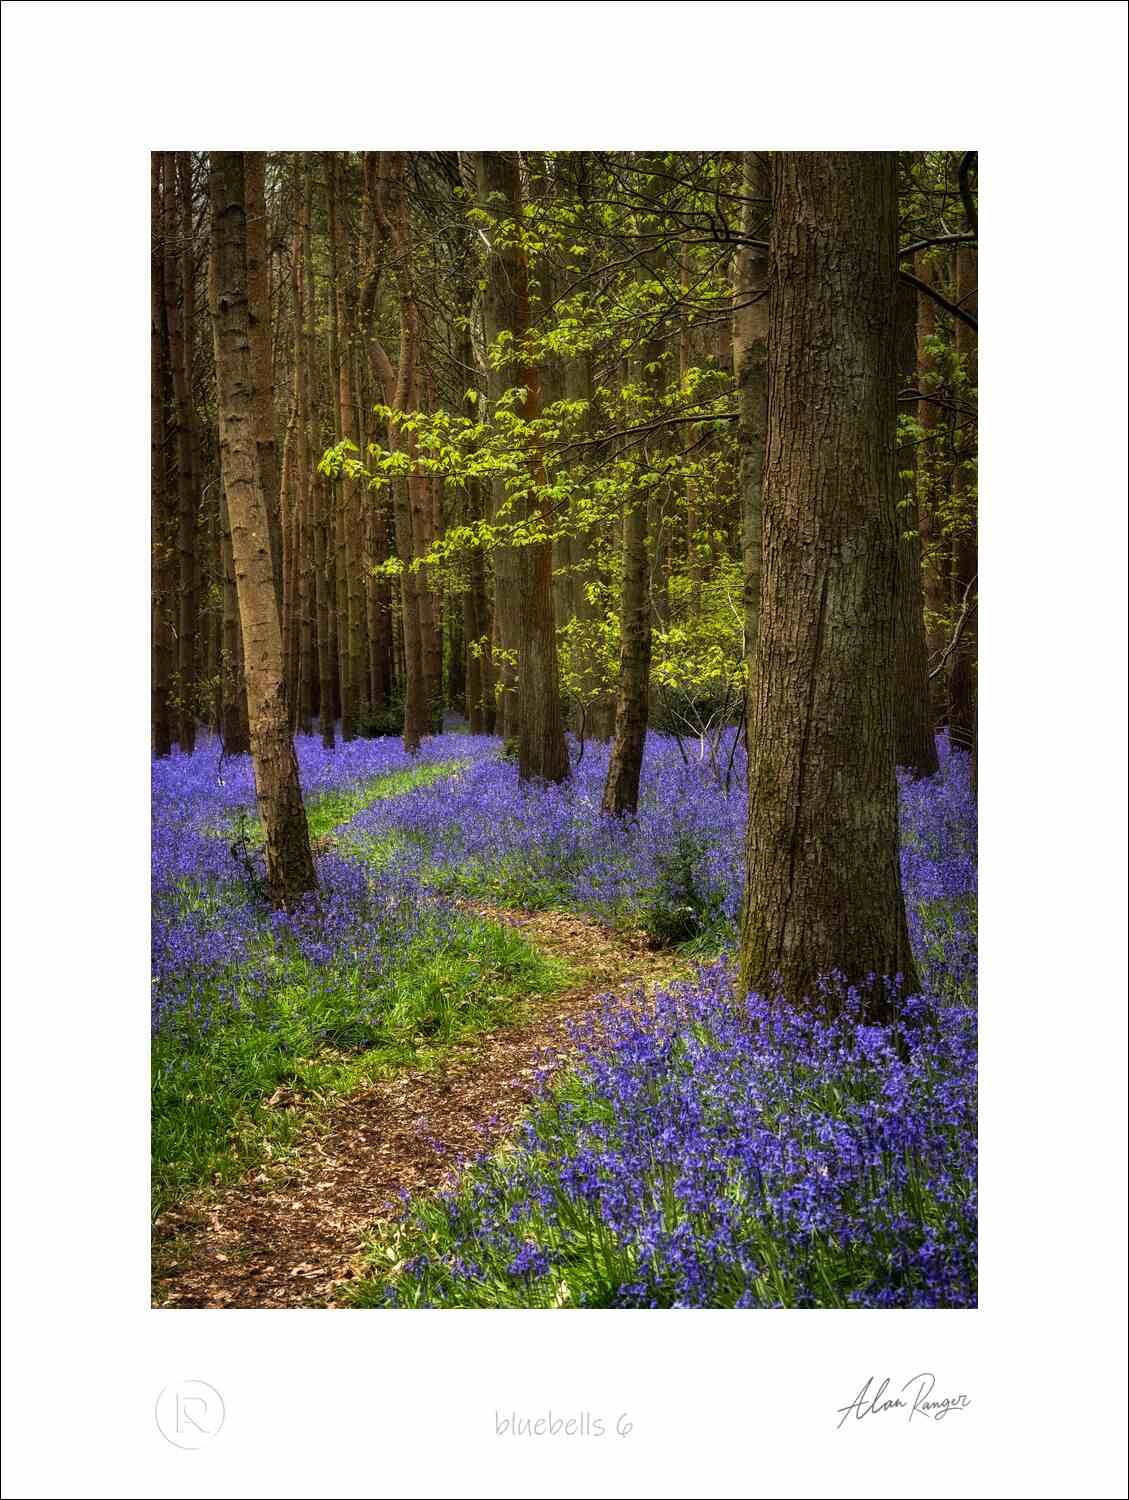
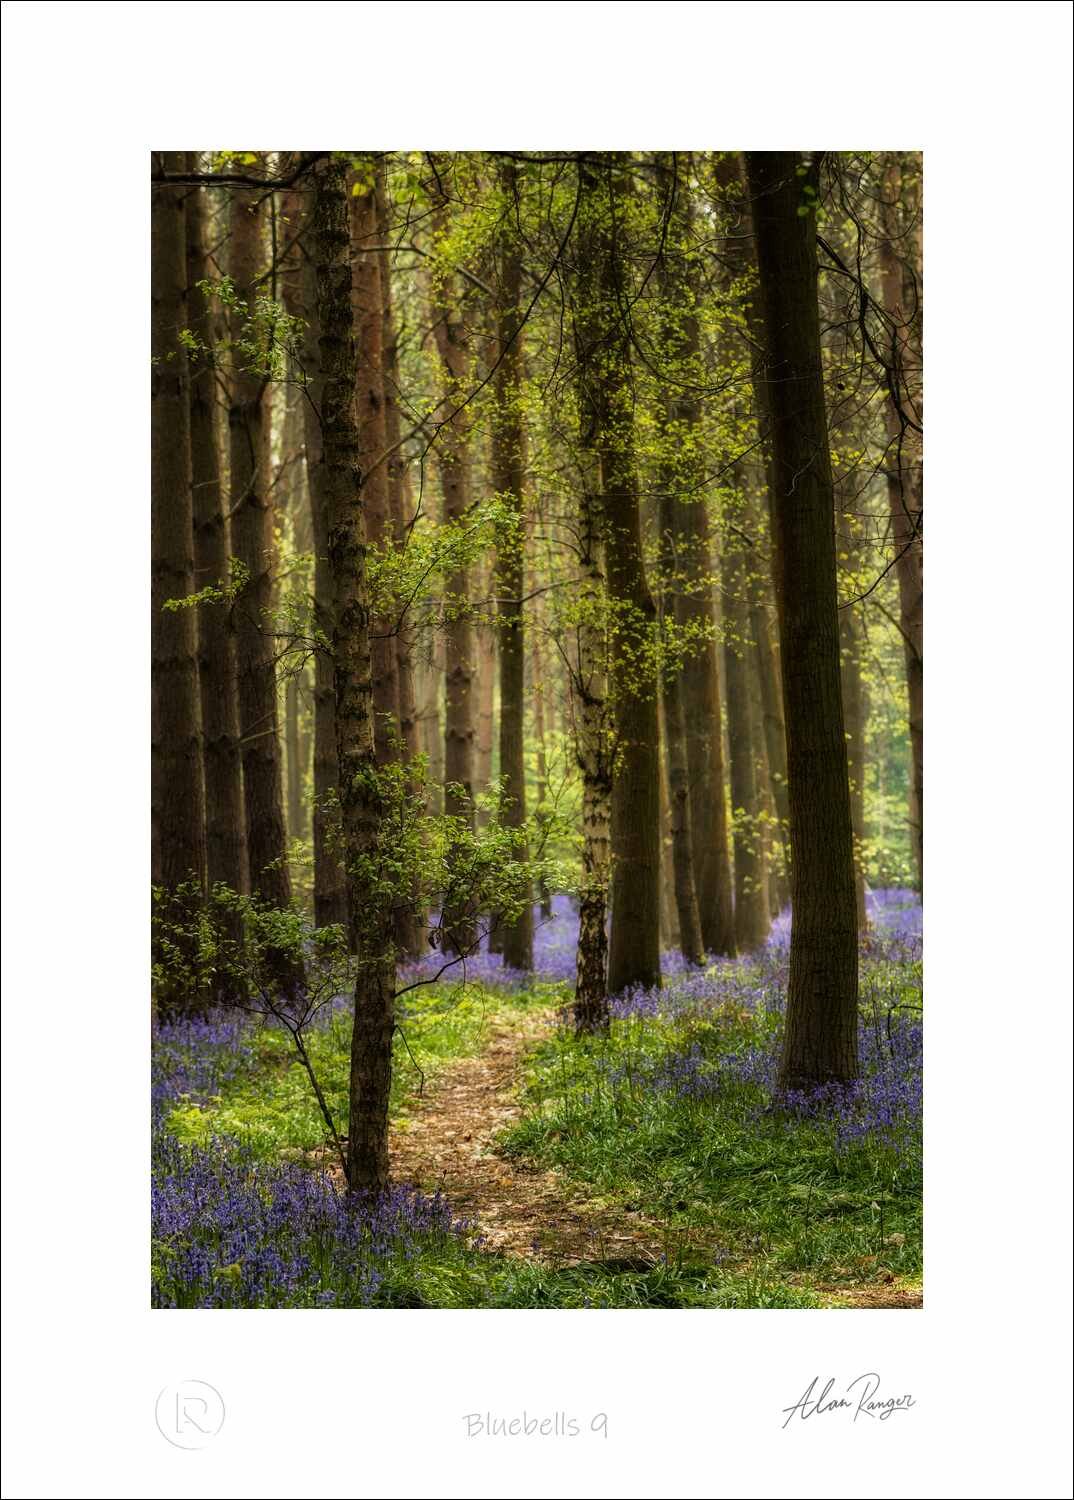
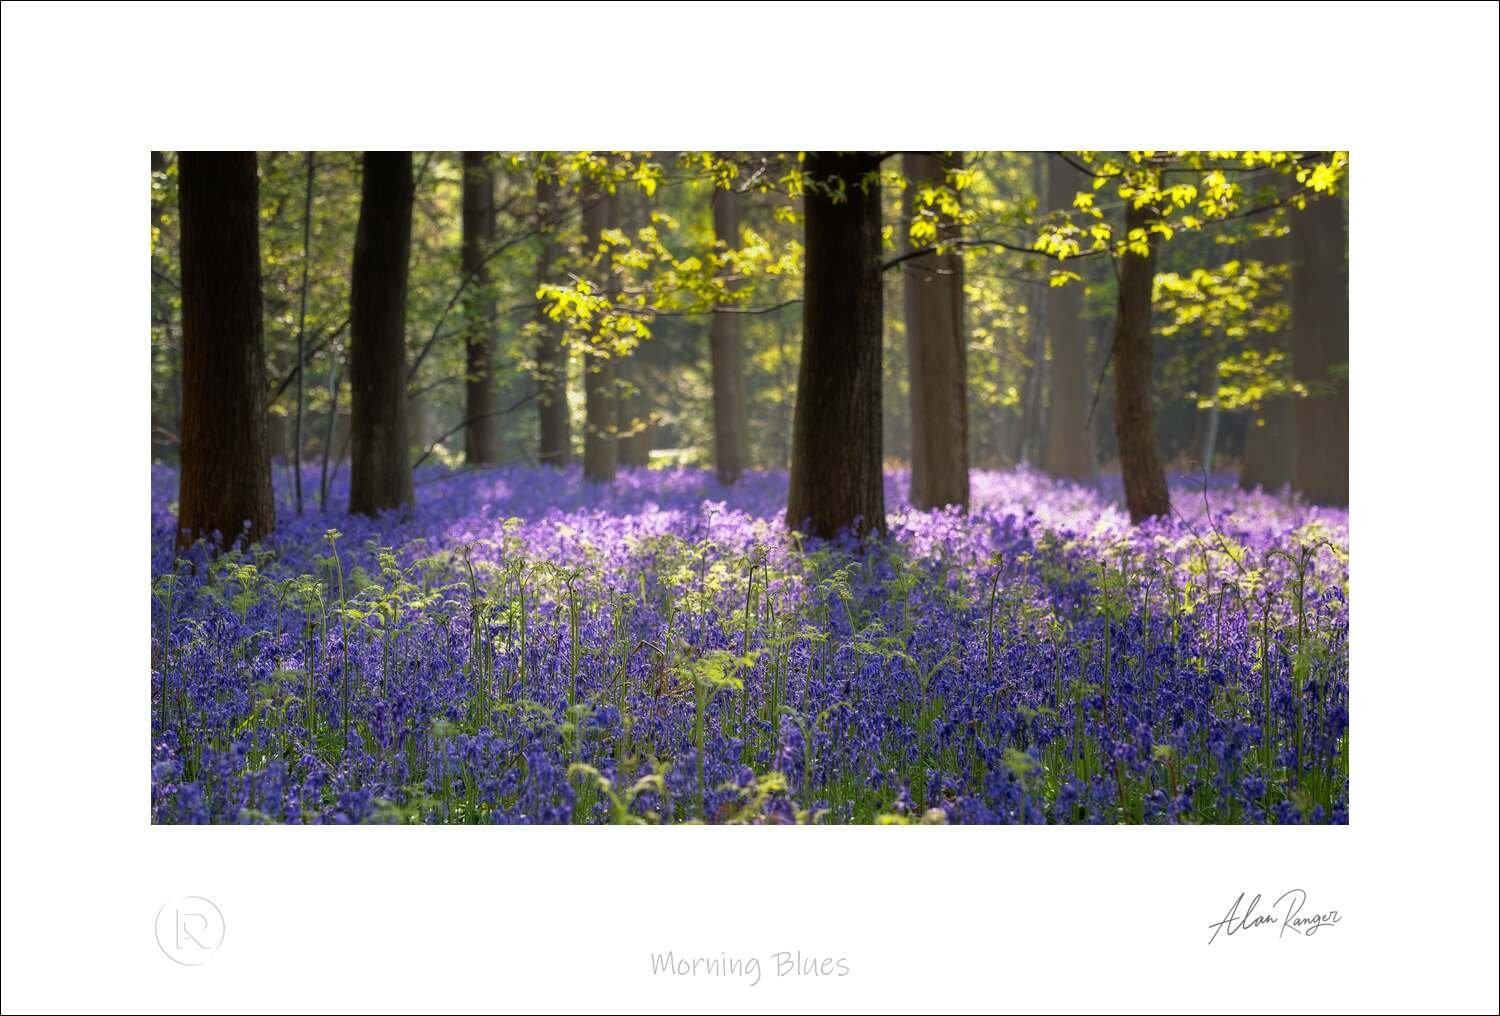
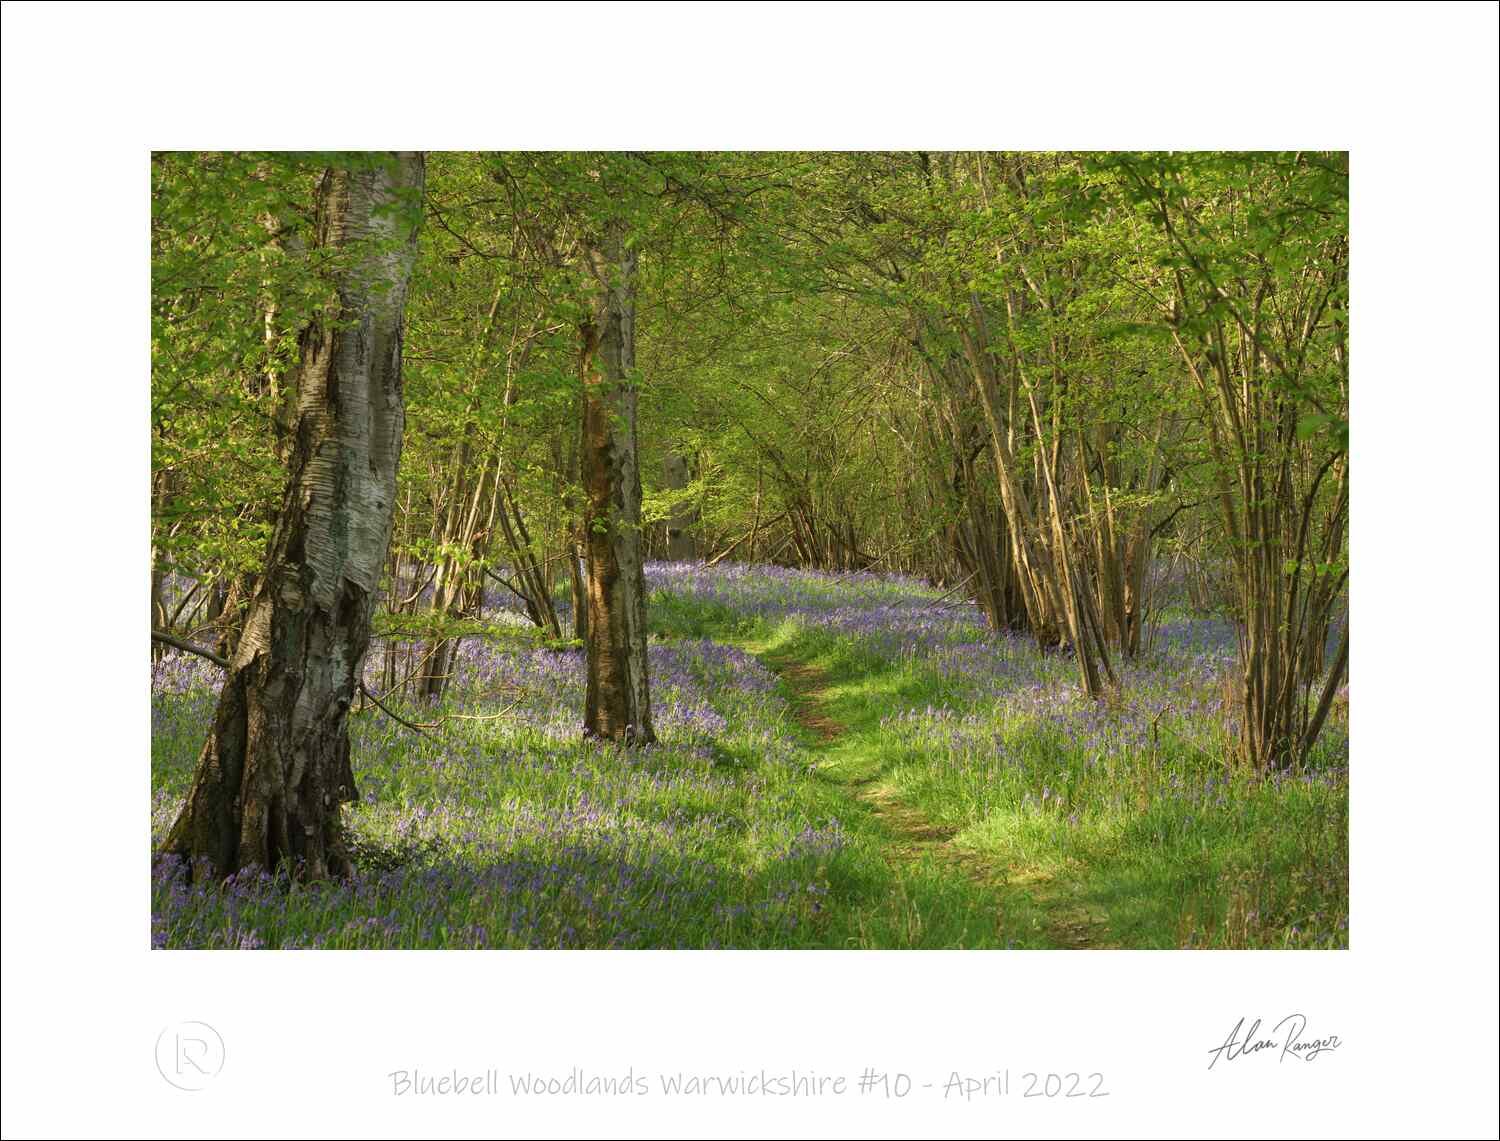
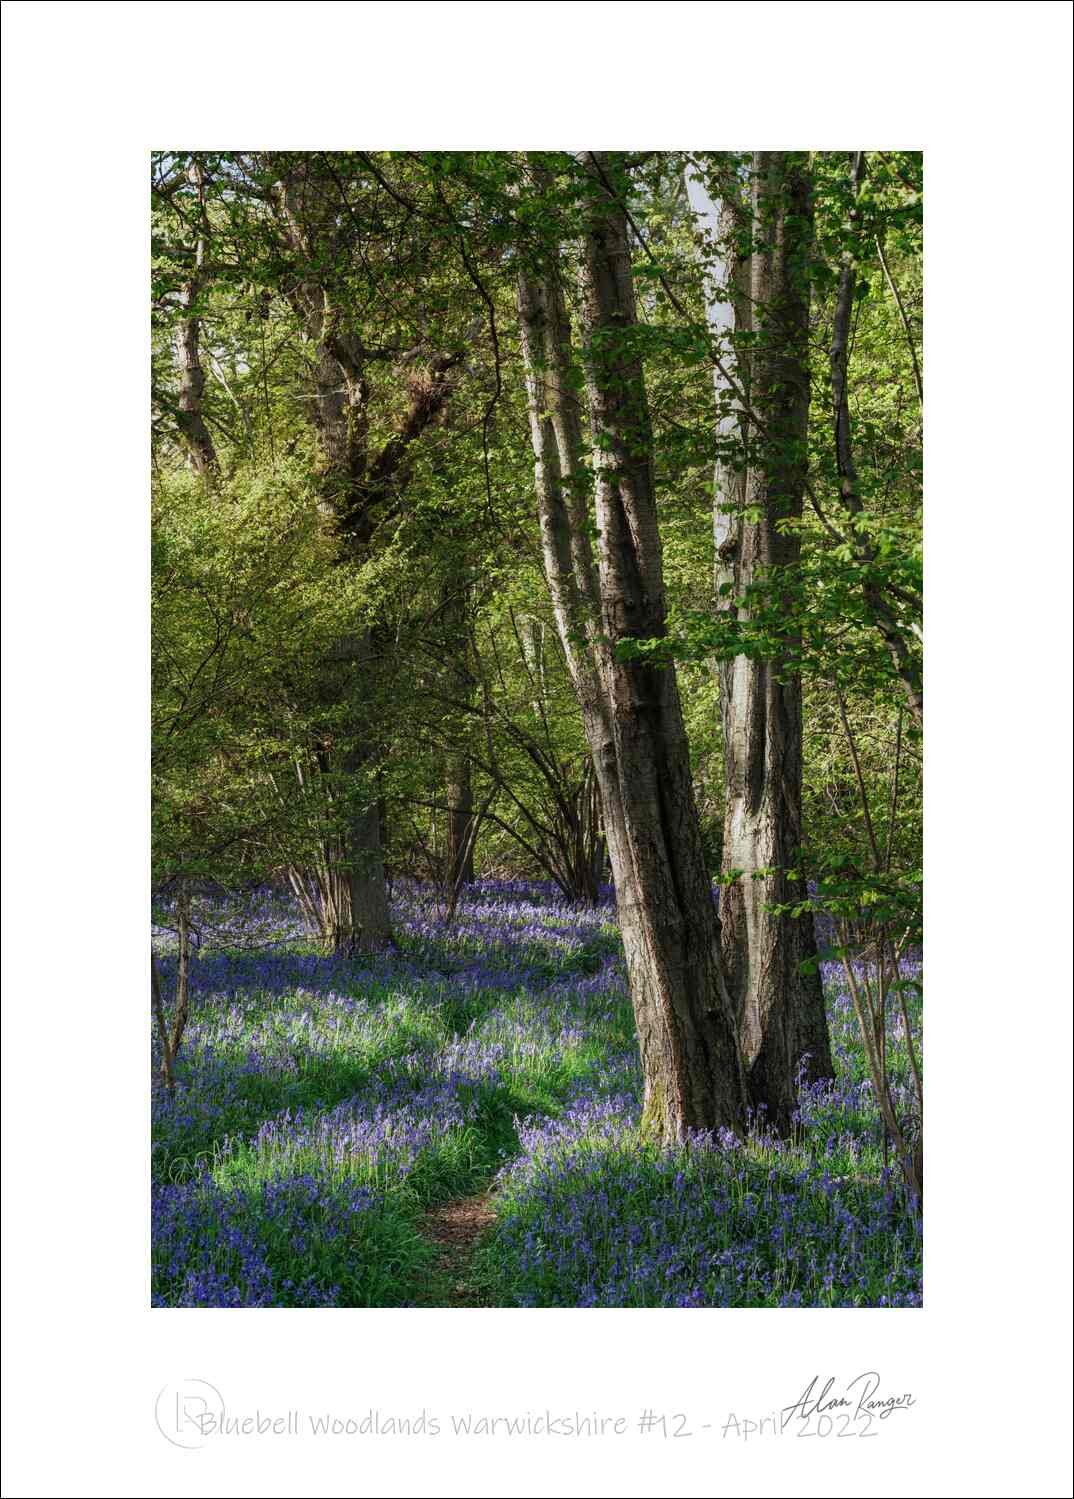
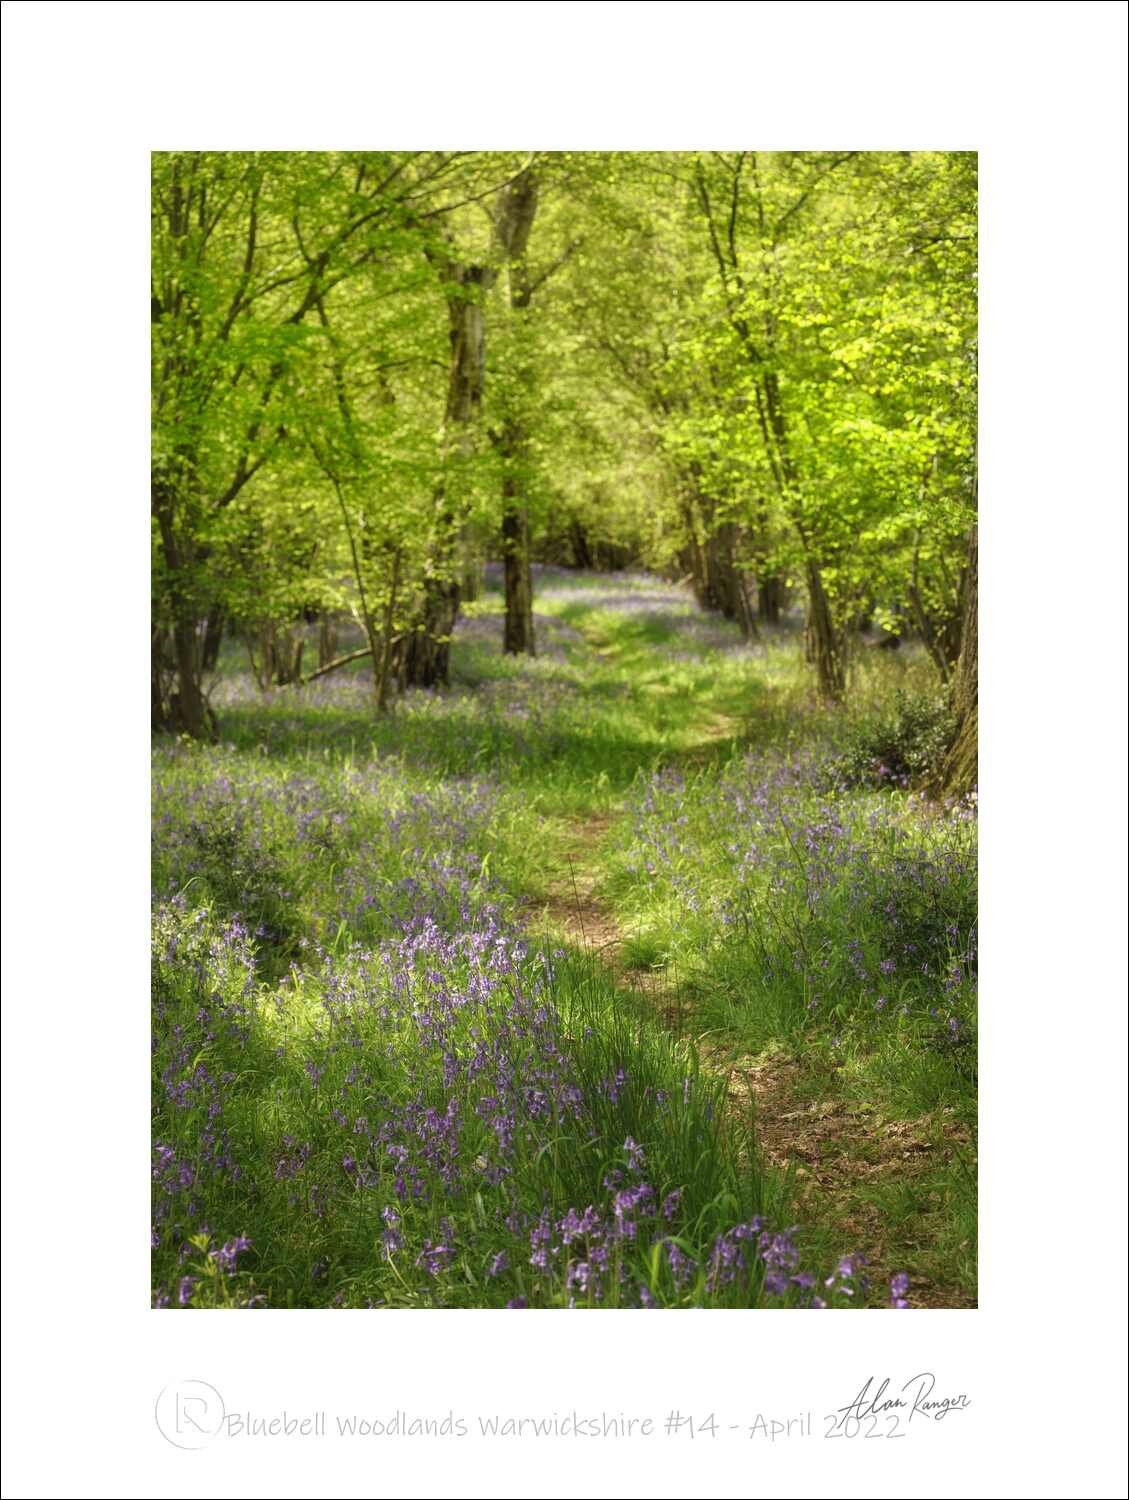
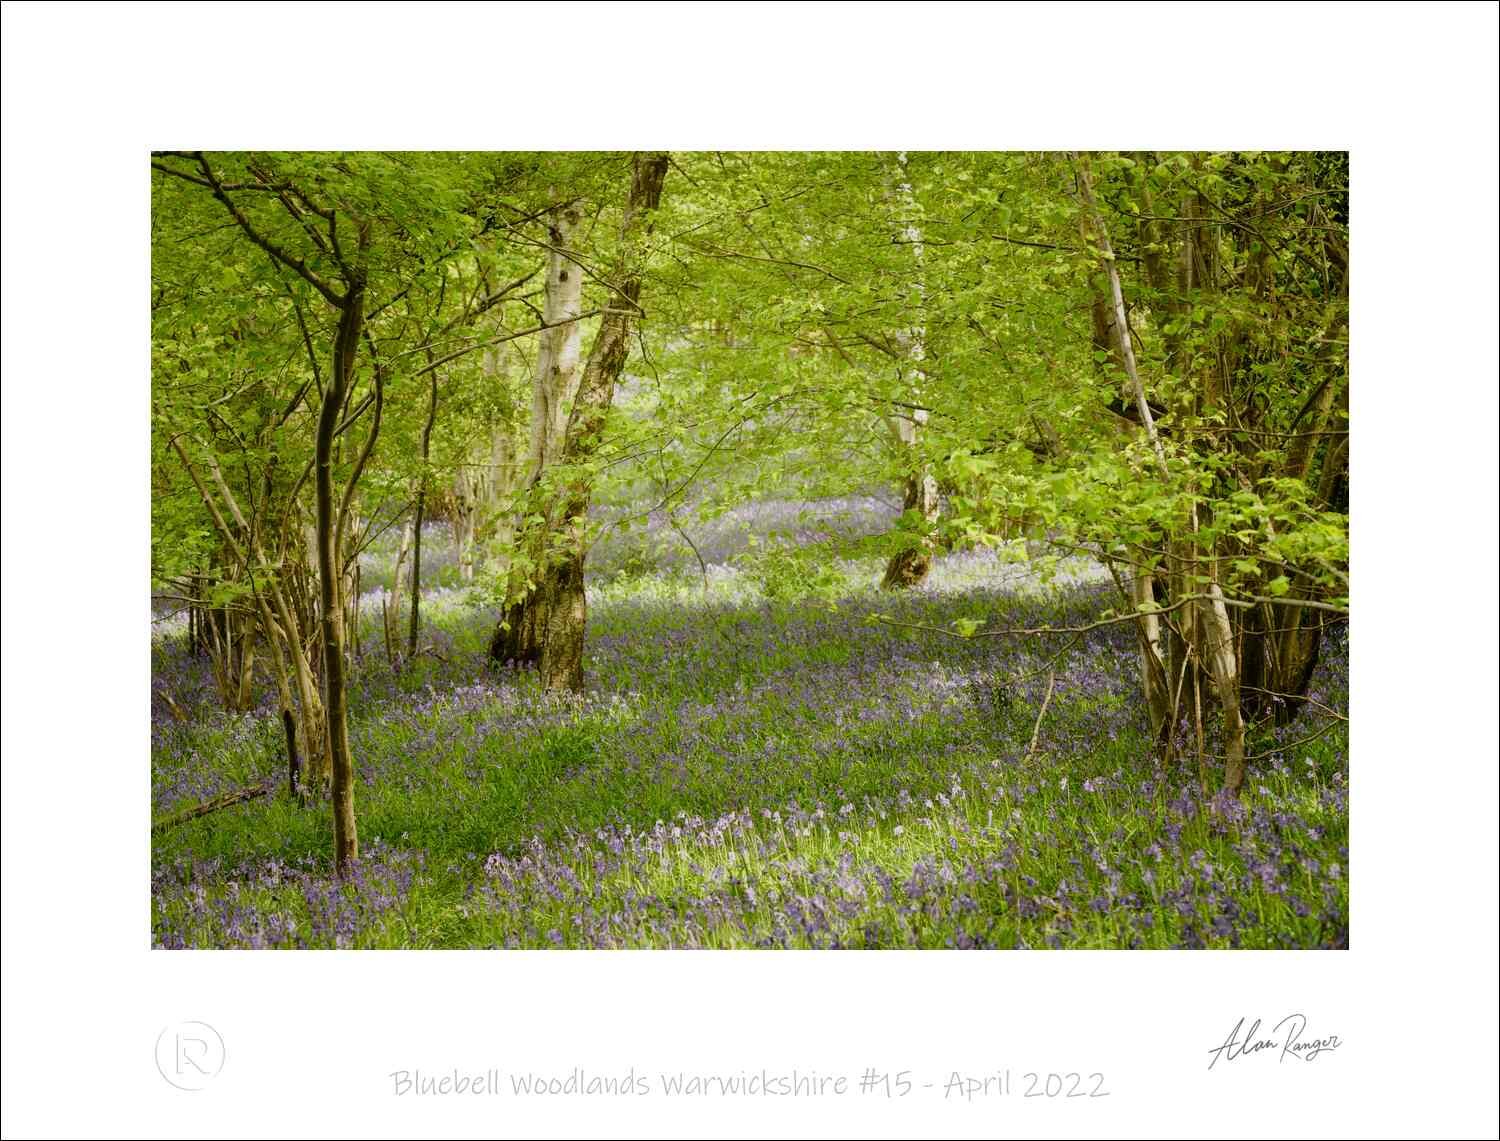
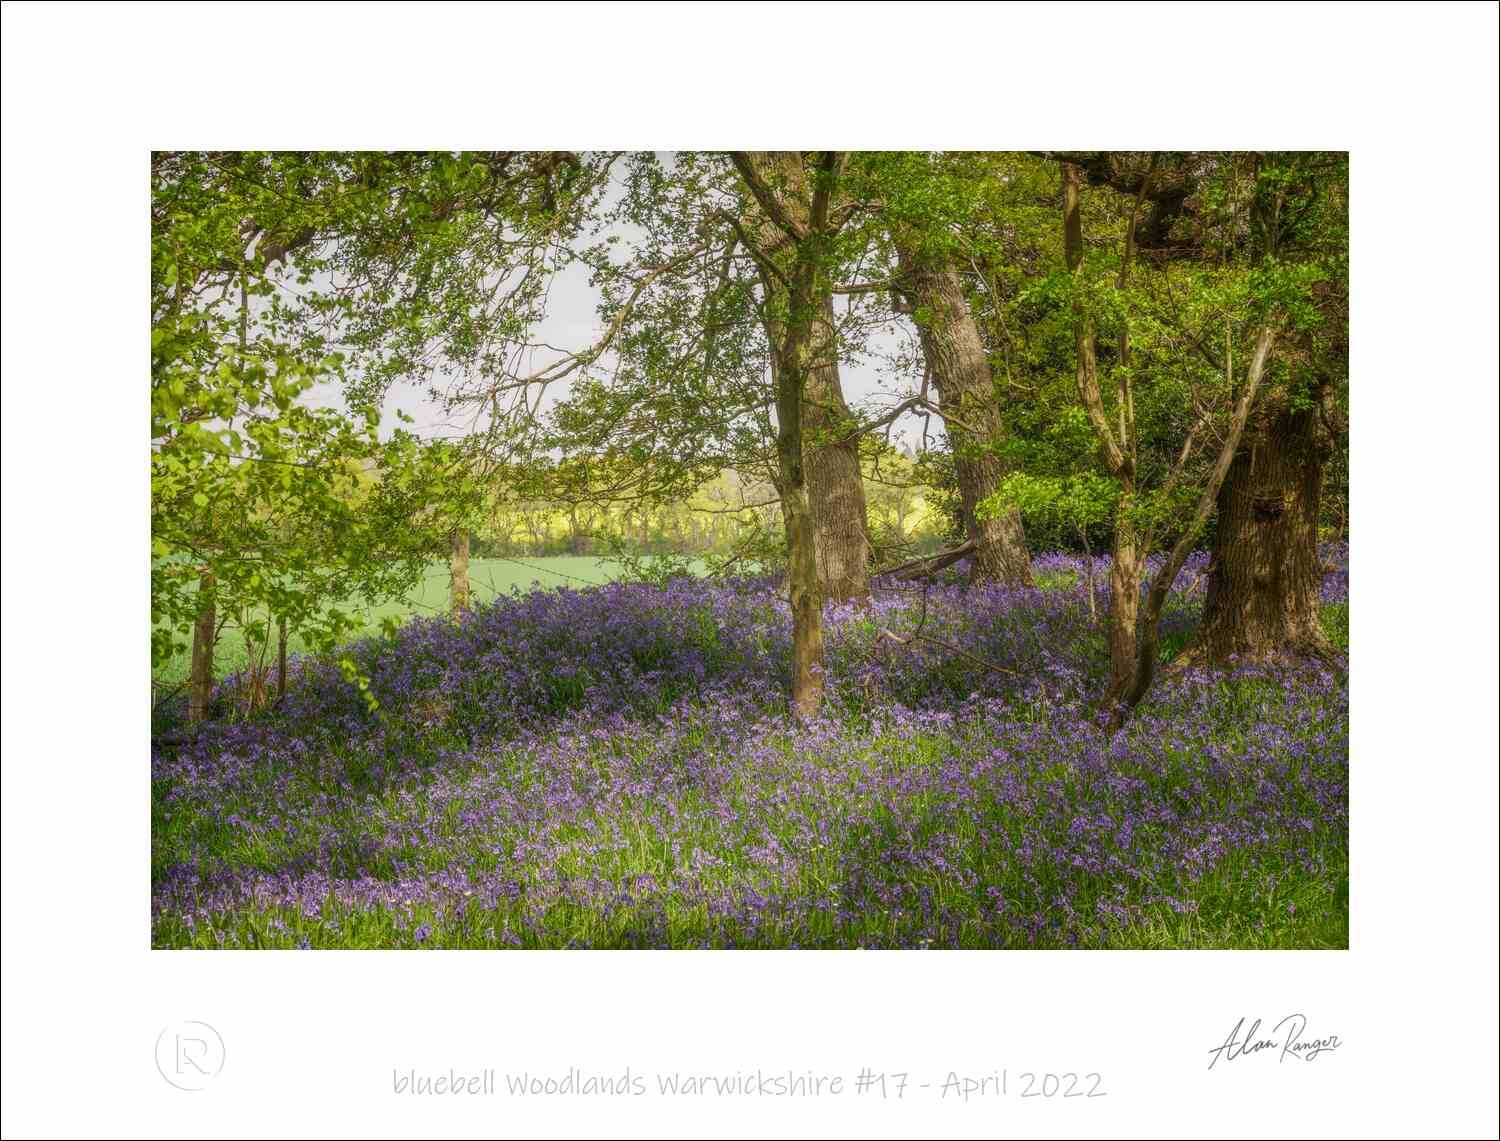
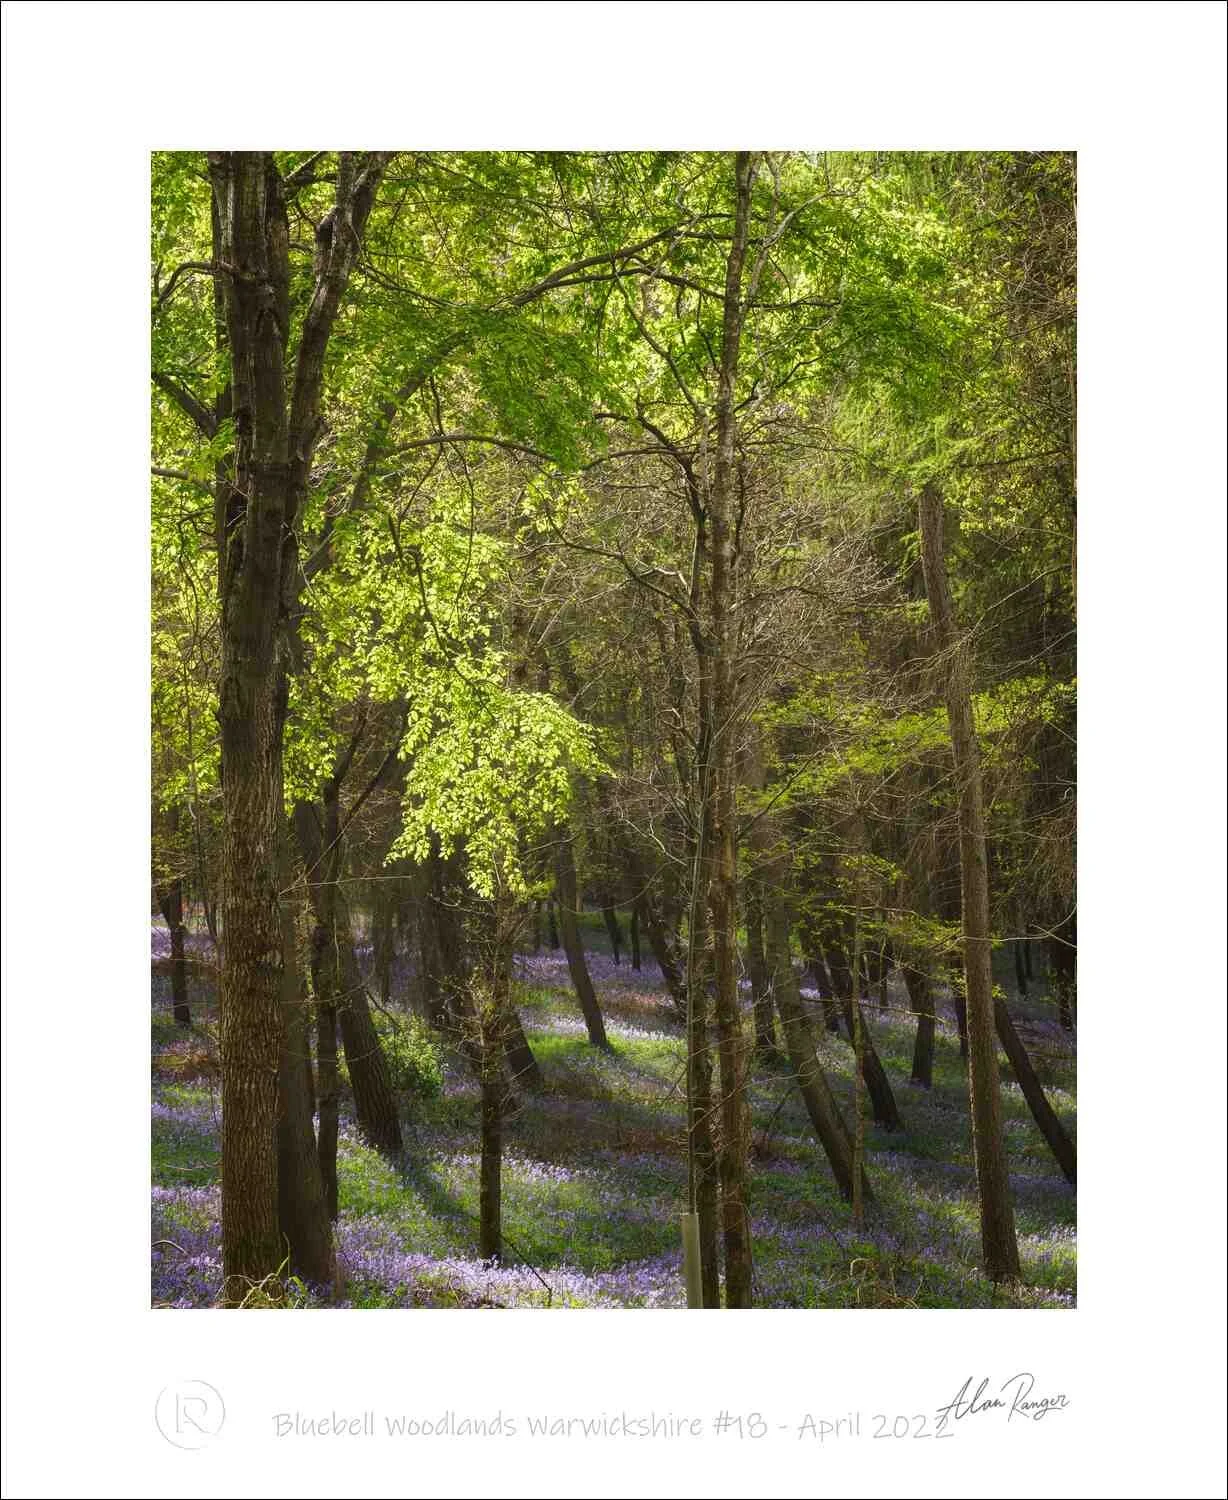
The wide carpet. Shows the dense floor of bluebells receding into trees. Needs a clean, leading composition — usually a path, a trunk, or a directional light shaft anchoring the eye. Wide lens (24–35mm), low position, narrow aperture (f/8–f/11), tripod essential. The hardest of the four to do well because the entire frame has to work.
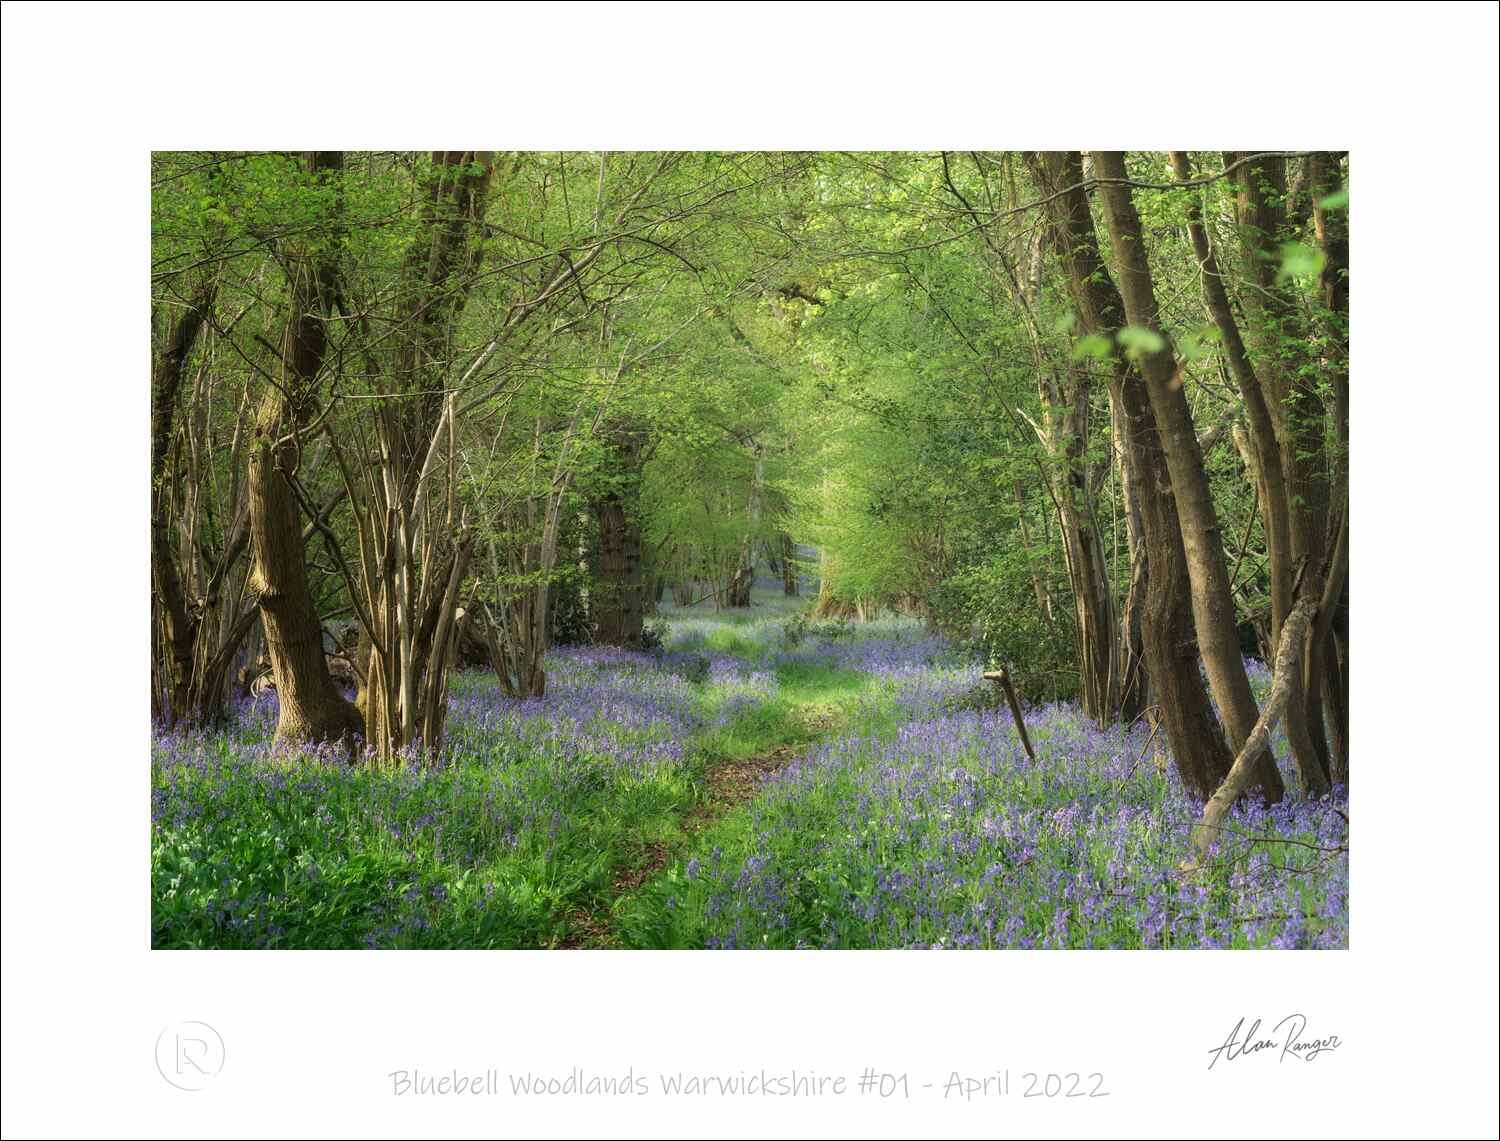
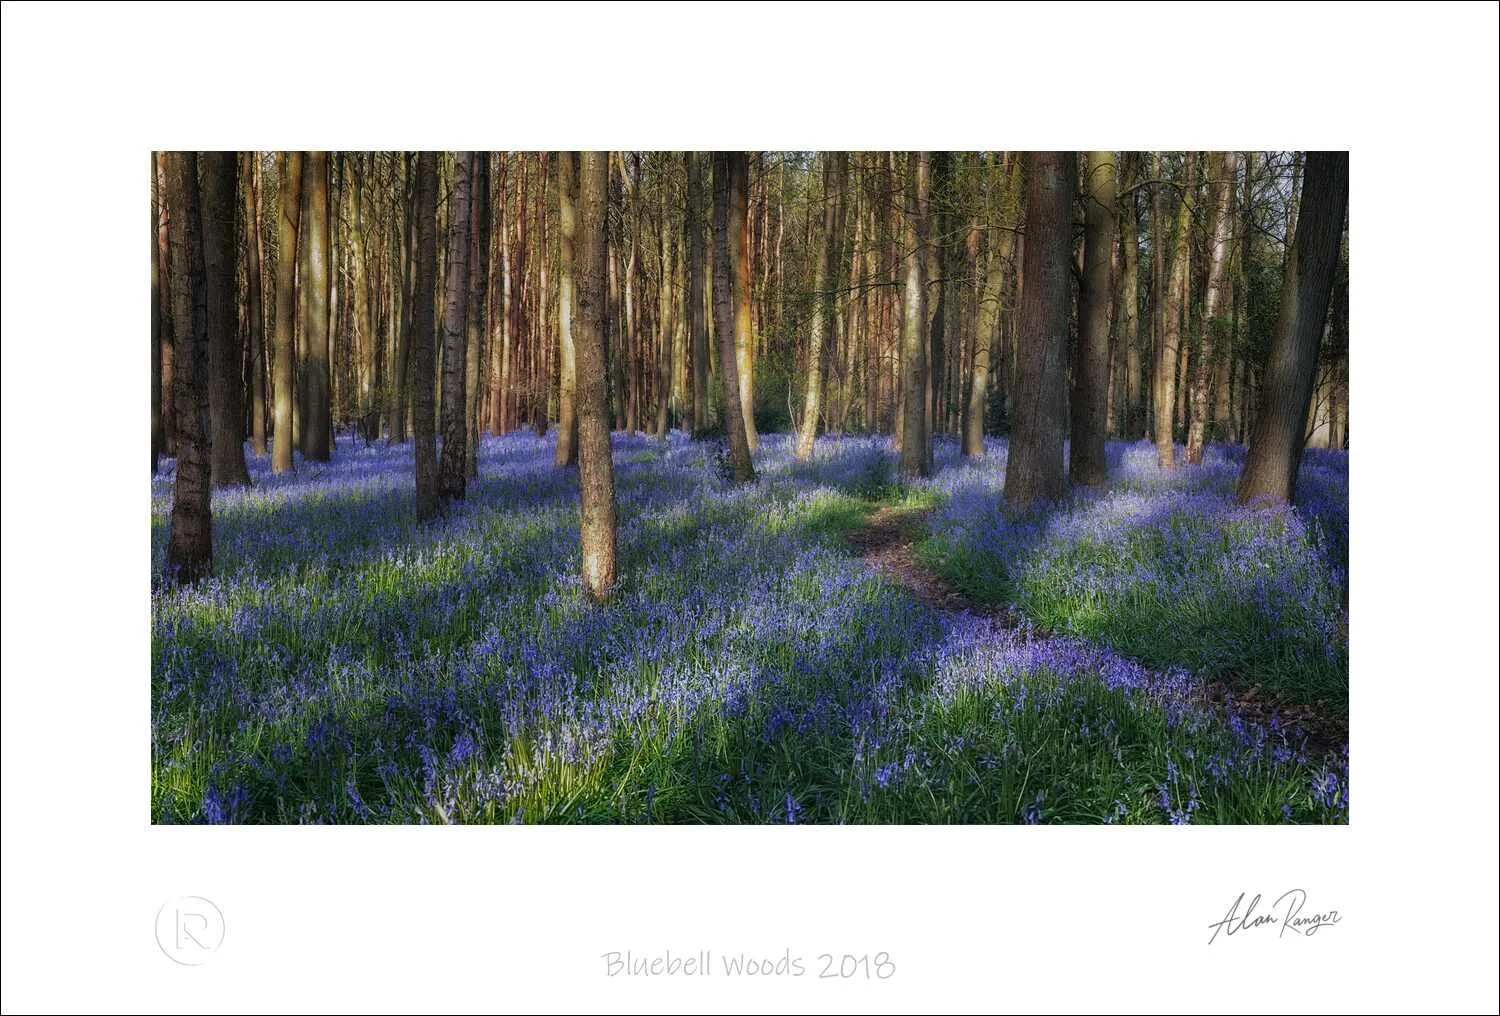
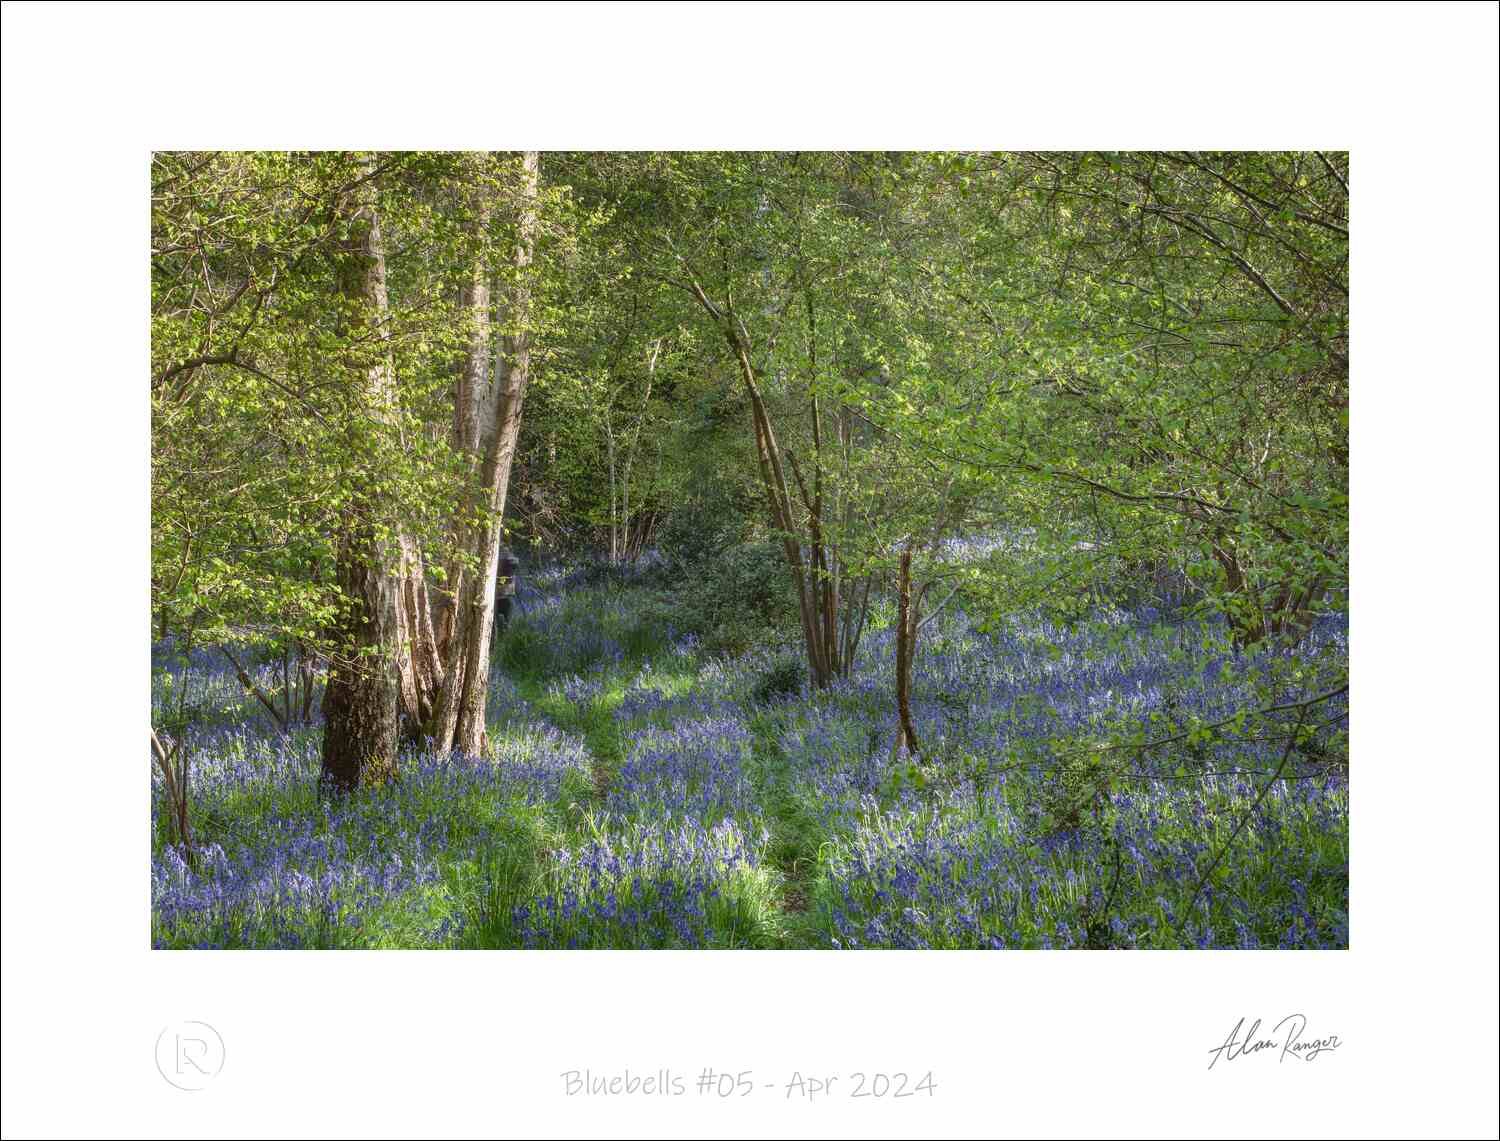
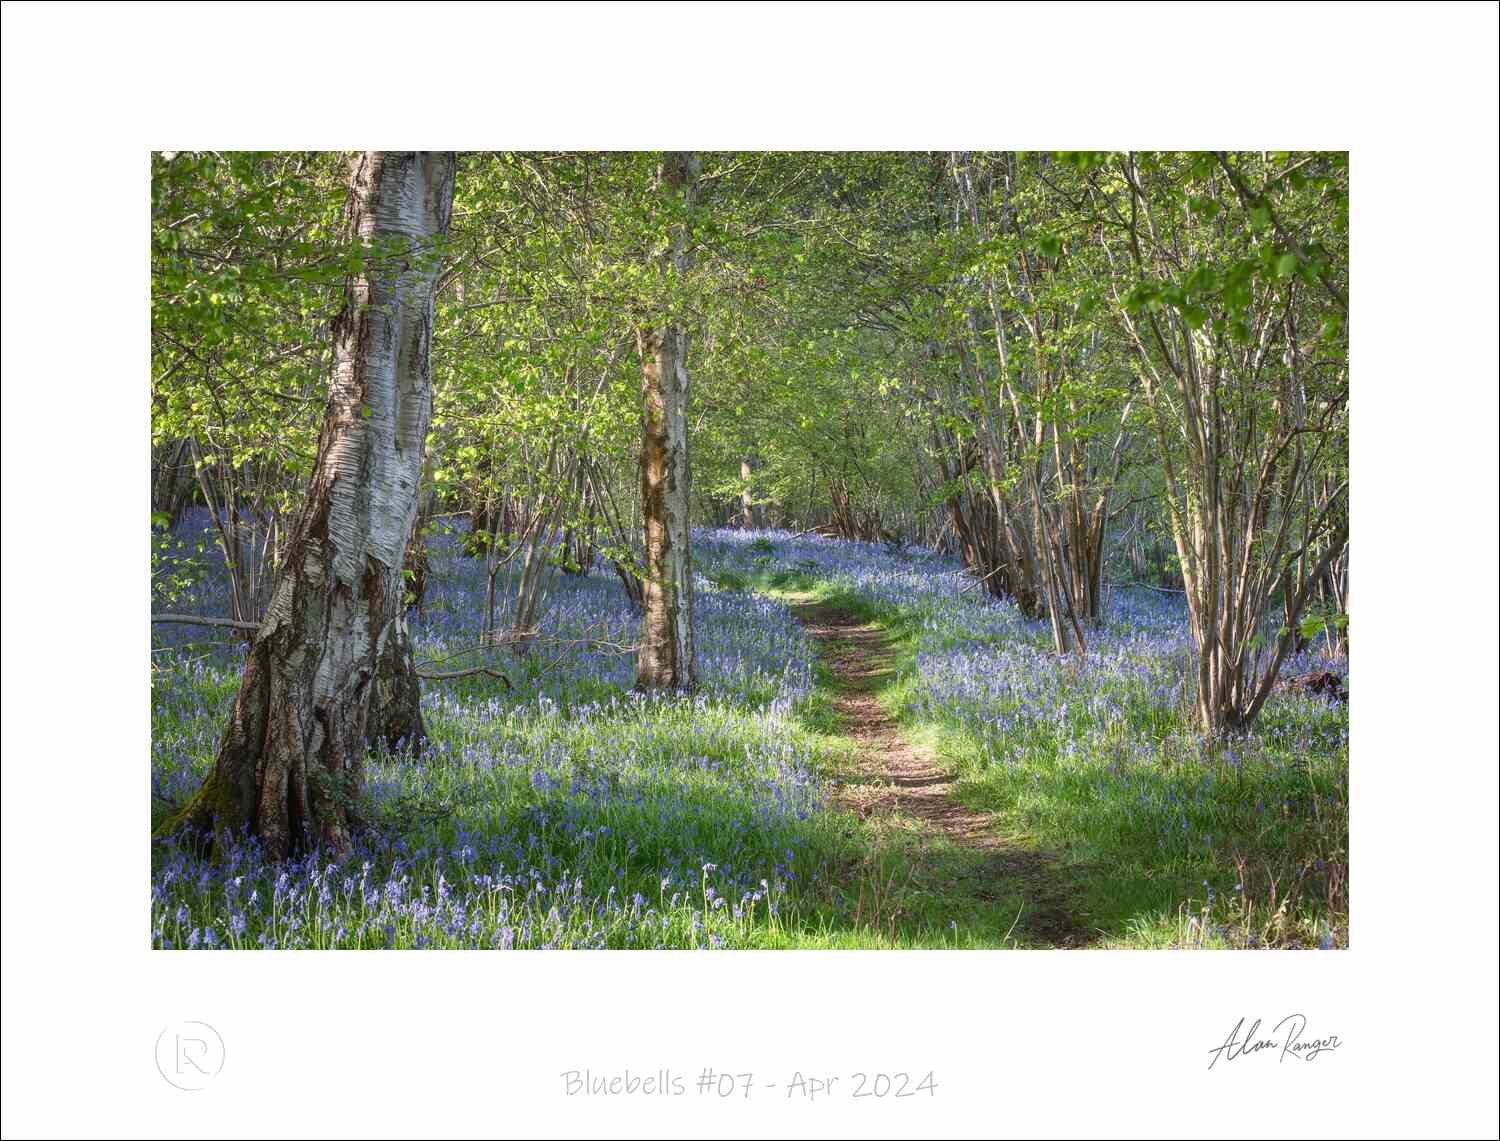
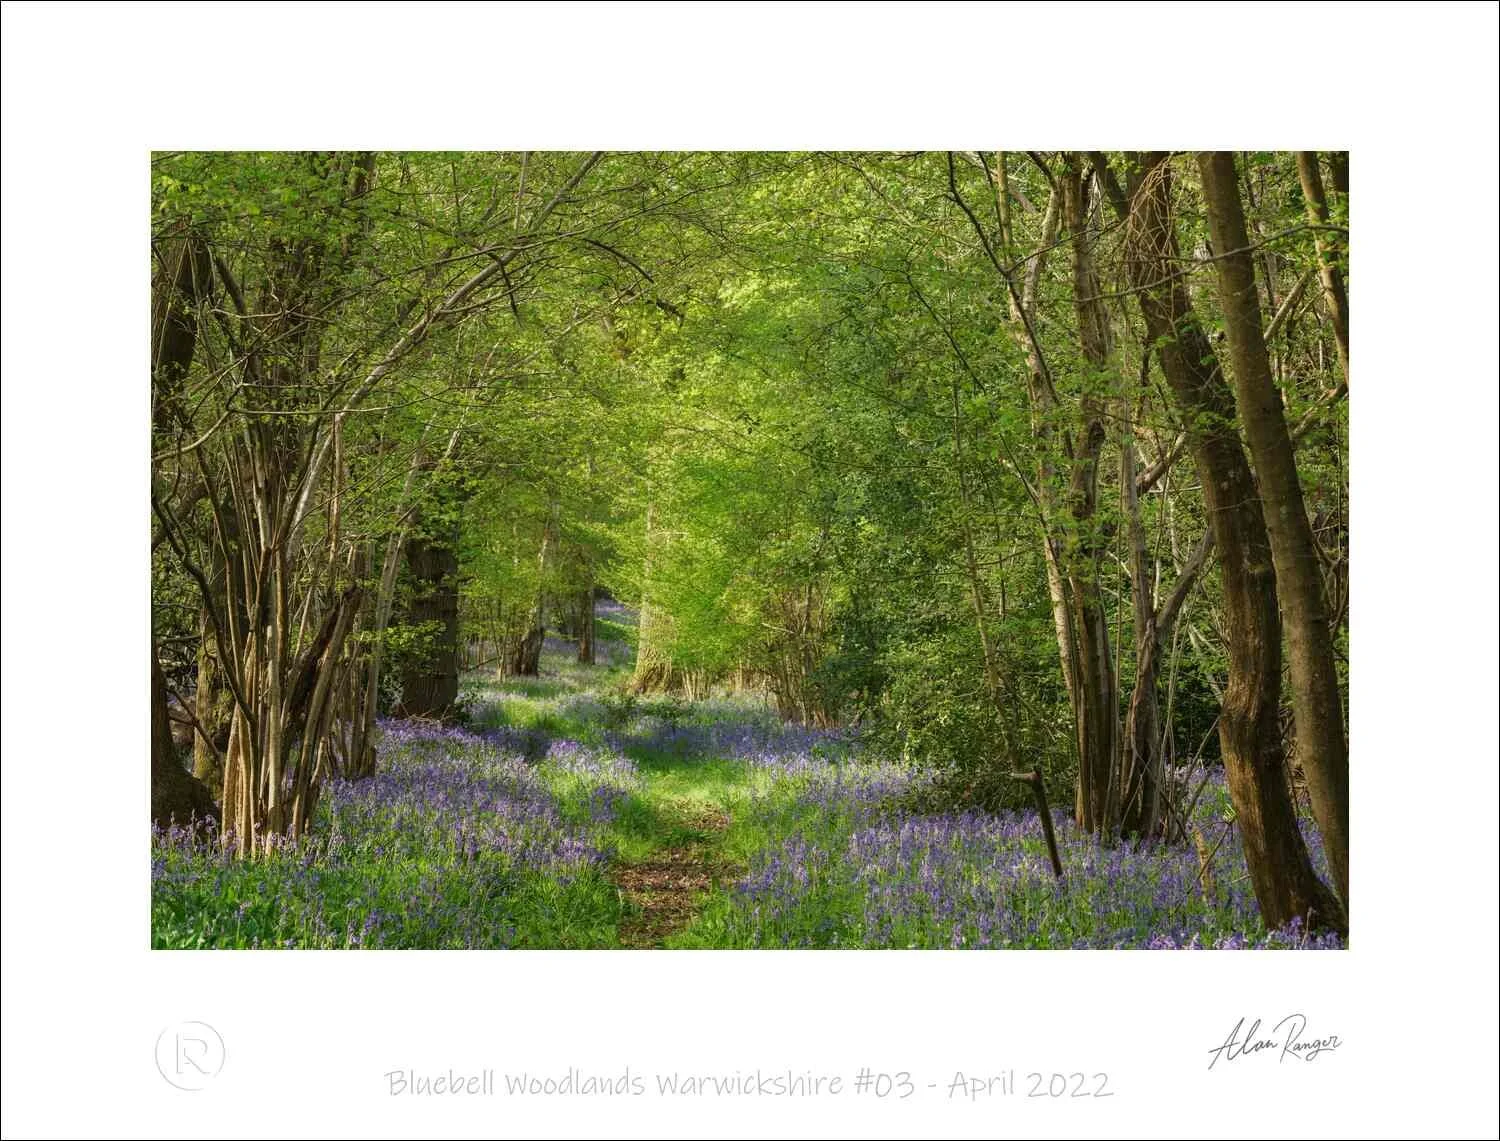
The path through. A defined track or natural gap leading the eye into the bluebell mass. Easier than the wide carpet because the path does the compositional heavy lifting. Mid-range lens (35–70mm), aperture f/5.6–f/8, eye-level or slightly low. Watch the path doesn't just dump the eye out at a tree trunk — it should lead to a destination (light, a clearing, a feature tree).
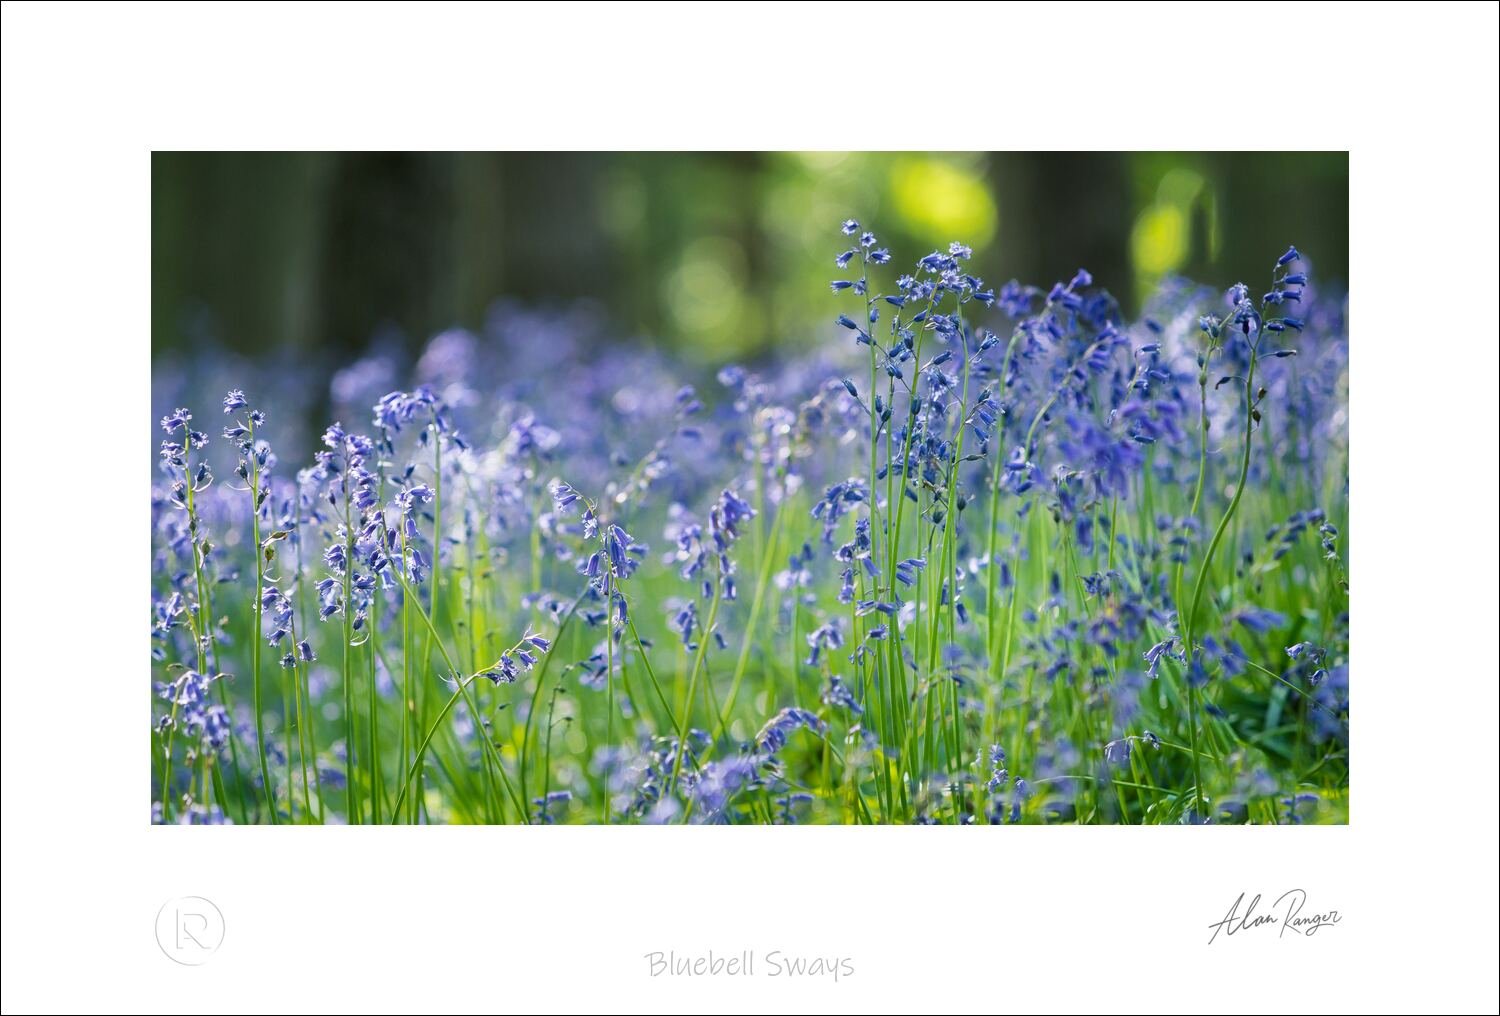
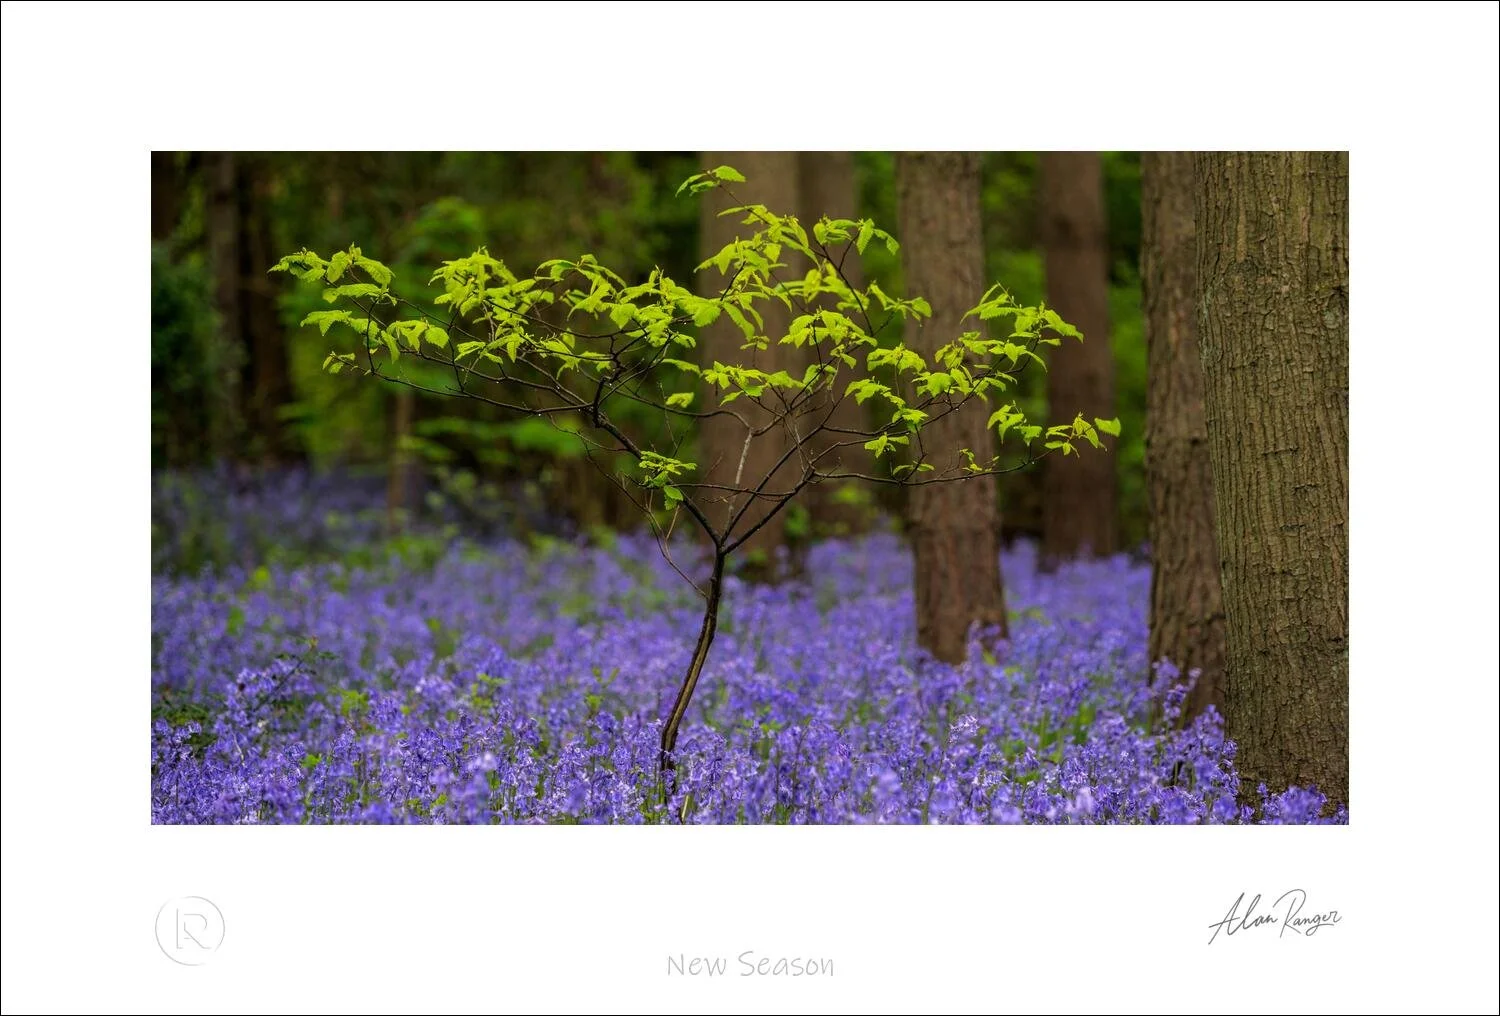
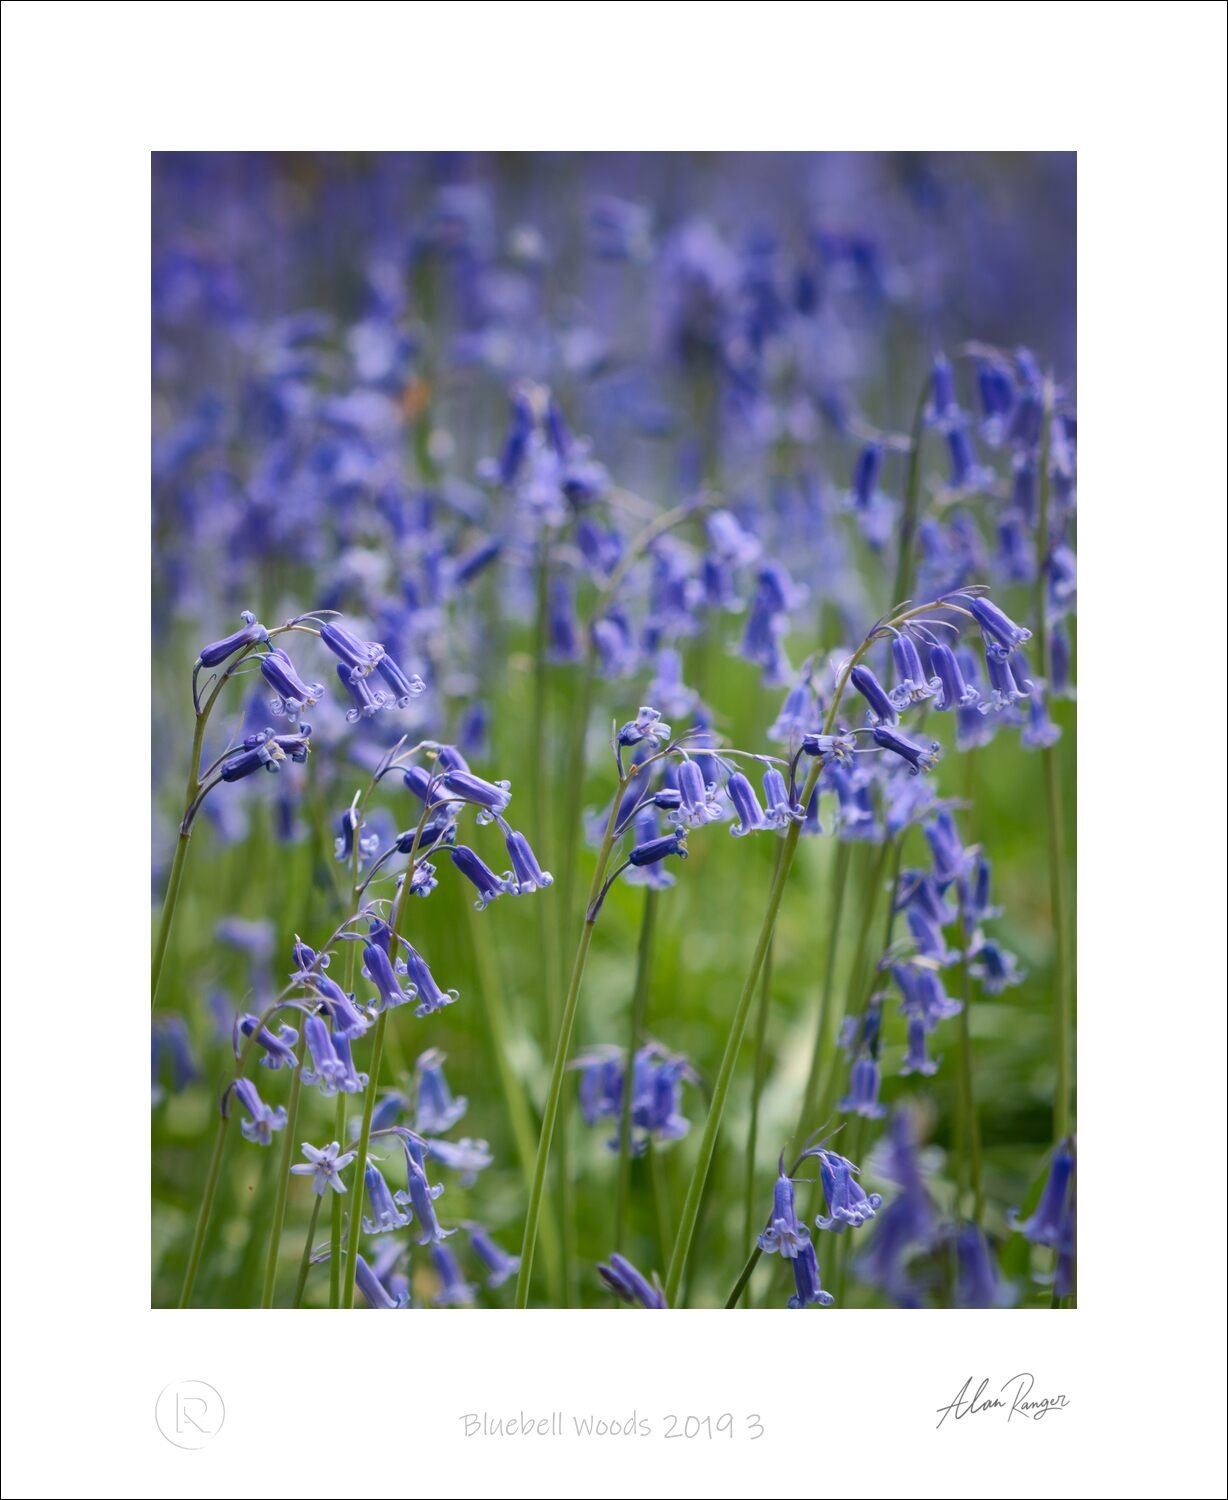
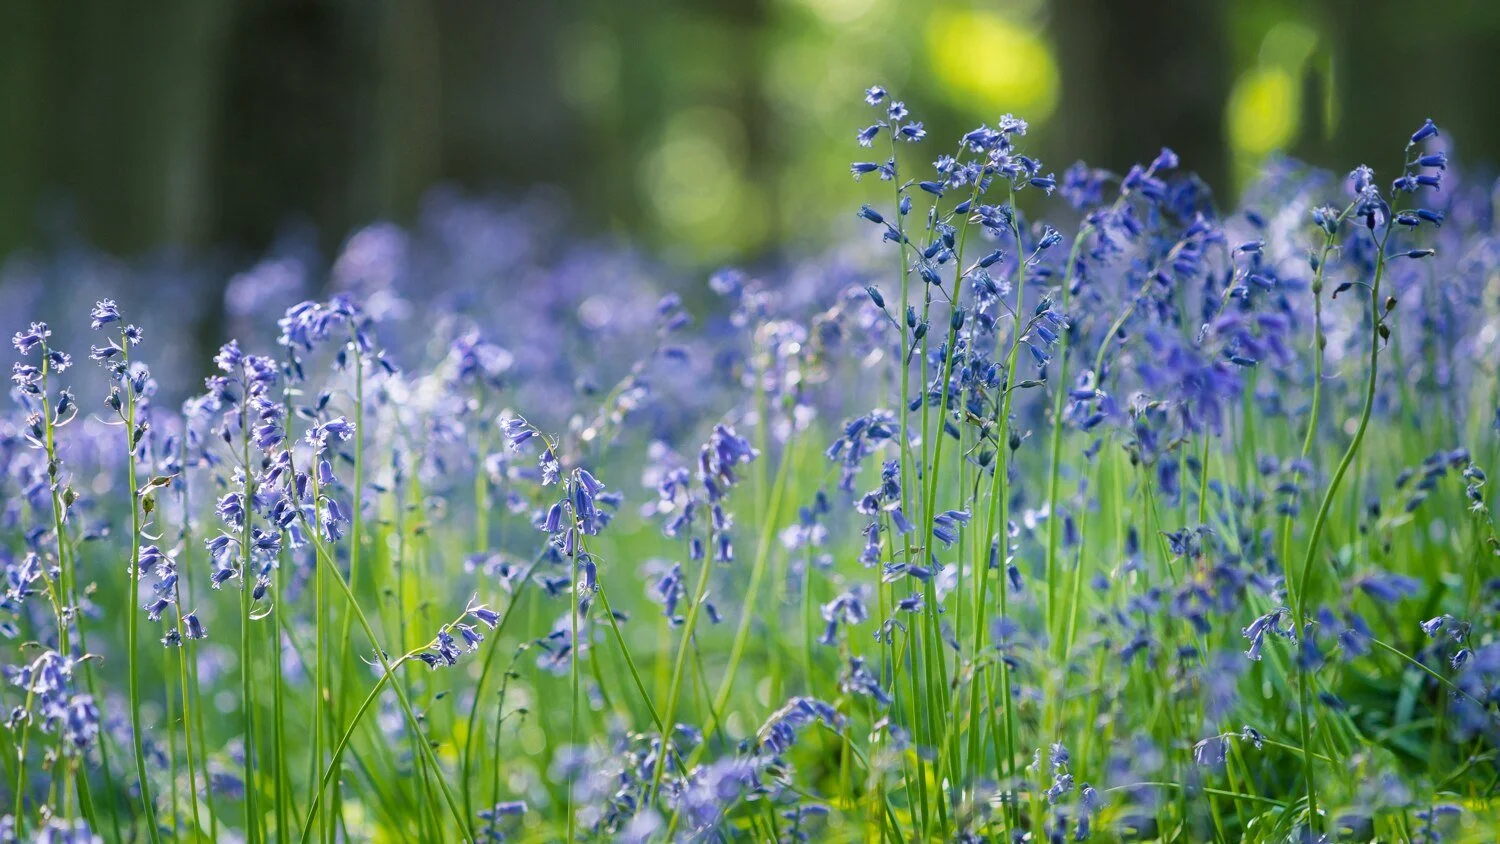
The detail cluster. A small group of flowers in sharp focus against a defocused bluebell background. Shows the flower structure while keeping the woodland feeling. Telephoto (70–200mm) or short macro, wide aperture (f/2.8–f/5.6), tripod recommended. Focus on the front edge of the cluster, let the rest fall away.
The backlit single stem. A single bluebell stem with low directional light coming through it from behind. Most graphic of the four — almost graphic-design rather than landscape. Telephoto or macro, wide aperture, dawn or late evening only. Background goes nearly black, the stem glows.
Most photographers mix all four every visit and end up with no strong examples of any. Pick one or two per session and commit.
Bluebell settings by shot type — starting points, not absolute rules. Adjust for your specific light and lens, but these get you in the right neighbourhood for each of the four shot types.
The bluebell shoot workflow
A good bluebell shoot runs on rhythm: arrive in darkness, set up before light, work the wide shots while the directional light lasts, switch to detail and close-up work once the sun is up, and leave by mid-morning before the woods fill with walkers. The same rhythm works for any UK woodland subject but bluebells reward it the most because the window is so narrow.
See a UK woodland photographer at work
The video below — "Spring Woodland Photography On Location" by Simon Baxter on the Simon Baxter channel — is a calm, considered visit to a Yorkshire spring woodland with bluebells and wild garlic, showing how a working UK woodland photographer thinks through composition, light, and patience on location. About 16 minutes; well worth the time before your first bluebell visit of the season.
Common bluebell photography mistakes
The mistakes are all decision mistakes, not technique mistakes:
Going at the wrong week. First week of bloom is too patchy; third week the canopy has closed and the light is gone. Watch local social media or wildlife trust pages a week before you book the day off.
Going at the wrong time of day. Bright midday sun is unworkable in dense woodland. If that's your only window, find an open-canopy edge or skip the day.
Including too much sky. The dynamic range between dense shade and bright canopy gaps exceeds what the camera can hold in one frame. Compose to keep sky out of the frame, or shoot through a tree.
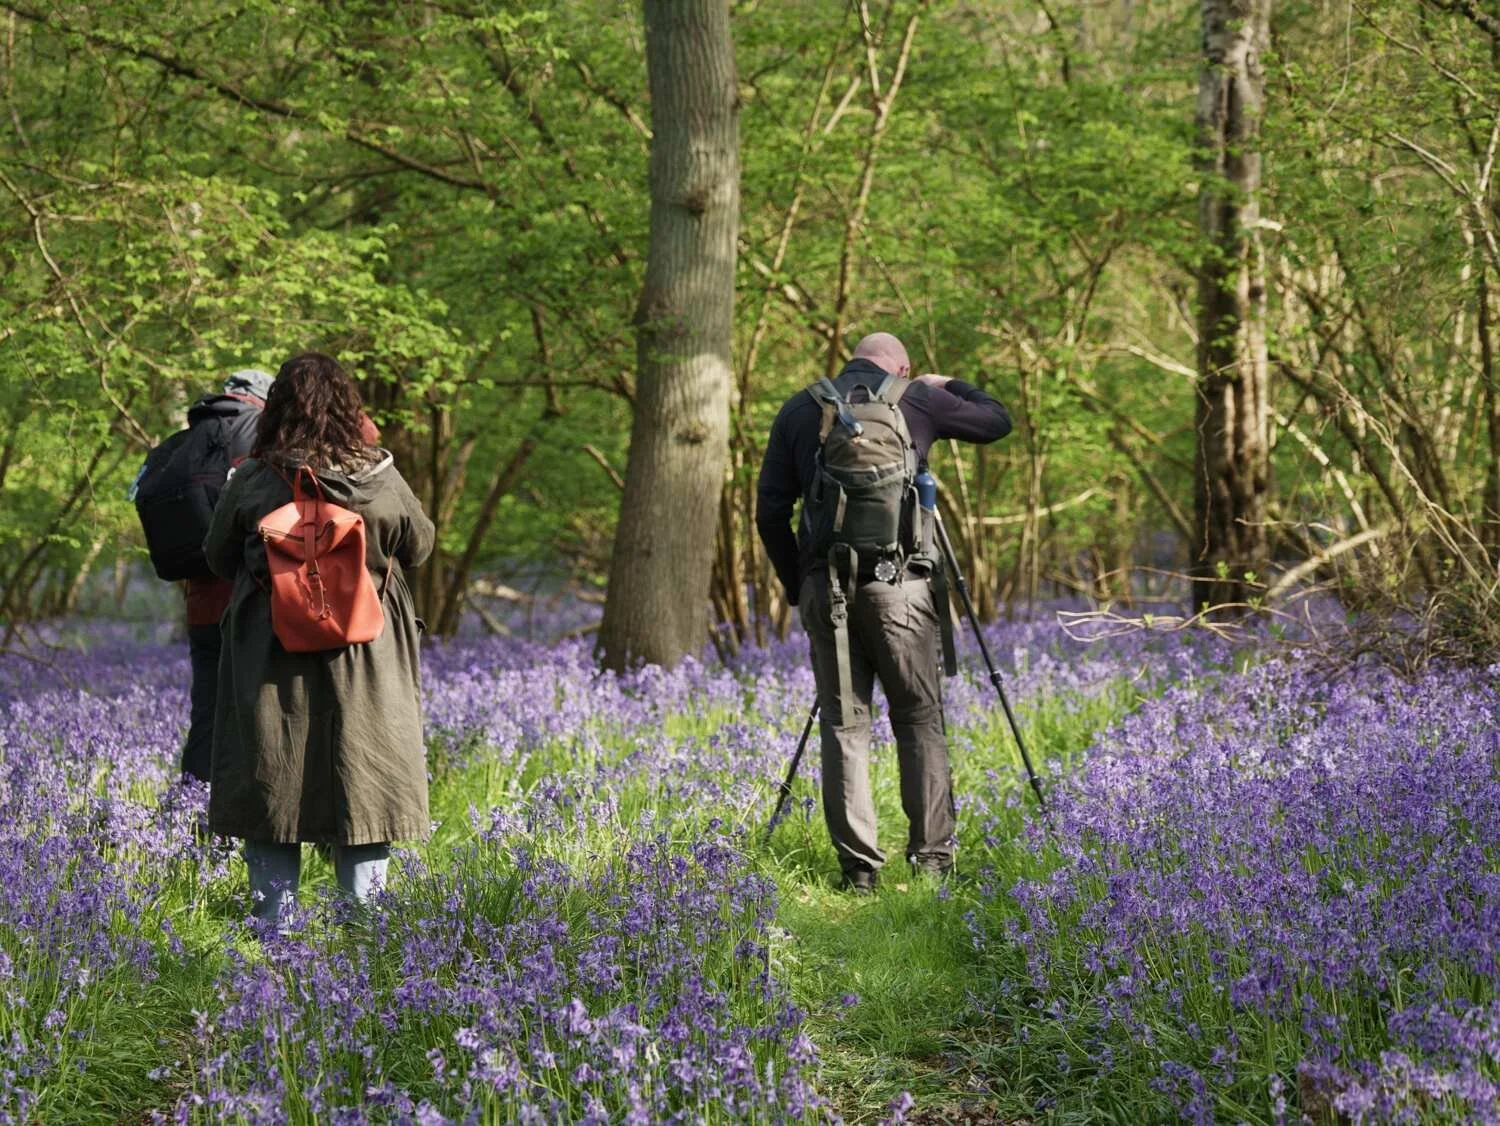
Trampling the flowers to get the shot. Bluebells take five years to recover from being walked on, and they're protected under the Wildlife and Countryside Act 1981. Stay on paths, shoot from the edge looking in, use a longer lens to compress without crushing.
Treating every bluebell shot the same. The wide carpet, the path, the cluster and the backlit single each need different decisions. Shooting them all at f/8 with the same lens means none of them works to its potential.
Over-saturating in edit. The classic mistake — pushing blues until the photograph looks like a screensaver. Keep the edit honest. Bluebells are a soft purple-blue in real life, not electric.


Bluebell photography FAQ
Key takeaways
The window is short and the planning matters more than the camera. Mid-April to early May, second week of bloom, overcast bright or first/last hour, second week of bloom.
Pick one or two of the four shot types per visit — wide carpet, path through, detail cluster, backlit single. Don't try all four in one morning.
Background and supporting structure matter more than the bluebells themselves. A clean composition with the right light will always beat a denser bluebell carpet shot badly.
Stay on paths and respect the legal protection. Bluebells take five years to recover from trampling and are protected under UK law.
Edit honestly. Soft purple-blue, not electric blue. Lift contrast, leave saturation alone.
Get there for first light, leave by mid-morning. Best light, no walkers, time to review and plan tomorrow.
Continue learning
Conclusion and summary
Bluebell photography in the UK rewards planning more than equipment. The three-week flowering window, the need to be on site before light, the narrow gap between the wrong weather and the right weather, the legal protection of the flowers, and the quickly-closing canopy all make this a genre where the photographers who come home with keepers are the ones who made the decisions — where, when, what shot type, what light — before they left the house.
To recap the field-guide approach: aim for the second week of full bloom, not the first or third. Go at first light or overcast mid-morning, never bright midday. Match your lens and aperture to one or two of the four shot types (wide carpet, path through, detail cluster, backlit single stem) rather than trying all four in one visit. Set a custom white balance. Shoot in RAW with a neutral picture style. Stay on paths, respect the legal protection, never pick. And edit honestly — soft purple-blue, not electric blue.
If you want to experience guided access to a private Warwickshire bluebell woodland with exclusive arrangements and no walkers, my bluebell photography workshops run for about two weeks in late April and early May each year. Places are limited to six per session and book up months in advance because the woodland is kept clear of the public. For everything else, your local ancient woodland, a first-light alarm, and the four-shot framework above is more than enough to come home with a handful of photographs that stand up to a year of looking at them.