
UK Architectural Exterior Photography - Intermediate Guide
UK Architectural Exterior Photography: An Intermediate Guide
Table of Contents Show
The gap between a competent photograph of a building and a printable architectural exterior is rarely about gear. Most photographers who reach the intermediate stage already own a wide-angle lens, a tripod, a polariser, and a camera capable of producing technically clean files. What separates the snapshot of a building from a frame worth printing is the layer of decisions on top of that technical floor — when to be there, what kind of building works in what kind of light, when to fix perspective in post versus when to use a tilt-shift, and which of the four exterior shot types you're actually pursuing.
This guide is the intermediate decision-layer companion to my master architecture photography guide (which covers gear, fundamentals, and beginner technique) and my architecture photography checklist. Both are useful foundations. This article sits above them: how to choose between the four UK exterior shot types, the two golden moments specifically for buildings, the three options for perspective control, and a working location framework across UK cities. Less "what gear do I need" and more "I have the basics — now what makes the difference between a record shot and a print?"
Why architecture is harder than it looks
Architecture is one of the most accessible genres on paper — the subject doesn't move, you can return whenever you want, lighting is reasonably predictable from one day to the next. That apparent ease is also why most amateur architectural exteriors fail. The forgiving nature of the subject masks the precision the genre actually demands. Three things make architectural exteriors harder than the casual viewer assumes:
Geometry is unforgiving. Buildings have hard straight lines and right angles built into them. A two-degree tilt that wouldn't be noticed in a landscape becomes obvious in a building façade. Perspective convergence that's natural in casual photography reads as careless in architecture.
Light direction is everything. A landscape can work in flat overcast; an architectural exterior usually can't. Buildings need directional light to reveal three-dimensional form, texture, and shadow. The difference between a building photographed at the right hour and the same building photographed at noon is greater than almost any other genre.
Context is part of the subject. A landscape is its setting. A building is itself plus its setting — the surrounding street, the sky behind it, the time-of-day human activity. Excluding context flattens the photograph to documentation; including the wrong context produces visual clutter. The decision of how much surrounding to keep is one of the genre's defining editorial choices.
The intermediate photographer's task is to internalise these three constraints and turn them into deliberate decisions rather than accidents. The four-shot-type framework below is the first lever; the two golden moments and the perspective-control framework are the second and third.
The four UK architectural exterior shot types
Every productive UK architectural exterior photograph fits one of four shot types. Same Applied Learning shot-type framework I use elsewhere — pick one per session, set up for it, save the others for next time.
The four UK architectural exterior shot types — pick one per session, set up for it, save the others for next time. Different shot types reward different lenses, different times of day, and different weather.
Different shot types reward different gear, different times of day, and different weather. The single biggest mistake intermediate architectural photographers make is treating buildings as a generic subject — turning up at the same time of day with the same focal length regardless of whether they're photographing Bath Abbey (heritage stone) or the Shard (modern glass). The shot-type framework forces a decision before you arrive: which of the four am I pursuing today, and what does that decision require?
The two golden moments for buildings
Light direction and quality matters more for architectural exteriors than for any other genre I teach. There are two specific time windows that consistently produce strong building photographs across most UK locations and most building types — and they're not the generic "golden hour" advice that dominates beginner guides.
The first golden moment — pre-sunrise blue hour for modern glass. Modern glass buildings (the Shard, Manchester's Beetham Tower, Coventry city centre's modern wings) come alive when interior lights are still on and the sky is deep blue but not yet black. This window opens roughly 30 minutes before sunrise (when interior lights are typically still on for cleaners and early workers) and closes roughly 15 minutes before sunrise as ambient light overpowers interior light. The combination of warm interior glow and cool blue sky produces a tonal contrast that midday flat sky never delivers. Tripod essential. Long exposures (5-15 seconds) at base ISO. Worth being there 45 minutes before sunrise to set up.
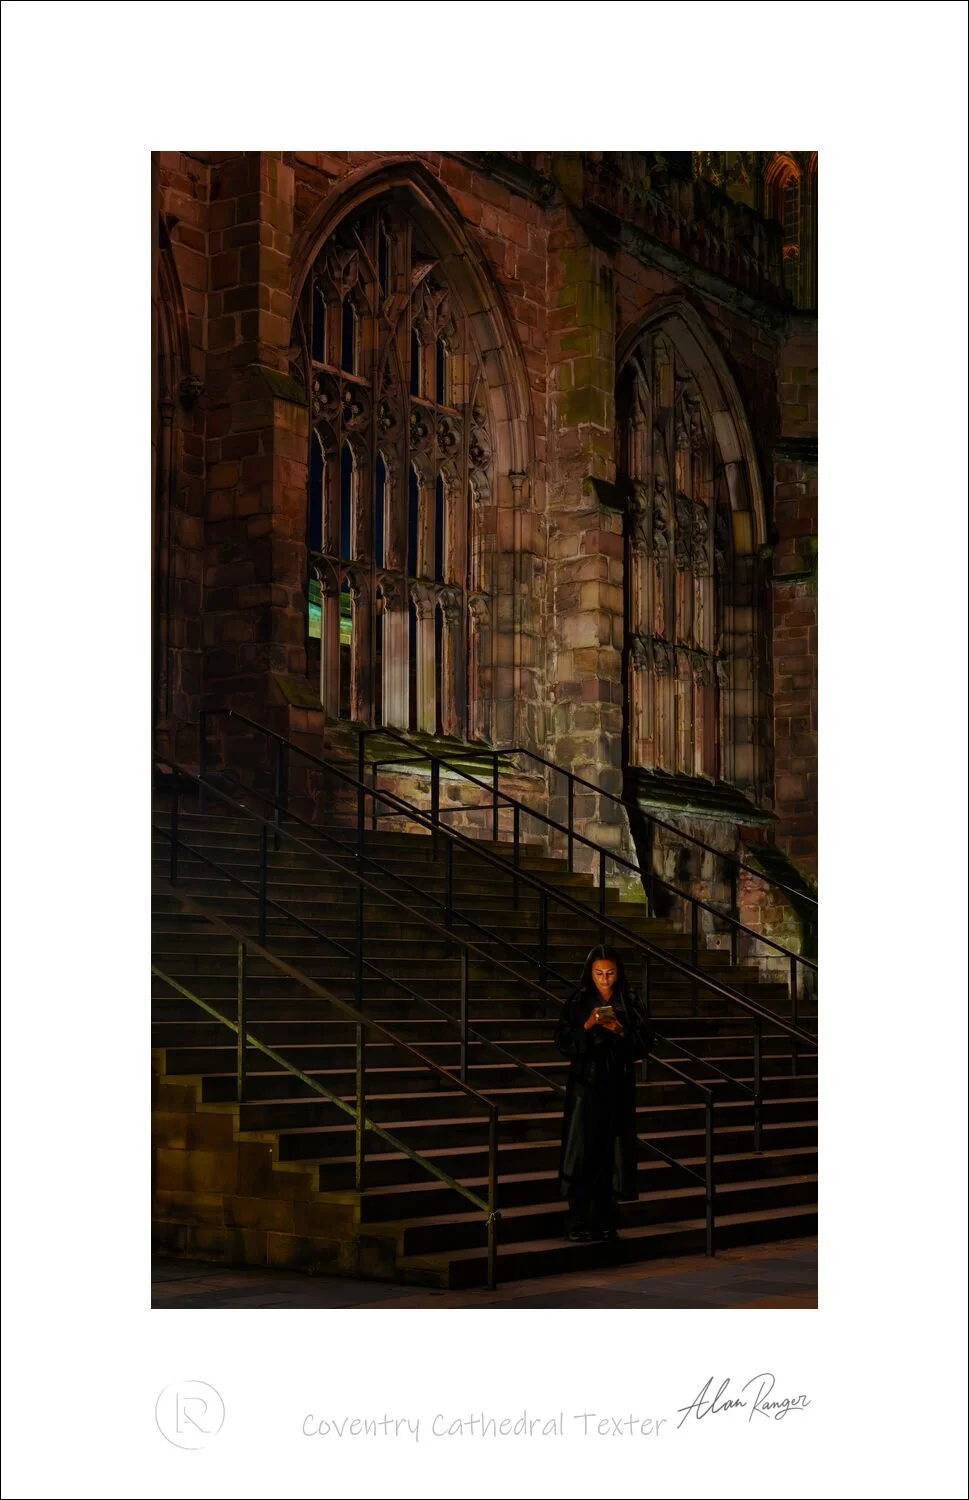
The second golden moment — post-sunset golden-into-blue for warm-stone heritage. Heritage stone buildings (Bath, Edinburgh, the Cotswolds, Cathedral cities, Cambridge colleges) photograph best in the post-sunset window when the façade catches the last warm light and the sky deepens behind it. This window opens roughly at sunset and closes roughly 45 minutes after sunset, with the strongest 15-20 minute window starting about 10 minutes after the sun drops below the horizon. The warm stone amplifies the warm sunset light while the deepening blue sky creates the contrast that flat-lit midday photographs can never achieve. Same tripod and base ISO discipline as blue hour. Watch for the moment when the building's exterior lights come on — that's the strongest single window of the entire session.
The intermediate decision is matching the building to the moment. A modern glass tower at sunset golden hour reads as flat compared to the same tower at blue hour 12 hours later. A heritage stone building at pre-dawn blue hour reads as cold and lifeless compared to the same building 30 minutes after sunset. Same building, different moment, completely different photograph. For the broader composition framework that supports both moments see my 15 principles to improve composition.
The two golden moments matched to building type — same building, different moment, completely different photograph. Match the building to the moment, not the moment to the building.
Perspective control — the three-option framework
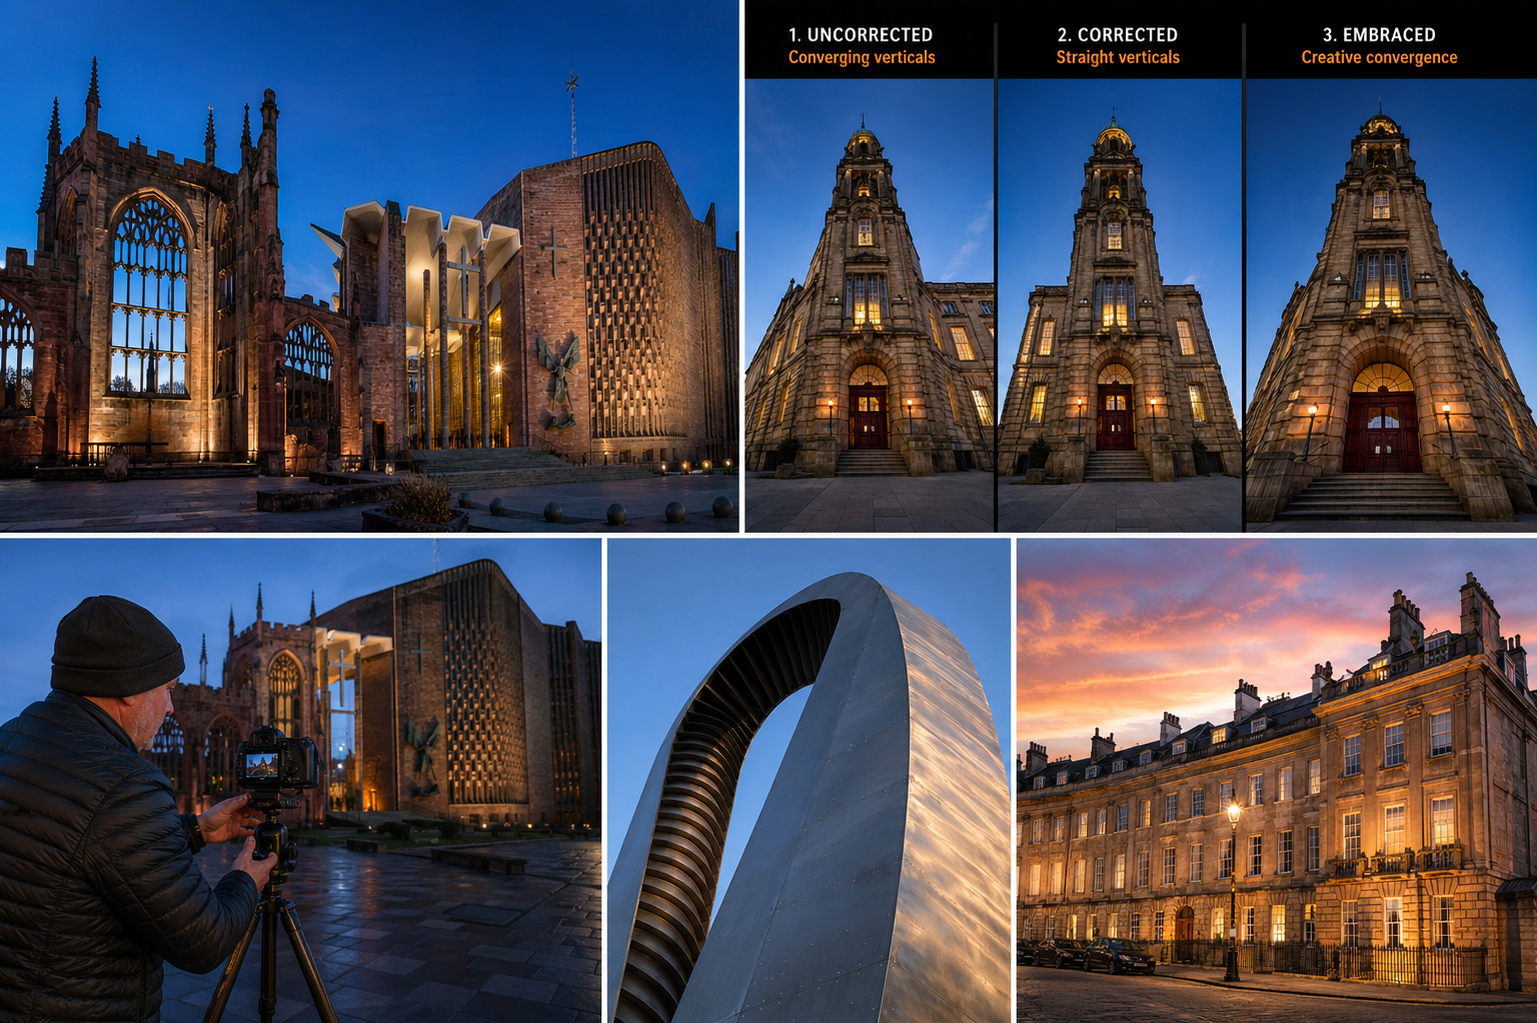
Wide-angle lenses pointed at tall buildings produce converging vertical lines — buildings appear to lean back as if falling away from the camera. This is the single most distinctive architectural-photography problem and the one that separates intermediate work from competent-amateur work. There are three legitimate ways to handle it. Picking the right one for the situation is part of the craft.
Option 1 — Use a tilt-shift lens. The traditional architecture-photography solution. A tilt-shift lens (typically 17mm, 24mm, or 45mm in full-frame terms) lets you keep the camera back parallel to the building while shifting the lens upward, capturing the full height of the building without converging verticals. The optical correction is the cleanest possible result — no resolution loss, no perspective distortion, straight lines remain straight. The downsides are real: tilt-shift lenses are expensive (£1,500-£2,500 for a quality one), manual focus only, and require practice to use effectively. Worth the investment if architecture is a genuine focus; overkill if it's an occasional interest.
Option 2 — Fix perspective in Lightroom. Modern Lightroom and Photoshop perspective-correction tools (Auto, Guided, Vertical, Level) handle moderate perspective convergence well, particularly when the original frame was shot from a position not too far below the building's top. The technique: shoot wider than you need, leave generous margins on all sides, then use Lightroom's Transform panel to straighten verticals. The resolution loss is usually 10-15% of the original frame after the correction crop — acceptable on modern 24-45 megapixel sensors. Best for occasional architectural work where a tilt-shift isn't justified.
Option 3 — Embrace the lean. Sometimes the converging verticals are the photograph. Looking straight up at a tall building from the base produces dramatic foreshortening that's genuinely a creative effect rather than a technical failure. The decision is to commit fully — extreme angle, deliberate composition built around the convergence — rather than half-commit and produce a frame that looks like an accident. Modern glass towers, brutalist architecture, and abstract detail shots often work better with embraced convergence than corrected verticals. Leading lines become an active compositional tool in this approach.
The intermediate decision: which of the three options matches the building, the shot type, and the final use? A heritage façade for fine-art print? Tilt-shift if you have one, careful Lightroom correction if not. A modern tower for editorial use? Embrace the lean and commit. A four-storey townhouse exterior for property documentation? Fix in Lightroom with a wide-margin original capture. For deeper composition discipline see my lines, shapes and geometry assignment.

Weather and conditions framework
Different building types reward different sky and weather conditions. The intermediate photographer plans the shoot day around the weather forecast as much as around the time-of-day light direction. Three working principles:
Modern glass loves dramatic cloud. Glass towers and contemporary buildings reflect the sky directly into the photograph. A clean blue sky produces a clean blue tower; a sky full of dramatic cloud produces a tower full of dramatic cloud. The Shard, Beetham Tower, Tate Modern's chimney, City of London skyscrapers all read more dramatically against broken cloud than against featureless blue.
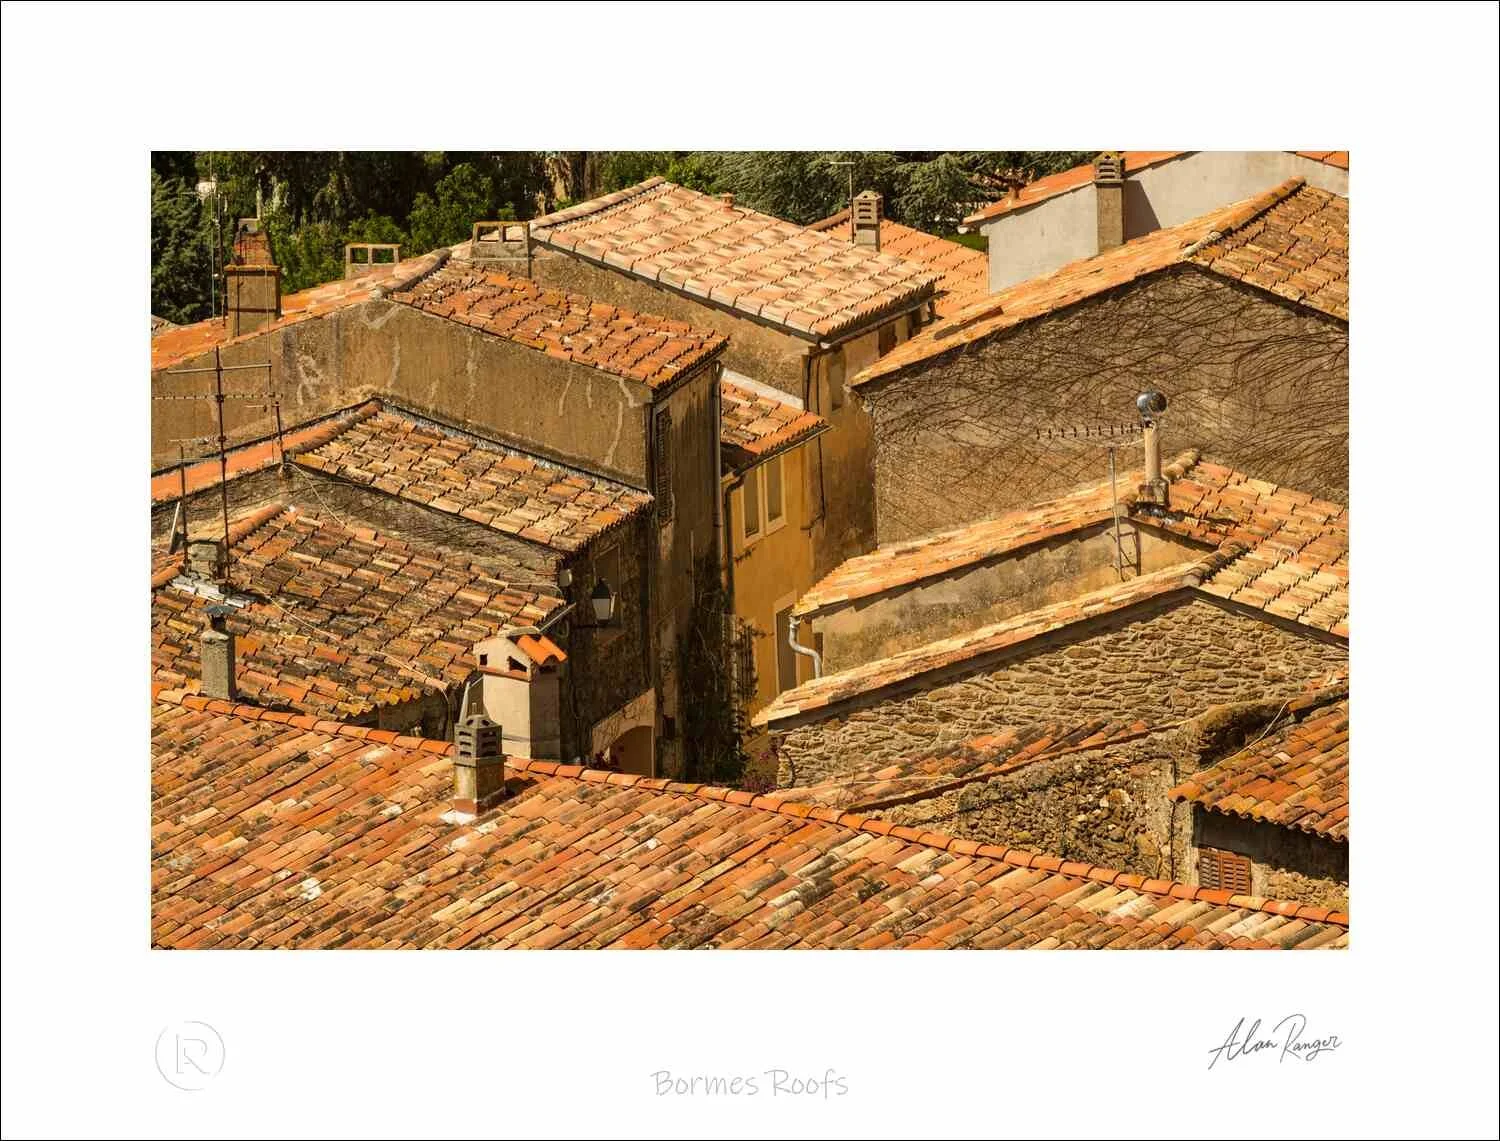
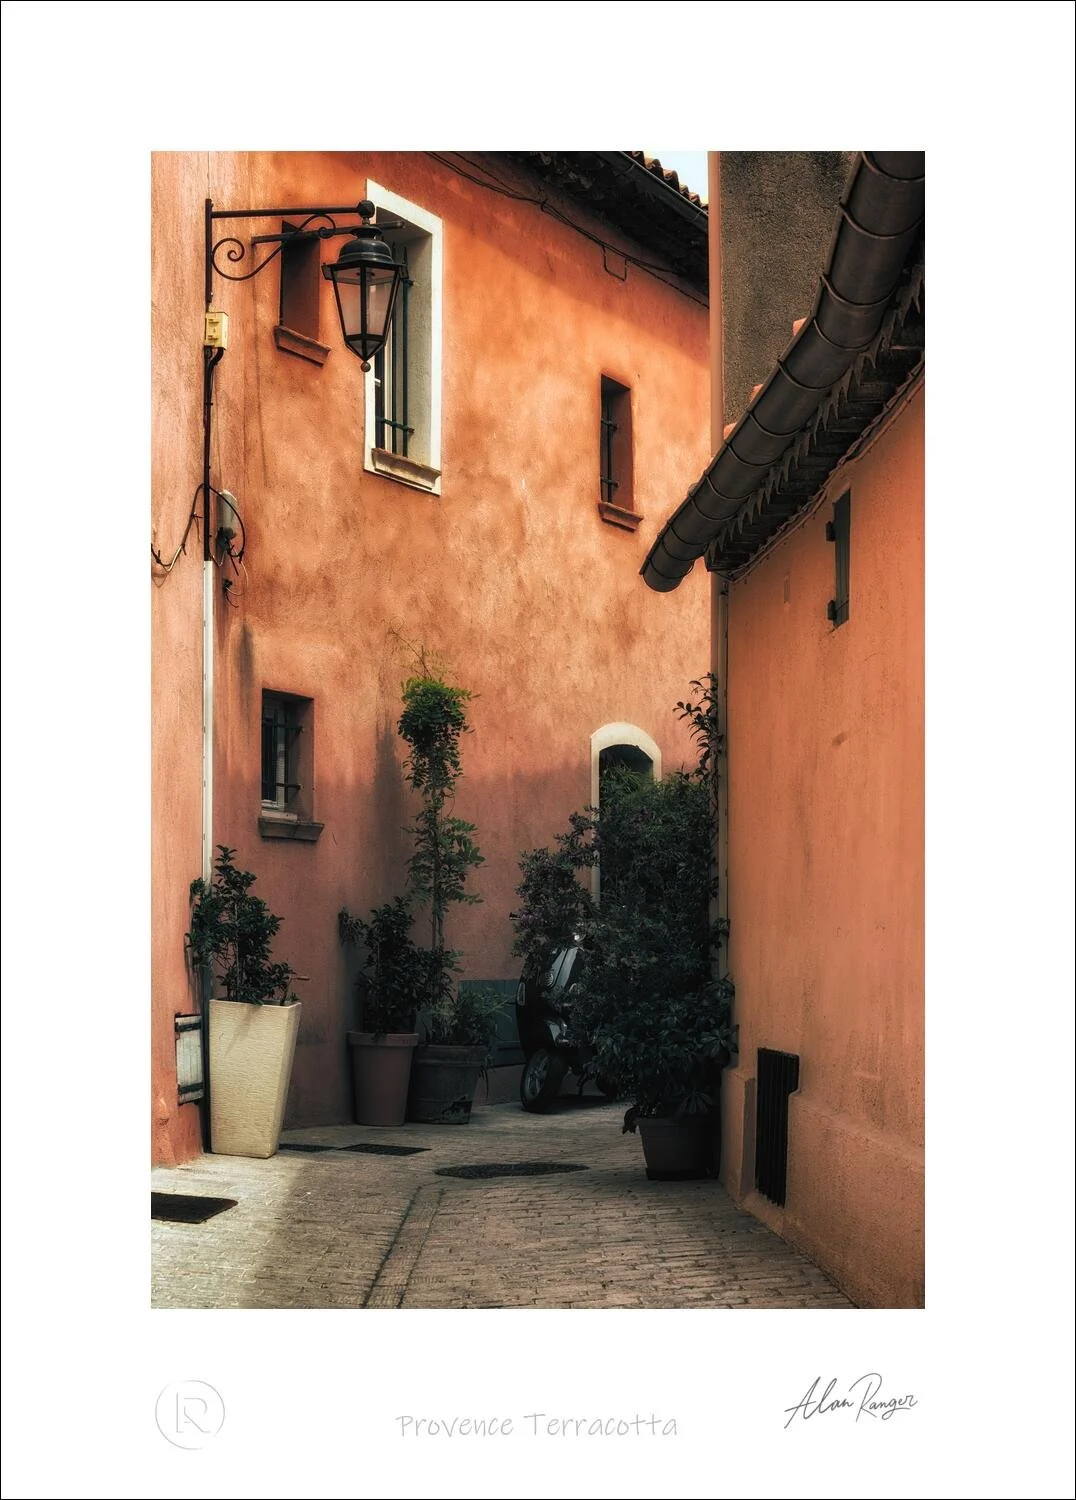
Heritage stone reads better in clean blue. Bath, Edinburgh's New Town, Oxford colleges, Cambridge colleges, Cotswold market towns. The warm-stone façade and the stable architecture benefit from a featureless blue sky that doesn't compete for attention. Dramatic cloud over heritage stone often reads as overcomplicated rather than dramatic.
Brutalism and modernism work at noon. The Barbican (London), Park Hill (Sheffield), the Hayward Gallery, Coventry's Whittle Arch and modern city centre wings, Manchester's CIS Tower. Concrete-led brutalist architecture relies on hard shadow contrast as part of its visual identity. The midday sun that flattens heritage stone produces the geometric shadow patterns that brutalism was designed around. Counter-intuitive but consistent across practical experience.
Read the forecast 24-48 hours before the shoot. Decide which shot type you're pursuing based on the conditions, not the other way round. Showing up at heritage stone during dramatic cloud and trying to make it work usually produces a compromised frame; switching plans to a modern glass subject takes advantage of the conditions instead of fighting them.
The architectural exterior shoot workflow
The practical rhythm that turns conditions, location, and shot-type decision into consistent keepers. Six steps from prep to editing.
UK location framework
The UK offers an unusually dense architectural photography landscape across a small geographic area. A working framework of locations across the four shot types:
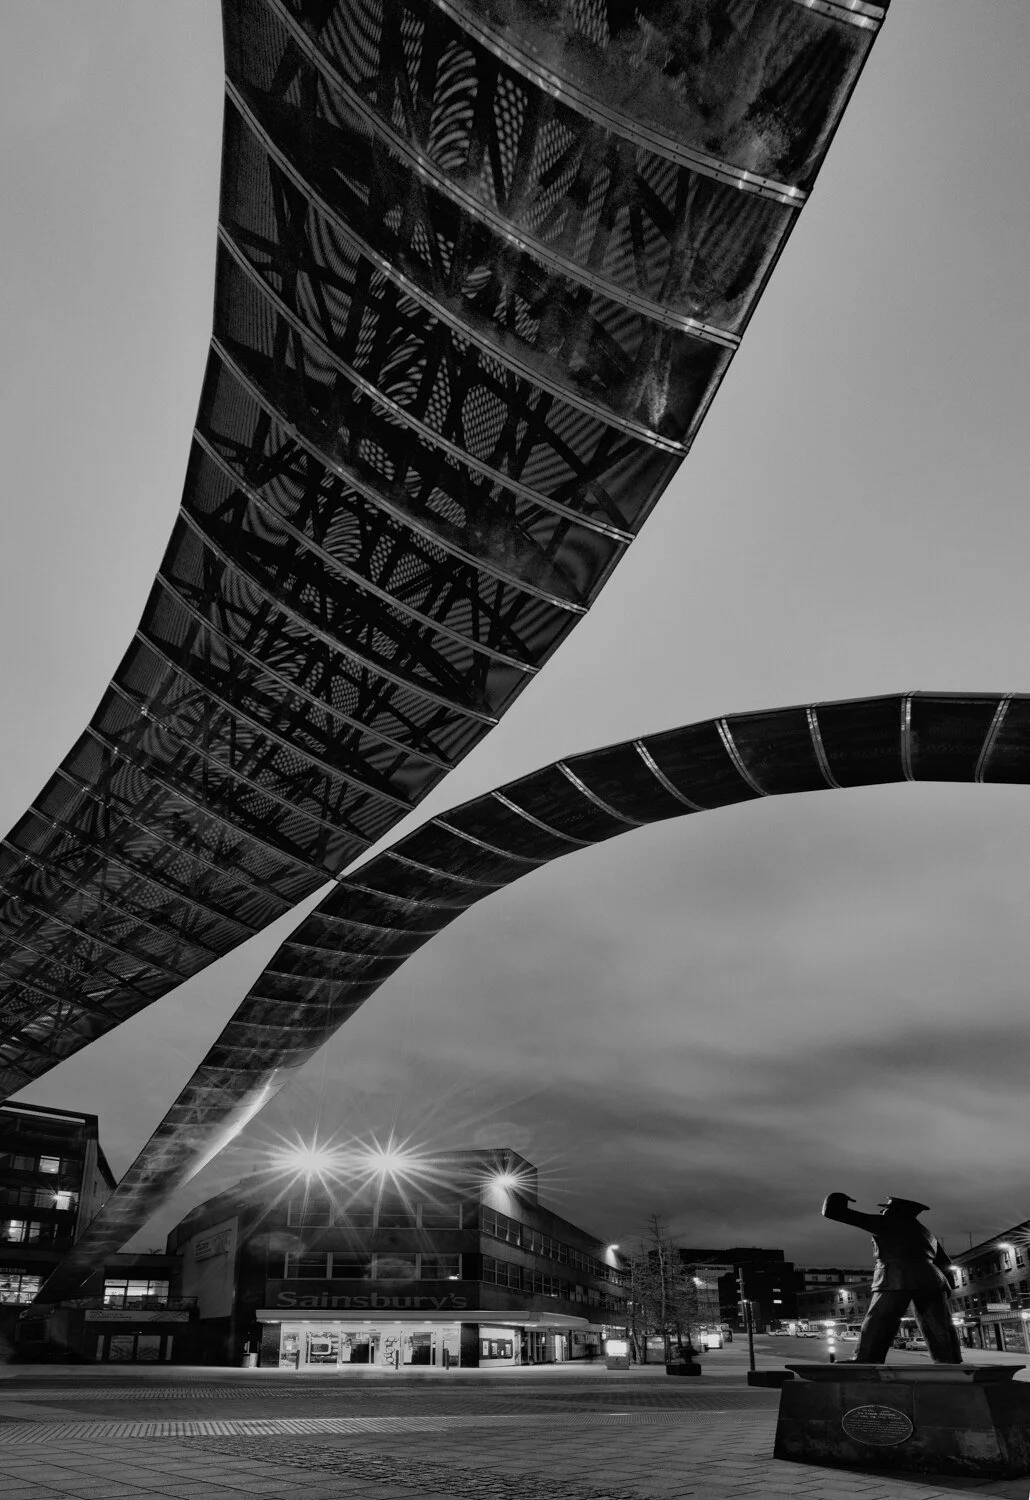
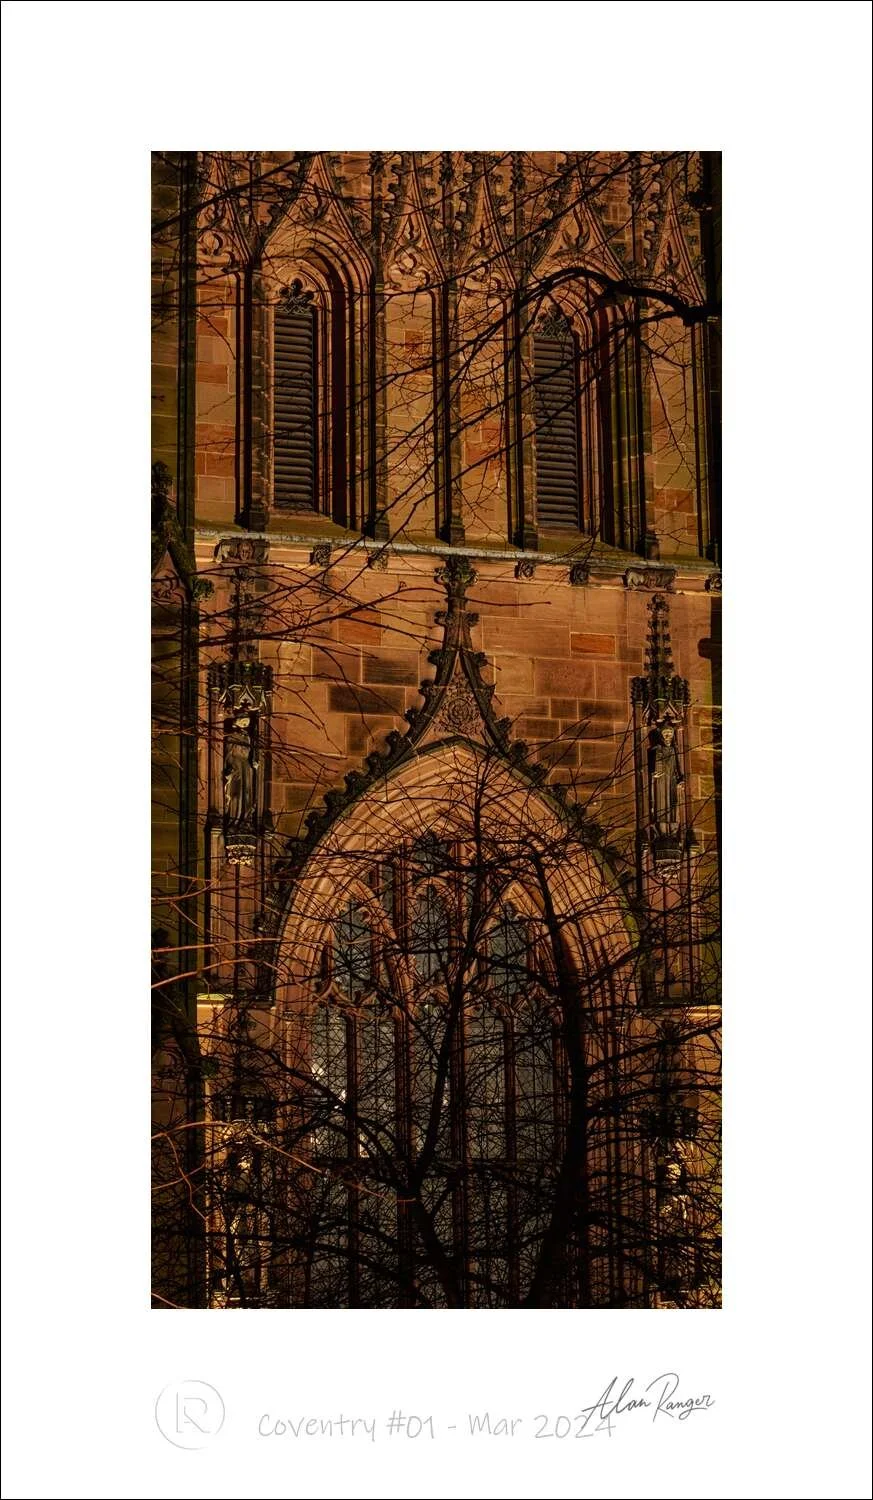
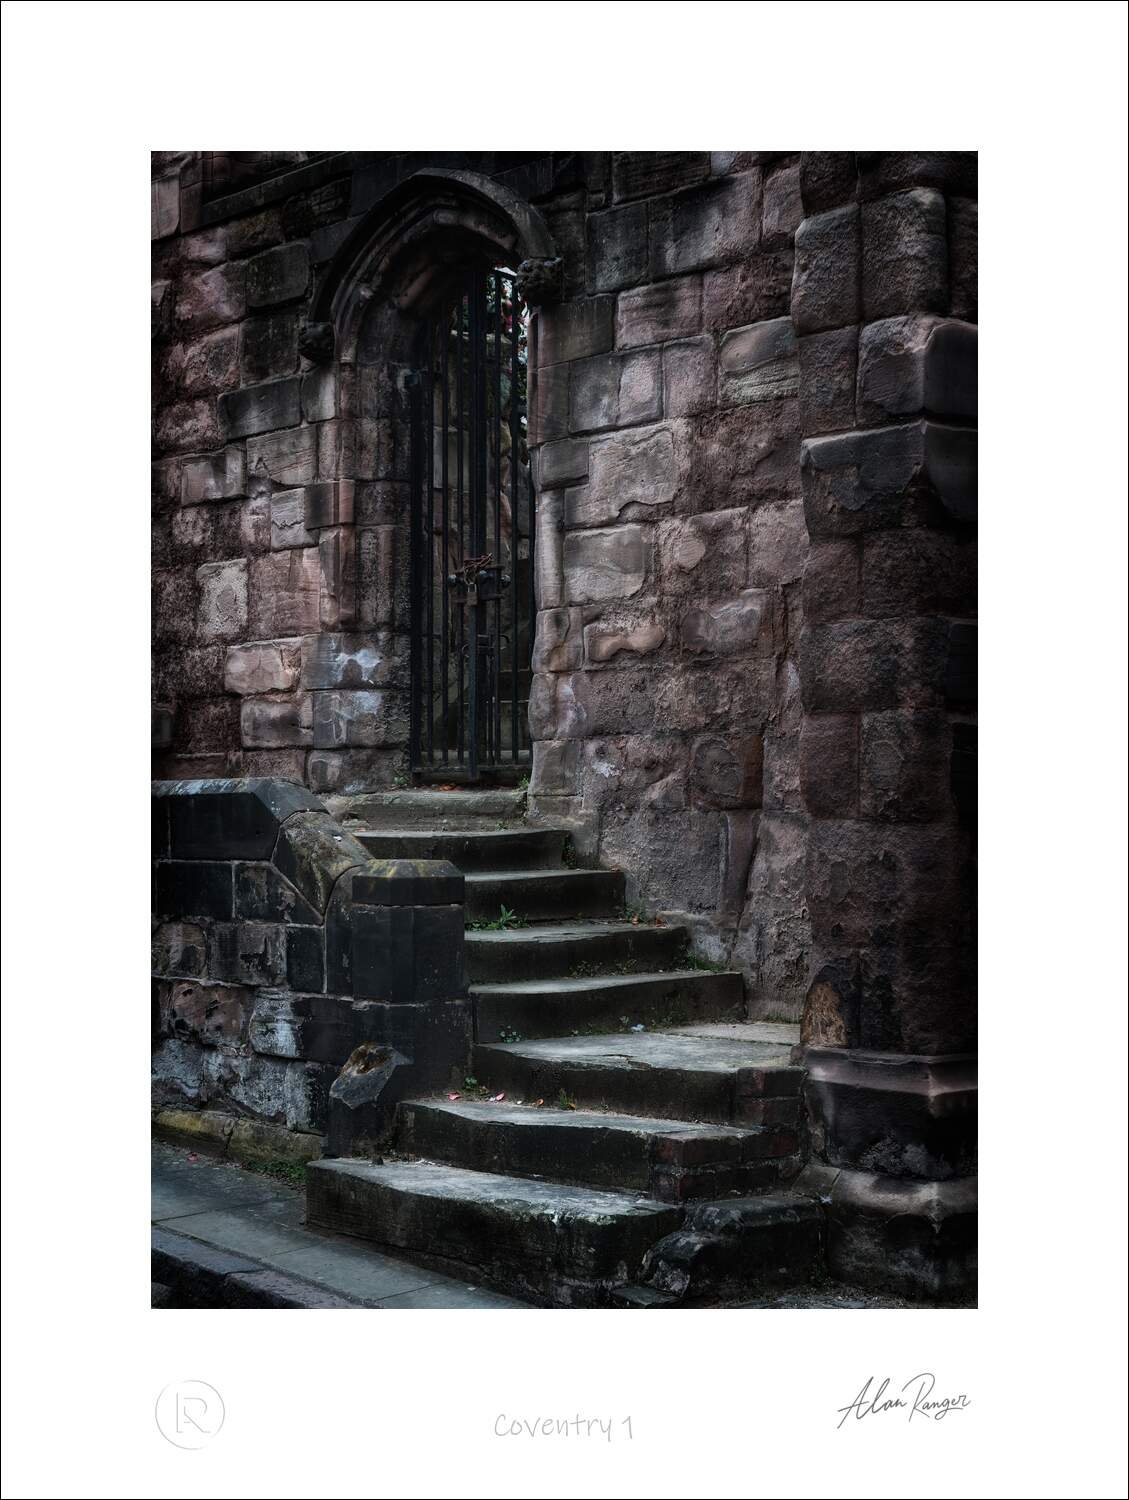
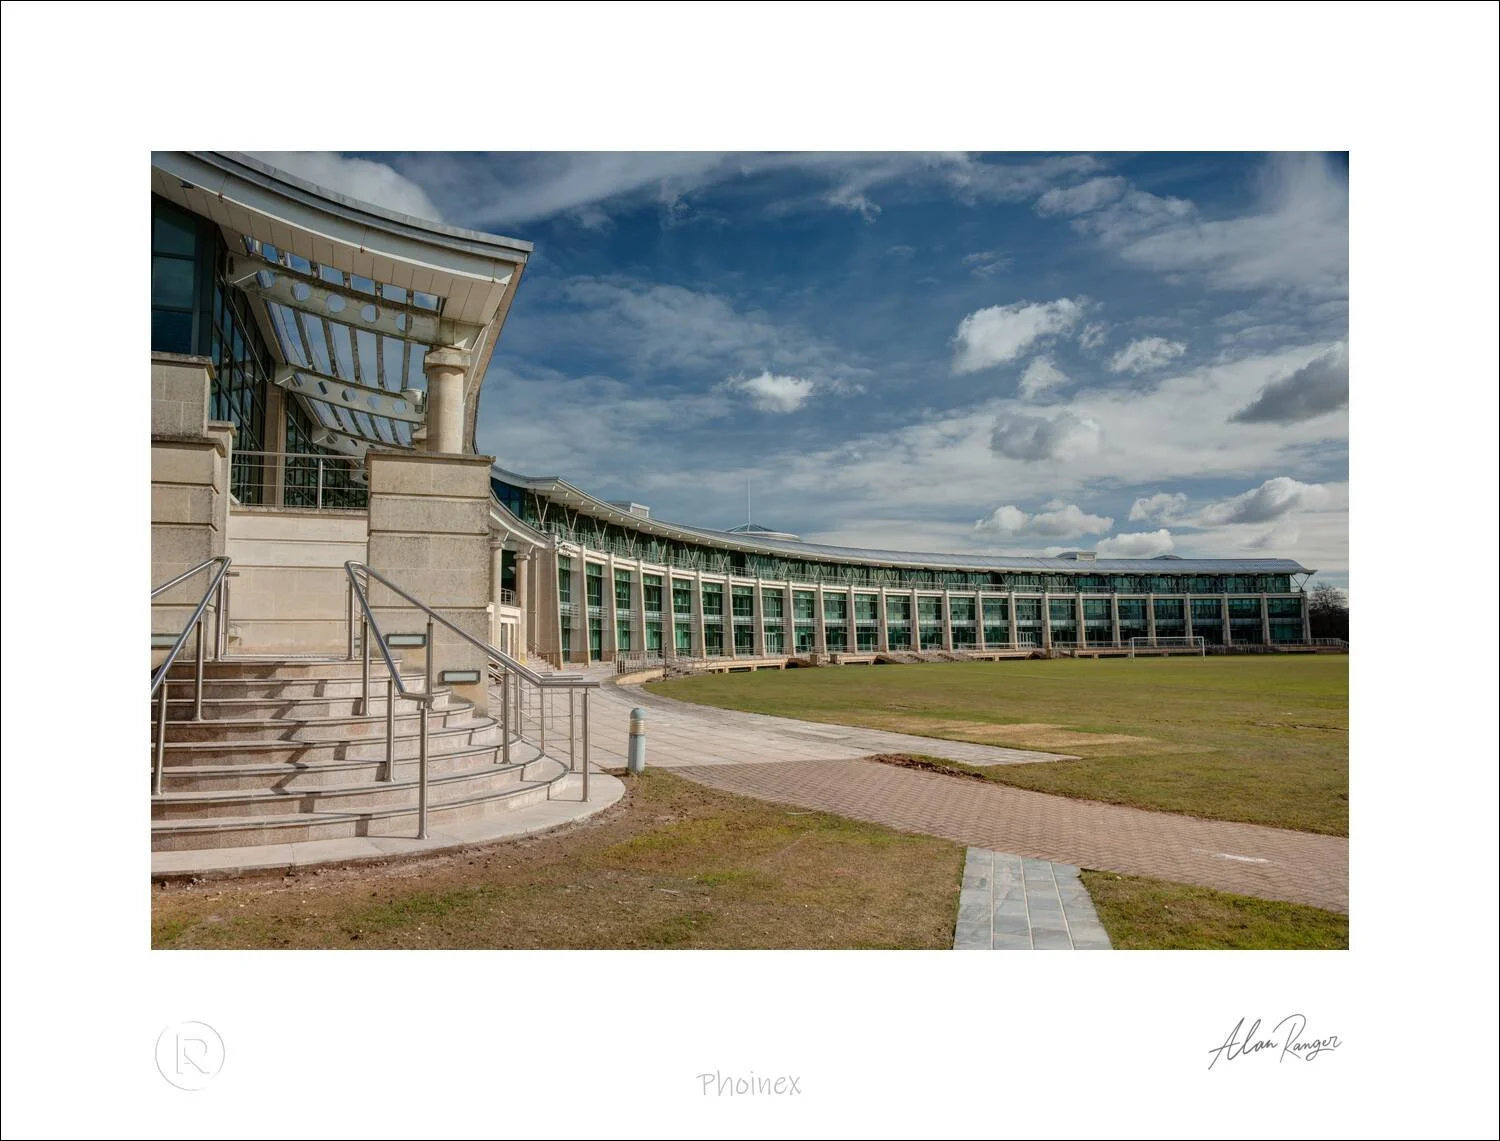
Coventry (Midlands). Coventry Cathedral juxtaposes the ruins of the medieval cathedral (bombed in 1940) with Sir Basil Spence's 1962 modernist replacement standing alongside — heritage and modern in a single composition. Whittle Arch (commemorating Sir Frank Whittle, jet engine inventor) is a striking contemporary landmark in the city centre. The wider Coventry city centre offers post-war modernism and 21st-century redevelopment within walking distance — one of the densest architectural variety stops in the UK for a city of its size. My Coventry urban architecture workshops work this specific landscape across half-day or one-day sessions.
London. Heritage (St Paul's, Westminster, Tower Bridge) plus modern (Shard, Walkie-Talkie, Cheesegrater, Gherkin in the City) plus brutalism (Barbican, Hayward) plus historic-modernism juxtaposition (Tate Modern, Battersea Power Station) — every shot type in a single weekend if you plan it right.
Bath (Somerset). The headline UK heritage-stone destination. Royal Crescent, the Circus, Pulteney Bridge, the Roman Baths context. Best in post-sunset golden-into-blue. Walkable, photographable on a single visit.
Edinburgh. Old Town heritage stone (Royal Mile, Princes Street Gardens panoramas of the castle) plus New Town Georgian (heritage at scale) plus contemporary (Scottish Parliament — divisive but photographically interesting). Strong year-round but exceptional in winter blue hour.
Liverpool. Albert Dock (heritage warehouse architecture), the Three Graces (Royal Liver Building, Cunard Building, Port of Liverpool Building), Anglican Cathedral, contemporary waterfront. Blue hour over the Mersey is one of the UK's underrated architectural photography opportunities.
Manchester. Beetham Tower (modern glass), Hilton/Beetham group, MediaCityUK contemporary, Town Hall and library heritage juxtaposition, Northern Quarter brick warehouse conversions. Strong contemporary character with heritage backbone.
Cambridge and Oxford. College courtyards, chapel exteriors, traditional academic architecture. Permission requirements vary college-by-college — check before tripod-based shoots.
For a Practice Pack hands-on assignment that applies this framework see my architecture photography practice assignment.
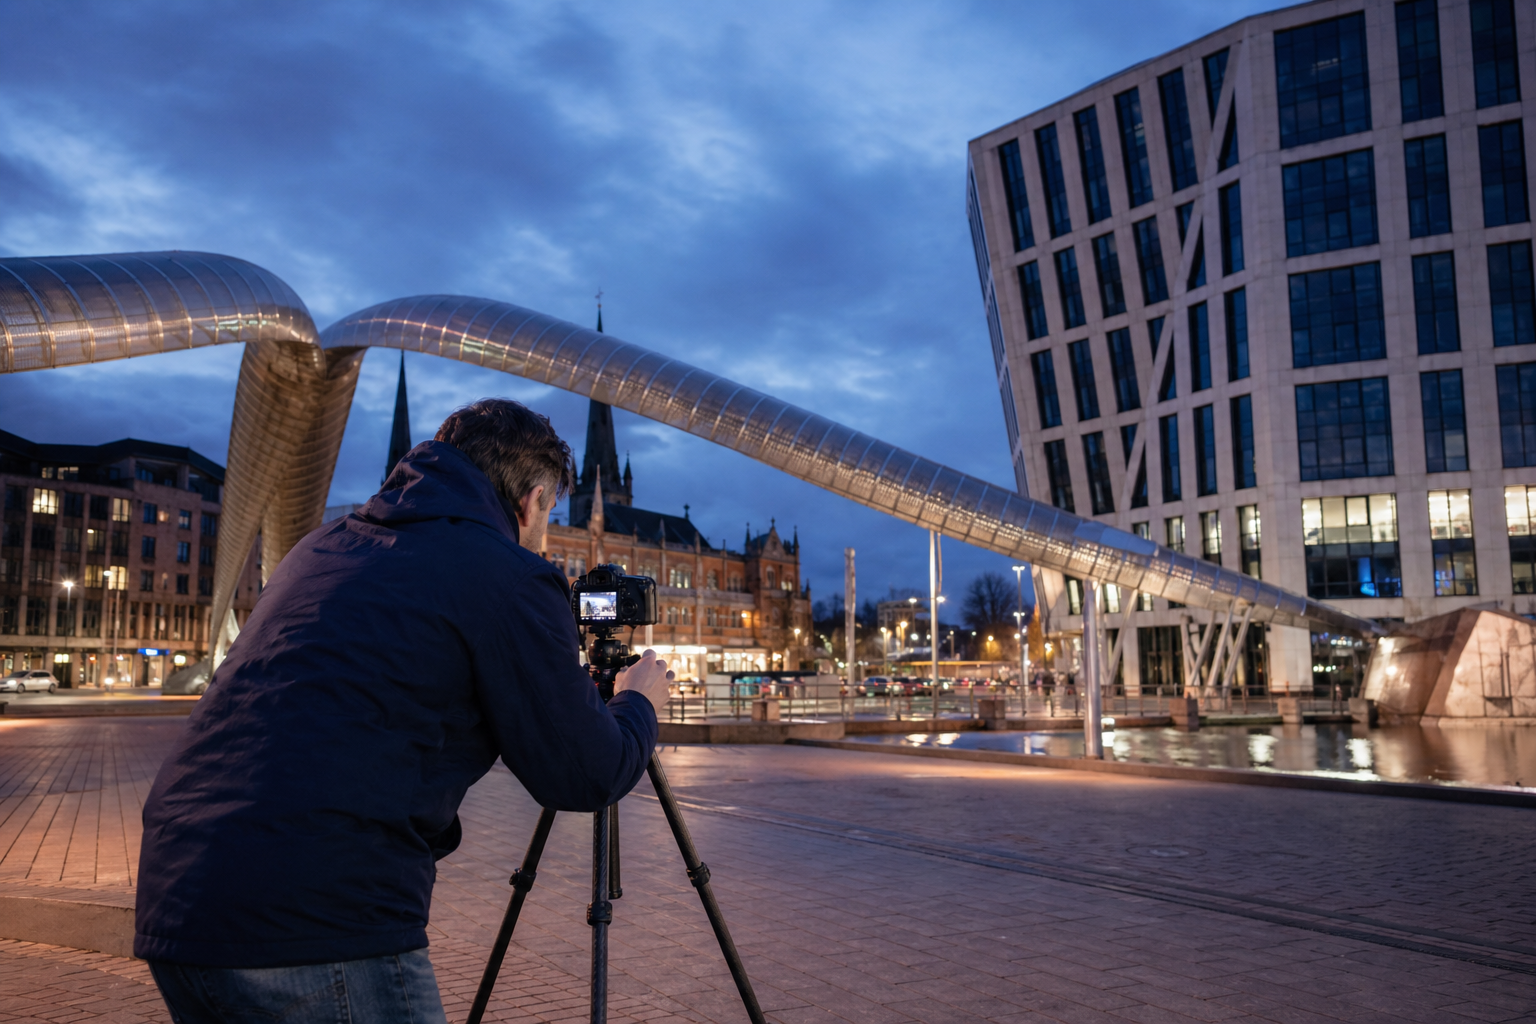
A UK architectural photographer at work
The video below — "The definitive Architectural Photography TUTORIAL" by Ben Harvey on the Ben Harvey Photography channel — is a comprehensive 21-minute walk-through of commercial architecture photography filmed on location in the South Downs National Park. Ben is a qualified architect with 15 years of building photography experience and the tutorial covers gear, white balance, focal length, perspective control, and the working process for handling exteriors and interiors — a strong foundational reference before your first serious architectural shoot.
Common architectural exterior photography mistakes
Photographing buildings at noon. Flat overhead light kills three-dimensional form. Wait for directional light at the appropriate golden moment for your building type, or plan around the noon-loving brutalist architecture instead.
Ignoring the sky. The sky behind the building is part of the photograph. A featureless white sky behind a strong building reads as flat; a dramatic sky behind a weak building still reads as flat. Match the sky condition to the building type — don't show up regardless.
Tripod always at full extension. Eye-level capture is the default but rarely the best. Lower viewpoints reveal context and foreground; higher viewpoints reduce convergence. Walk around the building before raising the tripod.
Including too much surrounding clutter. Cars, signs, bins, scaffolding, randomly-positioned people, parked vehicles — all need to be deliberately included or deliberately excluded. Half-cropped interruptions are the most common amateur tell.
Pushing perspective correction too far. Lightroom's perspective-correction tools work well within reason. Pushed too aggressively the building looks unnaturally rigid — a "too perfect" feel that's worse than a moderate convergence would have been. Leave 1-2 degrees of natural lean if Lightroom is producing artificial-looking results.
One focal length only. Wide-angle for context shots, standard zoom for façade compositions, telephoto for architectural detail. Most strong architectural portfolios cover all three; most weak amateur sets stay locked at 16-35mm regardless of subject.
Forgetting public access constraints. Tripods are restricted or banned at many UK heritage sites without a photography permit. Some London locations (Trafalgar Square, parts of South Bank) require commercial permits for tripod use. Check before traveling — a wasted trip teaches the lesson once.
Architectural exterior photography FAQ
Key takeaways
The gap between snapshot and print is decisions, not gear. Most intermediate photographers already have what they need; the leverage is in the decisions on top.
Pick one of the four shot types per session — heritage façade, modern glass, urban context, or abstract detail. The decision drives lens, time-of-day, and conditions choice.
Match the building to the moment. Modern glass at pre-sunrise blue hour; heritage stone at post-sunset golden-into-blue; brutalism at noon. Same building, different moment, completely different photograph.
Three options for perspective control — tilt-shift lens, Lightroom correction, or embrace the lean as a creative choice. Pick deliberately rather than half-committing.
Match the sky to the building type — modern glass loves dramatic cloud, heritage stone reads better in clean blue, brutalism works at noon hard shadow.
Walk before you set up — ground-level, mid-level, and elevated viewpoints all change the photograph. Eye-level default is rarely the best.
Compose man-made clutter deliberately — cars, bins, scaffolding, people either fully in or fully out. Half-cropped interruption is the most common amateur tell.
Continue learning


Conclusion and summary
UK architectural exterior photography rewards intermediate decision-making far more than equipment. The technical floor — wide-angle lens, tripod, polariser, base-ISO RAW capture — is genuinely the floor; modern cameras have made it close to free. The leverage is upstream of the technical layer: matching the building type to the right golden moment, picking the right shot type for the conditions you're going to face, choosing deliberately between the three perspective-control options, and reading the sky as part of the subject rather than as background. The photographers who consistently come home with prints they're proud of are the ones who decided before they arrived which of the four shot types they were pursuing, watched the forecast, and arrived at the right hour for the building rather than at a generic "golden hour" appropriate for landscapes but not for the specific building in front of them.
The framework to internalise: shot-type first, moment second, perspective-control decision third, conditions read fourth. Four shot types cover the genre — heritage façade, modern glass, urban context, abstract detail. Two golden moments deliver the bulk of strong frames — pre-sunrise blue hour for modern glass, post-sunset golden-into-blue for heritage stone, plus midday for brutalism specifically. Three perspective-control options — tilt-shift lens, Lightroom correction, embraced lean — and the discipline to pick one fully rather than half-committing. UK locations are unusually concentrated within a small area: Coventry, London, Bath, Edinburgh, Liverpool, Manchester, Cambridge, Oxford all deliver world-class architectural variety within a long weekend's reach.
If you'd like to develop architectural exterior photography under structured guidance with someone who runs dedicated UK urban architecture workshops, my Coventry urban architecture photography workshops work the specific Coventry landscape — Cathedral, Whittle Arch, modern city centre — across half-day or one-day sessions, suitable for any level of experience. The workshops apply the framework above to specific Coventry locations at the right hours for the buildings, with hands-on perspective-control practice and one-on-one guidance throughout. For architecture photography in a city of your own choice rather than Coventry, my private photography lessons are the natural fit — architectural exteriors are genuinely teachable in your home city with your own equipment, and a 1-on-1 session can transform your specific local landscape into a productive photography territory in a way generic advice can't. Across more than twenty years of professional photography teaching, the photographers I've watched improve fastest with architecture are the ones who stopped showing up randomly and started planning sessions around the framework above. The framework is the starting point. The buildings are the practice. The conditions are the variable. The decisions are what produce the print.