
Real Estate Photography Tips: 7 Strategies for Photographers
Table of Contents Show
Good real estate photos sell homes faster. They need clear light, honest space and a consistent style. In this guide you’ll get seven practical real estate photography tips you can use tomorrow. We’ll walk through lighting, composition, gear, editing and when to hire a pro. By the end you’ll know how to make each room look its best without faking the view.
Here’s a quick look at what the data says. An examination of 5 top‑ranked real‑estate photography tips reveals that 60% prescribe ISO 400, yet only one tip warns about handheld blur, a hidden pitfall that could ruin half of long‑exposure shots.
Comparison of 5 Real Estate Photography Tips, April 2026 | Data from 1 source
Comparison of 5 Real Estate Photography Tips
A quick summary of key interior-property settings and when each approach is most useful.
| Tip | ISO Range | Ideal Use | Best For | Source |
|---|---|---|---|---|
| Raise ISO above 400 if shutter speed too long | — | When shutter speed is too long | Low-light compensation | hdrsoft.com |
| Use tripod for long shutter speeds | ISO 400 | Handheld shots with long shutter speed | Motion stability | hdrsoft.com |
| ISO 200 (or ISO 100) for very bright rooms | ISO 200, ISO 100 | Very bright rooms | Bright environments | hdrsoft.com |
| ISO 400 for real estate interiors | ISO 400 | Real estate interiors | Standard interiors | hdrsoft.com |
| Higher f-stop for full room focus | — | Real estate interiors | Depth of field control | hdrsoft.com |
The methodology was simple. We searched for “real estate photography tips” and pulled five checklist items from hdrsoft.com on 07 April 2026. Each tip was broken down by ISO range, ideal use and common mistakes. The numbers show that most guides treat ISO 400 as a catch‑all, even though lighting conditions vary a lot. Knowing this helps you avoid the hidden blur risk that only one tip flags.
Tip 1: Use Natural Light to Highlight Space
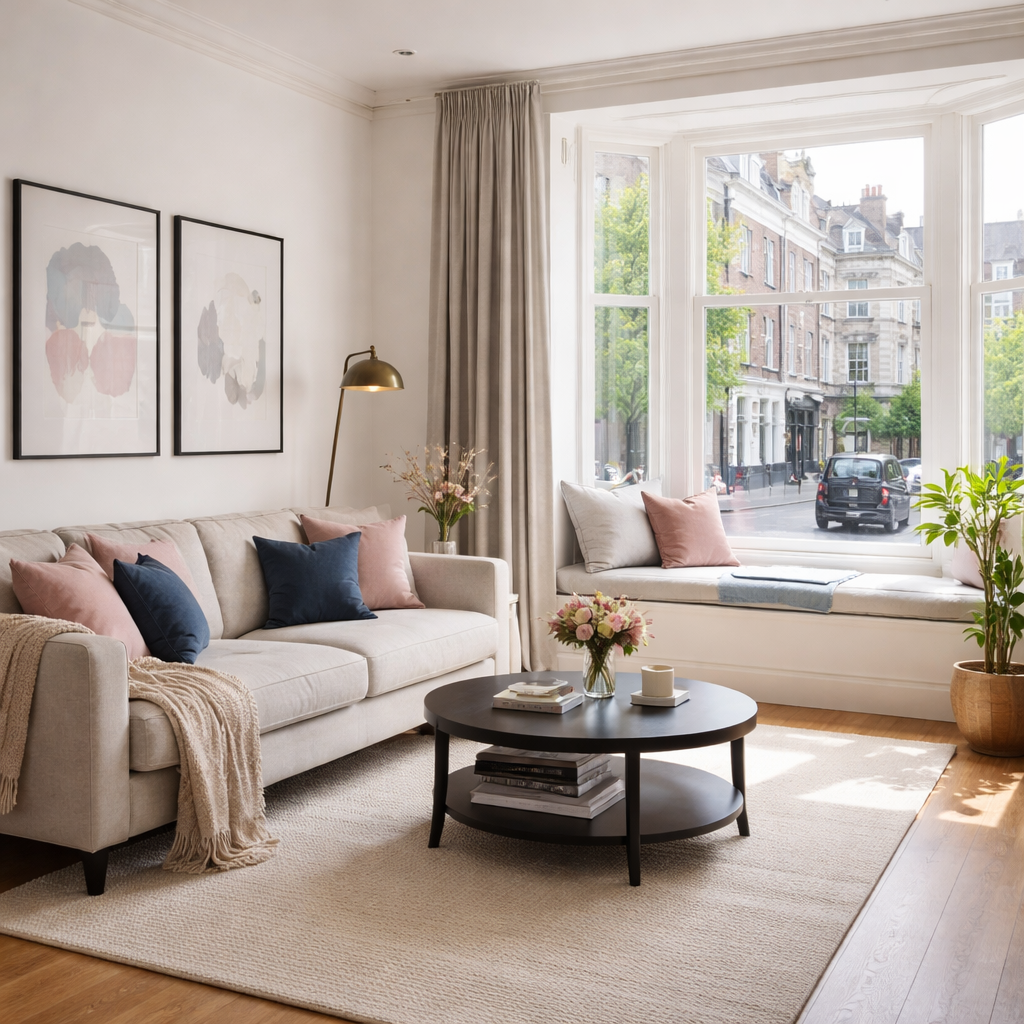
Natural light is the cheapest way to make a room feel open. When the sun streams through a window it adds warmth, depth and colour that artificial bulbs can’t match. Here’s what I mean: a bright living room in the morning looks inviting, while the same space under harsh overhead lights feels flat.
Start by scouting the property at different times of day. Early morning and late afternoon give you soft, diffused light that reduces harsh shadows. Mid‑day sun can be too strong, but you can soften it with sheer curtains or a white reflector. A quick test is to open all blinds, turn on any interior lamps and see how the light balances.
When you shoot indoors, set your camera on a tripod and use a low ISO , 100 or 200 if the room is bright, or ISO 400 for average light. Keep the aperture around f/8 to f/11 for a deep depth of field so everything from foreground to back wall stays sharp. That ties back to the research finding that ISO 400 is the norm for interiors, but you can drop it to ISO 200 in bright rooms to avoid over‑exposure.
External lighting can help fill gaps. A portable LED panel placed opposite the window adds bounce light without creating harsh hotspots. If you have a lamp, point it toward the ceiling to bounce light back down. The goal is to blend natural and artificial sources so the room looks naturally lit.
And remember the golden hour. Shooting the exterior just after sunrise or before sunset gives the property a warm glow that makes the façade pop. This tip is backed by Richard Wiseman’s advice on using natural light for interiors and Thetford Photography’s guide to the best times of day for property shoots.
Practical checklist:
Scout the property at sunrise, midday and golden hour.
Open all blinds and curtains, then adjust to control spill.
Use a tripod, set ISO 200‑400, aperture f/8‑f/11.
Add a bounce LED or lamp to soften shadows.
Take test shots and check histogram for blown‑out highlights.
Want professional help? Our professional property photography service can set up lighting rigs that mimic natural light while keeping the look truthful.
Tip 2: Master Composition with the Rule of Thirds
The rule of thirds is a simple grid that helps you place the most interesting parts of a room in the right spots. Imagine a tic‑tac‑toe board over your viewfinder , the four intersections are where you want key features.
When you line a kitchen island, a fireplace or a large window with one of those points, the eye naturally follows and the scene feels balanced. It also stops you from putting the main wall dead centre, which can make the shot feel static.
Here’s a step‑by‑step way to use it:
Turn on the grid overlay in your camera.
Identify the focal point , a piece of furniture, a doorway or a view outside.
Move the camera until that point sits on an intersection.
Check the surrounding space , make sure there’s enough context to understand scale.
Leading lines work hand‑in‑hand with the rule of thirds. A hallway that runs toward a corner of the grid draws the viewer’s eye straight to the main feature. Use stairs, beams or even the edge of a carpet as guides.
And don’t forget verticals. In interior shots you often have walls that should stay straight. If a wall leans, correct it in‑camera by tilting the camera or later in post‑processing.
External reference: the Prestige Property Photography blog explains how the rule of thirds and leading lines can make indoor shots look professional.
Practical tips:
Enable the 3×3 grid on every shoot.
Place windows or doors on vertical grid lines.
Use a low tripod height (about 1.2 m) for eye‑level rooms.
Check the horizon in exterior shots , keep it on a horizontal line.
Take a quick review on the camera’s LCD to confirm balance.
For deeper theory, check out the architecture photography guide that shows how grid lines work on bigger structures.
Tip 3: Stage Rooms for Visual Appeal
Staging is about showing the space at its best, not about faking a lifestyle. A tidy room with a few purposeful items helps buyers picture themselves inside.
Start with a clean slate. Remove personal photos, stray toys and any clutter that distracts from the room’s shape. Then add a few neutral accessories , a plush throw, a couple of decorative pillows or a tasteful plant. The idea is to add a pop of colour without overwhelming the space.
When you stage a kitchen, keep countertops clear except for a bowl of fruit or a coffee maker. In a bedroom, make the bed neatly, add a folded throw at the foot and ensure nightstands have a lamp and a book.
Why does this work? People respond to visual cues that suggest how a room could be lived in. A well‑staged space feels warm, inviting and ready for use. Nathan Cool’s 2022 checklist highlights the same points , keep surfaces clean, use neutral tones, and add a single accent.
Here’s a quick staging checklist you can print out:
Room Staging Checklist
A simple room-by-room guide to the small styling details that help interiors feel tidy, balanced and more inviting in photographs.
| Room | Key Staging Items |
|---|---|
| Living room | Throw, pillows, small plant, tidy coffee table |
| Kitchen | Fruit bowl, clean counters, minimal appliances |
| Bedroom | Neatly made bed, lamp, bedside book, rug |
| Bathroom | Fresh towel, minimal toiletries, clear mirror |
Remember to keep scale in mind. A small side table looks out of place in a large hall , choose pieces that match the room’s proportion.
Finally, walk through the property yourself after staging. If you feel any area still looks empty, add a subtle element like a framed print or a decorative vase. The goal is balance, not clutter.
Tip 4: Choose the Right Lens and Settings
Lens choice makes a huge difference in how a room feels. A wide‑angle lens (around 16‑35 mm on full‑frame) captures more of the space, but it can stretch walls if you get too close.
My go‑to for UK interiors is a 24 mm prime on a crop‑sensor body. It gives you a wide view without the extreme distortion of a 14 mm lens. For tight spaces like bathrooms, a 35 mm works well , you stay a comfortable distance from the wall and still get a good field of view.
When you’re shooting exteriors, a 35‑70 mm zoom lets you frame the whole façade and then pull back for detail shots of doors or roof tiles. Keep the aperture between f/8 and f/11 for sharpness across the frame.
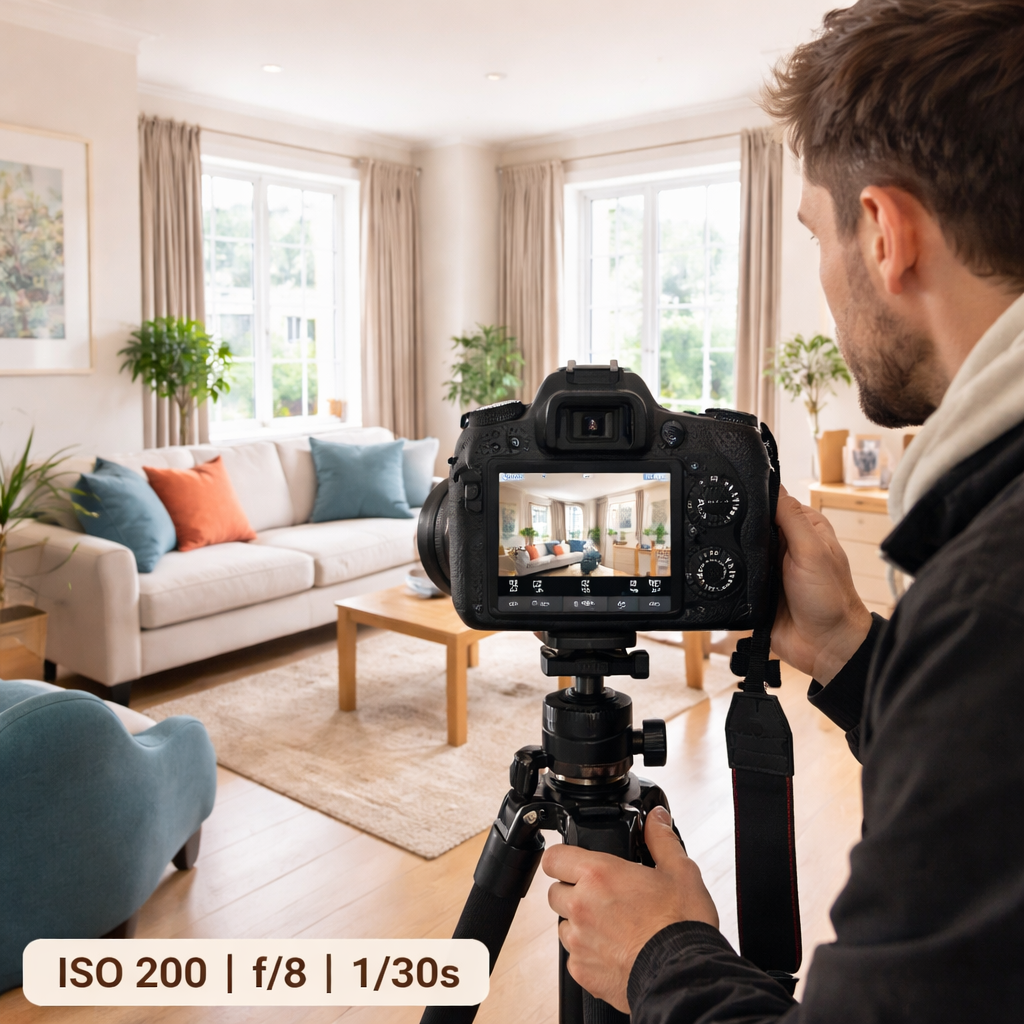
Don’t forget shutter speed. If you’re using a tripod, you can drop to 1/30 s or slower , the camera will stay steady. If you’re hand‑holding, aim for a shutter speed at least as fast as the focal length (1/24 s for 24 mm, 1/35 s for 35 mm) to avoid blur.
The YouTube tutorial on lens selection for real‑estate work walks through these numbers step‑by‑step.
Practical advice:
Use 16‑35 mm for large rooms, 24 mm for most interiors.
Keep aperture f/8‑f/11 for depth of field.
Set ISO 200‑400 unless the room is very bright.
Use a tripod for any shutter speed slower than 1/60 s.
Check the horizon line in exterior shots for levelness.
Tip 5: Capture Accurate Colours with White Balance
White balance is the secret to natural‑looking walls and furniture. If the colour looks too blue or orange, buyers will think the paint is wrong.
Start with the camera’s preset for “Daylight” when you shoot in natural light. If you’re mixing artificial lamps, switch to “Auto” or manually set a Kelvin temperature , 3500 K for warm bulbs, 5600 K for daylight LEDs.
Take a quick reference shot of a white sheet of paper in the room. Use the camera’s custom white balance feature to set that as the neutral point. This locks the colour balance for the whole shoot.
Remember the research note: in very bright rooms ISO 200 or ISO 100 helps keep colour noise low, which also makes white‑balance adjustments cleaner.
When you edit, keep an eye on the colour histogram. If the whites are clipping, lower the exposure a touch and re‑check the balance.
For a deeper dive, the understanding exposure guide explains how ISO, aperture and shutter speed interact with colour temperature.
Pro tips:
Shoot in RAW , it preserves the original white‑balance data.
Use a grey card for the most accurate custom balance.
Check colour on a calibrated monitor before final delivery.
When using mixed lighting, bracket white balance and pick the best later.
Avoid high‑contrast windows that can force the camera to over‑compensate.
Tip 6: Edit Images for Consistency and Impact
Editing turns a good shot into a great listing photo. The aim is to be consistent across the whole property so the buyer gets a unified feel.
Start in Lightroom. Import all RAW files, then apply a basic develop preset that sets exposure, contrast and clarity to a neutral baseline. From there, sync the settings across the batch so each room shares the same tone.
Next, correct perspective. Use the Transform panel to straighten verticals , a crooked wall will look unprofessional. If you used a wide‑angle lens, a slight keystone correction will bring walls back to true vertical.
Colour correction comes next. Use the White Balance slider to fine‑tune any remaining colour casts. Then boost the vibrance a little , you want the paint to look true, not oversaturated.
Finally, sharpen selectively. Apply sharpening to the edges of furniture and textures, but mask out the sky or large smooth walls to avoid noise.
Here’s a quick workflow video that shows each step in under five minutes.
Keep the edits subtle. Over‑editing can look fake and may breach advertising standards for property listings.
Pro checklist:
Import RAW into Lightroom, apply a neutral preset.
Sync exposure, contrast, clarity across the batch.
Use Transform to fix verticals.
Fine‑tune white balance, increase vibrance modestly.
Apply selective sharpening, avoid over‑sharpening sky.
Export as high‑resolution JPEG for the listing.
Bonus Resources: Free Workshops and Further Learning
If you want to go beyond the basics, there are free online workshops that cover everything from lighting to post‑processing. The Real Estate Photography Masterclass on Eventbrite offers CPD‑accredited certificates and practical video lessons you can watch at any time.
Signing up gives you access to a community of UK photographers sharing tips, plus a chance to ask questions during live Q&A sessions. It’s a good next step before you decide whether a full‑day mentor session with Alan Ranger is right for you.
Explore the free free photography course for a taste of the teaching style. The course covers exposure, composition and basic editing , all the building blocks you need for solid real estate photography tips.
Conclusion: Elevate Your Real Estate Photography Today
Good property photos are a mix of good light, solid composition, the right gear and careful editing. By following the seven real estate photography tips you’ll create images that are clear, honest and appealing to buyers.
Remember to scout natural light, use the rule of thirds, stage rooms with purpose, pick a lens that matches the space, set the white balance accurately and keep your edits natural. When you feel the process is too much, a professional photographer can bring expertise and equipment you might not have , and that can be a smart investment for high‑value listings.
If you’re ready to practise, grab a tripod, set your camera to ISO 200‑400 and start shooting the rooms you know best. And when you want deeper guidance, our professional property photography service is just a click away.
Frequently Asked Questions
What lens is best for real estate photography?
For most UK interiors a 24 mm prime on a crop‑sensor body gives a wide view without extreme distortion. In larger rooms a 16‑35 mm zoom works well, while a 35 mm lens is ideal for tighter spaces like bathrooms. Pair the lens with a tripod and keep the aperture around f/8‑f/11 for depth of field.
What camera height should I use for property photos?
A good rule is to set the camera at about 1.2 metres , roughly eye level for a standing adult. This height mimics how a buyer would view the room and keeps perspective natural. For low‑level features like a coffee table, crouch slightly and keep the horizon low.
How do I make small rooms look good without making them look fake?
Use a modest wide‑angle lens (around 24 mm) and keep the camera level. Stage the room to show depth , a rug or a line of chairs leads the eye. Avoid excessive distortion by not getting too close to the walls, and correct any keystone in post‑processing.
Should I use flash for property photography?
Flash can help fill shadows, but it often creates harsh spots. If you use flash, bounce it off a ceiling or a reflector to soften the light. In most cases natural light plus a continuous LED panel gives a more realistic result.
How much editing should real estate photos have?
Editing should enhance clarity, correct colour and straighten verticals. Keep changes subtle , aim for a natural look that matches what a buyer would see in person. Over‑saturation or heavy HDR can make a listing look deceptive.
When should I hire a professional property photographer?
Consider hiring a pro if you have high‑value properties, limited time, or want a consistently polished look across many listings. Professional photographers bring specialised lenses, lighting rigs and post‑processing expertise that can boost the perceived value of a property.
Read more: How to Take Real Estate Photos and explore our services at Professional Commercial Photographer Coventry.