
How to Take Real Estate Photos: The Complete UK Guide
Table of Contents Show
Good property photographs do more than fill a listing. They shape first impressions, help buyers or tenants understand the space properly, and can reduce wasted viewings from people who arrive expecting something different. The aim is not to make a property look unrealistically large or artificially glamorous. It is to show it at its best, clearly, honestly and professionally.
This guide explains how to take real estate photos in a practical UK context, whether you are photographing a home for sale, a rental property, a holiday let or a commercial space. It covers preparation, lens choice, camera settings, composition, lighting, staging and editing, while keeping realism at the centre of the process. For a deeper look at professional property photography, see our services.
We pulled together the most repeated and useful recommendations from the current draft’s research section, but the most important point is simple: good property photography relies more on preparation, level composition, clean light and sensible editing than on expensive gear or gimmicky processing.
Comparison of 15 Real Estate Photography Tips
A practical summary of useful property-photography advice, common mistakes, and where each tip is most helpful.
| Name | Recommended Setting / Equipment | Purpose / Benefit | Common Mistake | Best For | Source |
|---|---|---|---|---|---|
| Shoot with a wide-angle lens at waist height and use a tripod | Wide-angle lens (14–24mm or 16–35mm on a full-frame sensor), tripod | Keep images sharp and level | Shooting too wide: Ultra-wide angles distort rooms and misrepresent actual size. | Sharp, level shots | opendoor.com |
| Edit to brighten underexposed images, add contrast, correct colour temperature, and fix tilted horizons | Editing software | Enhance realism, correct perspective | Over-editing: Heavy filters, unrealistic sky replacements, or colour grading that misleads buyers. | Post-process realism | opendoor.com |
| Use a tripod | Tripod | Help you get much better results | Hand-holding it, going into the corner and shooting down on the room | Stability on a budget | youtube.com |
| Make sure that your verticals are straight | Tripod | You want your verticals to be straight | Shooting down on the room so the vertical lines form a V-shape | Precise alignment | youtube.com |
| Make sure you’re shooting with a wide enough lens | 16mm lens for full-frame cameras; 10–11mm lens for crop-sensor cameras | Your photos are not going to be wide enough and your clients are not going to like the results | Shooting with the kit lens that does not go wide enough | Adequate field of view | youtube.com |
| Do not overspend on gear | Any camera made in the last 10 years | Once your camera is good enough it’s not going to make any difference | Overspending on gear | Cost-effective setup | youtube.com |
| Get your drone licence as fast as possible | Drone licence | Having your drone licence can increase the value of a property shoot | Thinking this is a big, complex thing | Aerial marketing | youtube.com |
| Set tripod height and keep camera level | Tripod with ball head | Keep camera level to get good vertical lines | Adjusting framing by tilting the camera up or down | Level horizons | youtube.com |
| Show two walls per shot | Wide-angle lens | Makes composition easier for rectangular rooms | Showing more than two walls so wide-angle distortion becomes obvious | Balanced composition | youtube.com |
| Check and maintain straight vertical lines | Ball head, on-screen levelling gauge or bubble level | Avoid lens distortion and keep photos looking professional | Wide-angle lens distortion making photos look unprofessional | Distortion control | youtube.com |
| Open all blinds, curtains, and shutters | — | Adds warmth and authenticity | Poor lighting: dark corners, harsh window glare, mixed colour temperatures | Natural lighting warmth | opendoor.com |
| Shoot during the golden hour | — | Warm, inviting light | Midday light causing harsh shadows and blown-out highlights | Warm ambience | opendoor.com |
| Keep vertical lines straight | — | Prevents tilted lines that look amateur | Crooked walls and door frames looking unprofessional | Professional composition | opendoor.com |
| Do not waste your time with flash; it is not worth learning | — | You do not need to use flash to get strong results | Assuming flash is essential | Flash-free workflow | youtube.com |
| Avoid reflections in mirrors and shiny surfaces | — | Prevent the photographer appearing in the image | Mirrors or shiny surfaces showing reflections in shot | Clean interiors | youtube.com |
Step 1: Prepare the Property Before You Touch the Camera
One of the biggest differences between amateur and professional property photographs happens before the first frame is taken. If the room is cluttered, badly lit or visually confused, no amount of editing will fully rescue it.
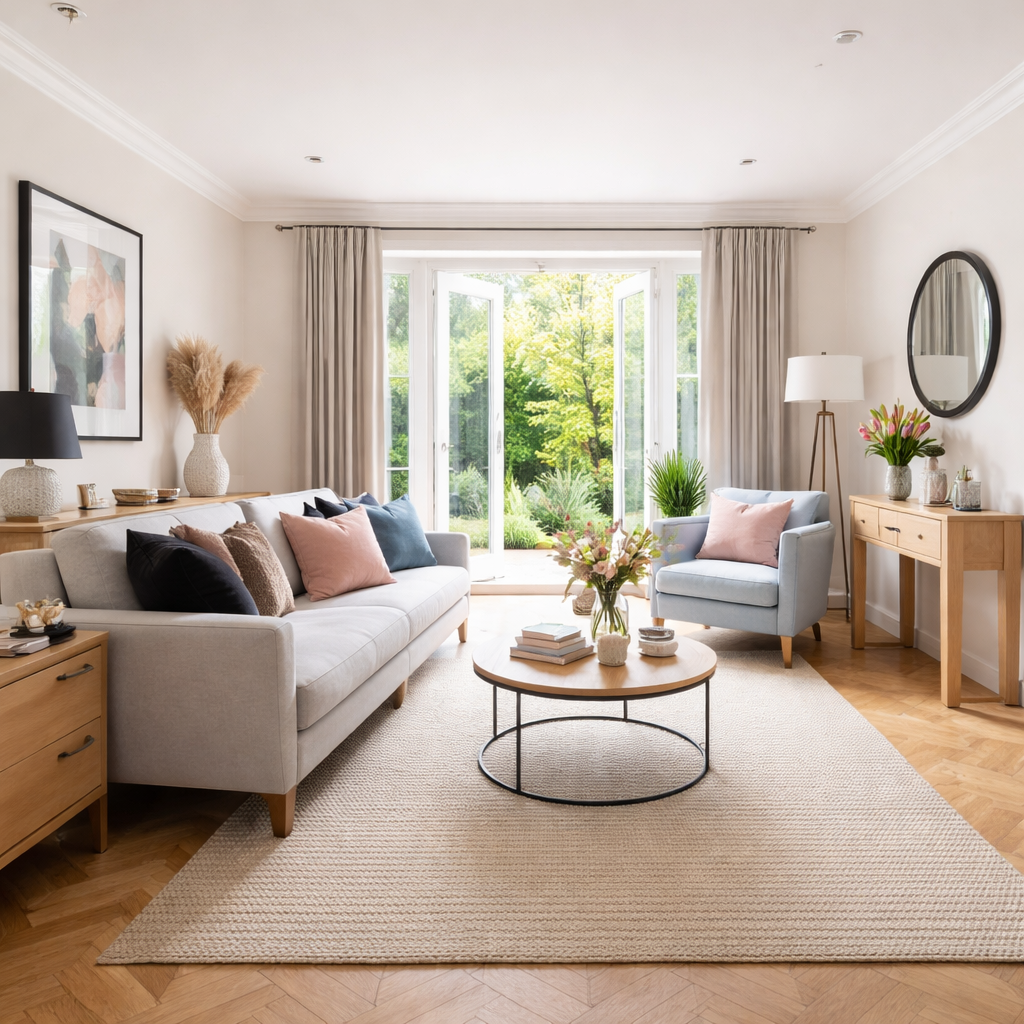
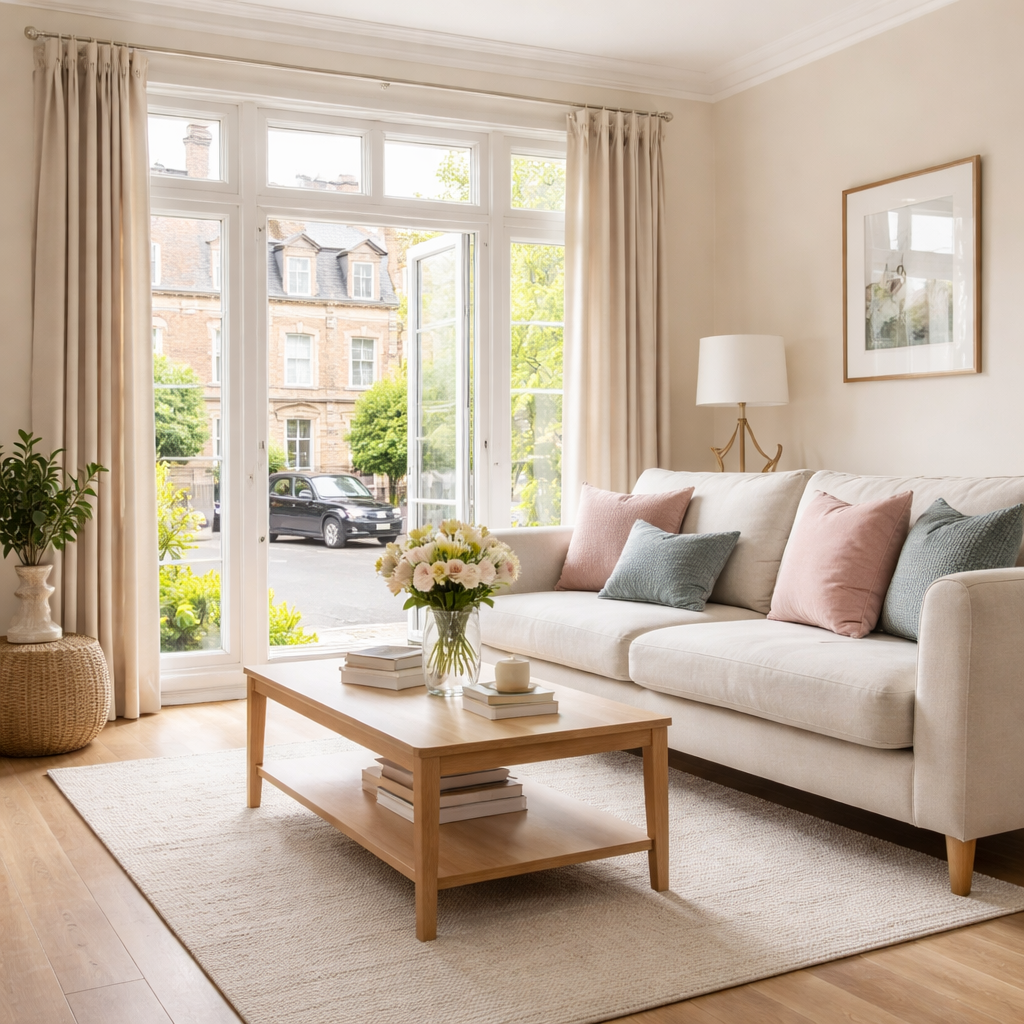
Walk through the property first and assess it room by room. Open curtains and blinds. Turn on lights only if they improve the room rather than creating mixed colour casts. Remove bins, cables, cleaning products, coats, pet bowls, bathroom bottles and anything else that distracts from the layout. Straighten chairs, cushions, lampshades and picture frames. Check mirrors and glossy surfaces for reflections.
For most residential shoots, a simple preparation checklist helps:
open blinds and curtains
tidy surfaces and remove clutter
clean windows, mirrors and shiny finishes
switch off lights with unpleasant colour casts
stage lightly rather than over-decorating
check the garden, driveway and front entrance
For estate agents, landlords and holiday-let owners, this stage matters because viewers are responding to clarity and trust as much as style. Rooms should look appealing, but still believable.
Step 2: Choose the Right Lens and Basic Kit
You do not need the most expensive camera on the market to photograph property well, but you do need the right focal length and a stable support.
A wide-angle lens is usually the starting point. On a full-frame camera, something around 14-24mm or 16-35mm is typically useful. On an APS-C body, roughly 10-20mm gives a similar field of view. The point is to show enough of the room without creating the exaggerated stretch that makes walls bow and spaces look misleadingly large.
A tripod is equally important. It helps with stability, consistency, slower shutter speeds and, crucially, keeping verticals straight. That matters more than many people realise. If walls and door frames lean, the image immediately feels careless.
A sensible property kit usually includes:
camera with RAW capture
moderate wide-angle lens
sturdy tripod
remote release or self-timer
spare batteries and memory cards
optional LED panels or bounced flash if needed
Expensive gear alone will not improve the work. Correct lens choice, a level camera and careful room preparation make far more difference.
Step 3: Set the Camera Up for Clean, Honest Results
Property photography is usually about clarity, consistency and control, not speed. Manual exposure is often the best starting point because it keeps results consistent from frame to frame.
A practical baseline is:
ISO 100-200 where possible
aperture around f/8 to f/11
shutter speed adjusted to suit the available light
tripod used for stability
RAW capture for editing flexibility
Real Estate Camera Settings Checklist
A quick-reference settings table for cleaner, sharper and more consistent interior property photographs.
| Setting | Recommended Value | Why It Matters |
|---|---|---|
| ISO | 100–200 | Keeps the image clean with low noise. |
| Aperture | f/8–f/11 | Helps keep the whole room sharp from foreground to background. |
| Shutter Speed | 1/60s–1/30s (tripod) | Allows enough light while avoiding blur when the camera is supported. |
| White Balance | Auto or Daylight | Helps maintain natural-looking indoor colour and can be refined later in post-processing. |
| Focus Mode | Single-point AF on centre | Locks focus on a clear detail such as a door frame or wall edge for more reliable sharpness. |
That aperture range usually gives enough depth of field to keep the room looking sharp from front to back. With the camera on a tripod, shutter speed can be slower without introducing blur from camera shake.
White balance matters too. If the room contains mixed lighting, colours can become messy very quickly. Either work mainly with natural light, or control the room lighting so it stays consistent. If a mixture of daylight, warm bulbs and cool LEDs is fighting for attention, the result often looks unpleasant and amateur.
The histogram is more useful than relying only on the rear screen. Check for clipped highlights around windows and overly dense shadows in corners. The goal is a balanced file that still looks believable.
Step 4: Get the Camera Height and Composition Right
A lot of poor property photography comes from camera position rather than camera settings. One of the simplest improvements is to work at a sensible height and keep the camera level.
A good starting point is roughly waist height, often around 1.1m to 1.3m depending on the room. This usually gives a natural-looking perspective and prevents the ceiling from dominating the frame. If the camera is too high, furniture can feel flattened. If it is too low, the room can feel awkward and distorted.
Try to show two walls in most interior compositions rather than pushing too hard to show everything at once. This often creates a more balanced, believable sense of space. If you try to show too much of a room with an overly wide lens from an awkward corner, distortion becomes obvious very quickly.
Always check the vertical lines before pressing the shutter. Door frames, cupboards and wall edges should look upright. If they lean in or out, correct that in-camera first rather than assuming editing will fix everything.
A good framing routine is:
place the tripod at a natural room height
level the camera properly
frame two walls where possible
leave enough breathing room around edges
remove distractions before shooting
review the corners of the frame before moving on
Step 5: Control Light and Windows Properly
Lighting is often where property photography becomes difficult. Bright windows and darker interiors can easily exceed what a single exposure can handle cleanly.
Start with natural light when it works. Open curtains and blinds to bring in light and make the room feel more welcoming. But do not assume more light always means better results. Harsh sunlight through one side of a room can create ugly contrast and blown highlights. Soft light, overcast conditions or a more balanced time of day can often be easier to work with.
If a room is too dark, add light carefully. LED panels or bounced flash can help lift corners and reduce muddy shadows, but the result should still look natural. Avoid obvious hotspots or a heavily flashed look that makes the room feel artificial.
Windows need special attention. If you expose only for the room, the view may burn out completely. If you expose only for the window, the room may collapse into shadow. In these situations, exposure bracketing can help.
Step 6: Use Bracketing and HDR Carefully
Bracketing is useful when the dynamic range is too wide for one clean exposure. A simple three-frame bracket can often give enough information to merge highlights and shadows sensibly in post-processing.
The key word is sensibly.
HDR should be used to retain realism, not to create crunchy, glowing, over-processed images. A property photograph should still look like the room you stood in. If every shadow is lifted unnaturally and every window glows with fake detail, trust disappears.
A practical approach is:
take one exposure for the room
take one darker exposure for bright windows
take one balanced middle frame
merge gently in Lightroom or similar software
adjust with restraint
This is especially helpful in rooms with large windows, bright conservatories or interiors looking onto a bright garden or cityscape.
Step 7: Photograph Small Rooms Without Misleading Distortion
Bathrooms, box rooms, narrow kitchens and tight hallways are where many photographers are tempted to go too wide. That is usually where the image starts to feel dishonest.
A small room can still be photographed well, but the aim is not to make it look twice its real size. Instead:
keep the camera level
use a sensible wide-angle range rather than an extreme one
show shape and layout clearly
step back where possible
avoid pushing into corners just to force extra width
It is better to make a small room look clean, bright and accurately presented than large but obviously distorted. Good buyers and good agents value honesty because it sets expectations properly.
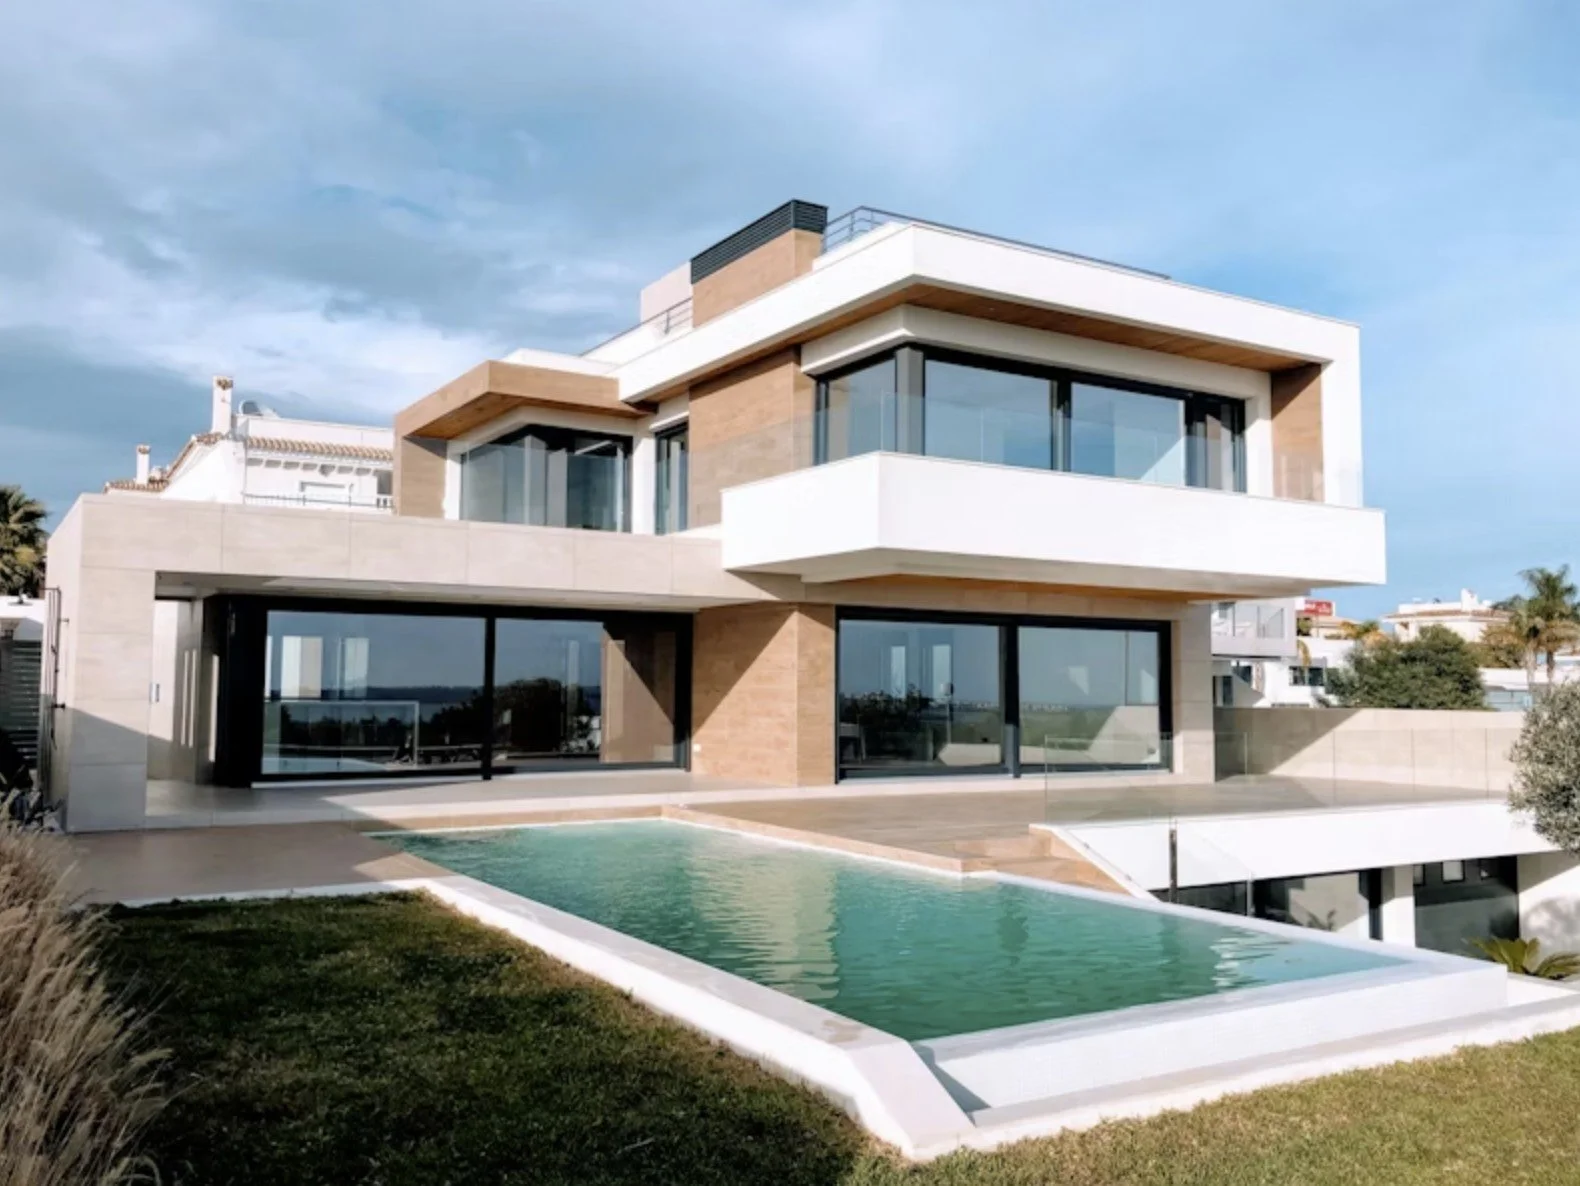
Step 8: Photograph the Exterior With the Same Care
Exterior images are often treated as an afterthought, but they matter hugely because they shape the first click.
Tidy the front of the property before photographing it. Move bins, cars and anything distracting if possible. Check the driveway, front door, garden edges and windows. If the property has a key selling point outside, such as a terrace, garden office, balcony or view, make sure it is photographed properly.
The best light is often softer light rather than harsh midday sun. Early morning, later afternoon or bright overcast conditions are often easier to manage. Keep the camera level outside too. Leaning walls or converging verticals can make a building look poorly photographed very quickly.
If the sky is too bright, a careful bracket may help, but again, realism matters more than dramatic artificial skies.
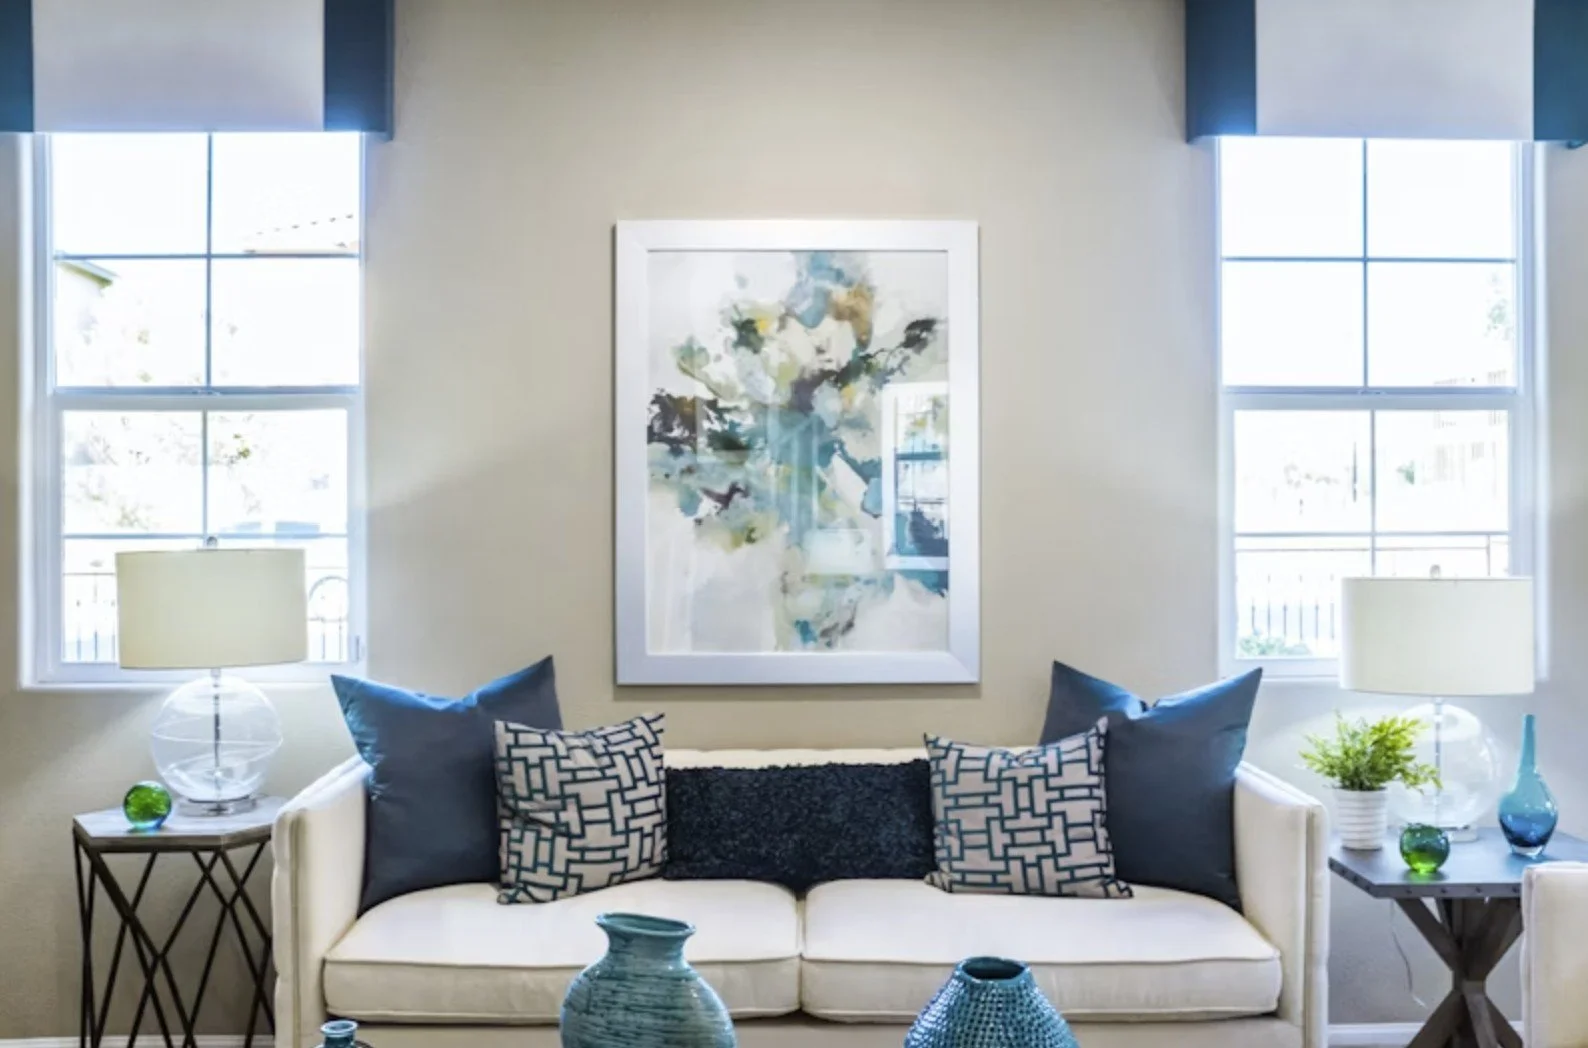
Step 9: Stage Lightly Rather Than Over-Styling
Staging for photography is not about making every property look like a show home. It is about removing distractions and giving the space enough structure to feel welcoming.
A few cushions, a tidy dining table, a neatly made bed or a fresh towel in a bathroom can help. But over-staging can backfire if it starts to feel artificial or distracts from the actual room.
Holiday lets may benefit from a slightly more lifestyle-led feel. Commercial spaces may need to show function as well as appearance. Residential sales and rentals often benefit most from a clean, neutral presentation that helps the viewer imagine their own use of the space.
Step 10: Edit for Clarity and Realism
Editing is where the file is refined, not reinvented.
The most useful property editing tasks are usually:
exposure balancing
white balance correction
lens correction
straightening and vertical correction
modest highlight and shadow recovery
slight contrast and clarity adjustments
export sizing for web and print use
Be careful with saturation, excessive HDR, dramatic sky replacements and aggressive local adjustments. They may attract attention briefly, but they can also damage trust. Property photography should make a space look accurate, clean and inviting, not fictional.
This is also where lens corrections and transform tools help tidy up geometry. If the room was photographed thoughtfully in-camera, editing should feel like refinement rather than rescue.
For businesses, landlords or agents who need reliable results across multiple spaces, consistent editing is just as important as good shooting. A listing should feel visually coherent from one image to the next.
When that consistency matters commercially, it can make sense to use a dedicated <a href="https://www.alanranger.com/professional-commercial-photographer-coventry/" rel="noopener noreferrer" target="_blank">professional property photography</a> service rather than trying to patch inconsistent images together afterwards.
Common Mistakes That Make Property Photos Look Amateur
The most common issues are usually predictable:
using a lens that is far too wide
tilting the camera up or down
photographing cluttered rooms
mixing ugly light sources
leaving verticals crooked
over-editing windows, skies or shadows
making small rooms look unrealistically stretched
failing to check reflections in mirrors and glossy surfaces
Most of these are preventable with a slower, more methodical approach.
Practical Advice for Different Types of Client
For estate agents, consistency and speed matter. Develop a repeatable workflow so each property is prepared, photographed and edited to the same standard.
For landlords, focus on the rooms that most affect enquiries: living area, kitchen, bedrooms, bathroom and exterior. Clear, honest images tend to attract better-aligned interest.
For holiday-let owners, atmosphere matters slightly more, but still without drifting into false presentation. Show amenities, comfort and any distinctive features naturally.
Business owners – For commercial spaces, include wide shots of the whole floor plan, close‑ups of signage and any specialised equipment, and ensure the lighting reflects the working environment.
When you need a professional hand, consider hiring a commercial photographer or a professional commercial photographer to complement your own work.
FAQ
What lens is best for real estate photography?
A moderate wide-angle lens is usually best. On full frame, that is often around 14-24mm or 16-35mm. On APS-C, around 10-20mm is common. The aim is to show enough of the room without creating obvious distortion.
What camera height should I use for property photos?
A good starting point is around waist height. This often gives a natural perspective and helps avoid ceilings dominating the image.
Should I use flash for interior property photography?
Sometimes, but carefully. Natural light is often preferable when it is balanced and soft. If you need extra light, bounced flash or LED panels can help, but the result should still look natural.
How do I make a small room look good without making it look fake?
Keep the camera level, use a sensible wide-angle focal length, compose carefully and avoid extreme perspectives. Show the room clearly rather than trying to exaggerate its size.
Can I take good estate agent photos with a phone?
You can improve results with a good phone, especially in strong light and with careful composition, but a dedicated camera, wide-angle lens and tripod usually give more control and better geometry.
How much editing should real estate photos have?
Enough to correct exposure, colour and perspective, but not so much that the room stops looking believable. Realism matters.
Conclusion
Learning how to take real estate photos well is less about tricks and more about discipline. Prepare the property properly, use a sensible lens, keep the camera level, control the light, bracket when needed and edit with restraint.
If the goal is to market a space honestly and effectively, those fundamentals matter far more than dramatic processing or expensive equipment. Done properly, property photographs should make a room feel clear, bright, trustworthy and easy to understand.