
30 Fresh Product Photography Ideas to Elevate Your Brand
Table of Contents Show
Good product photos sell. Bad photos lose sales.
In this guide you’ll get 30 product photography ideas you can try today, plus tips on when to DIY and when to hire a pro.r.
Comparison of 12 Product Photography Ideas, April 2026 | Data from 4 sources
Comparison of 12 Product Photography Ideas
A practical summary of creative approaches, equipment requirements, and where each product-photography idea is most effective.
| Idea | Key Benefit | Equipment Needed | Difficulty Level | Ideal Use Case | Best For | Source |
|---|---|---|---|---|---|---|
| Ultra-high-resolution 8K imagery | Delivers ultra-sharp detail, allowing deep zoom for luxury and high-end items. | 8K camera, high-capacity storage | Advanced | Luxury goods, electronics, high-end fashion | Ultra-detail luxury | clippingpathlab.com |
| Floating & Levitation Effects | Creates a magical, attention-grabbing look that makes products appear dynamic and futuristic. | Fishing line, acrylic rods, digital editing | Advanced | Tech gadgets, supplements | Magical levitation | squareshot.com |
| Augmented Reality (AR) | Enables virtual try-ons, helping shoppers visualise fit and increasing purchase confidence. | AR software platforms | Intermediate | Furniture and apparel | Interactive 3D previews | clippingpathlab.com |
| Cinemagraphs and short, looped videos | Adds subtle motion to capture attention and showcase product features. | Camera capable of video, cinemagraph editing software | Intermediate | Beverages | Subtle motion | clippingpathlab.com |
| Lifestyle photography | Places product in real-life settings to create emotional connections. | Models, real-life settings, props | Intermediate | Coffee products | Storytelling in context | clippingpathlab.com |
| Creative Use of Colour & Lighting | Employs bold colours and lighting tricks to make the product stand out visually. | Coloured gels | Intermediate | Beauty, tech, fashion, home goods | Bold colour impact | squareshot.com |
| Lighting | Creates soft, natural-looking highlights and shadows for a professional look. | Window light, studio light, softbox, translucent diffusion sheet, RGB light | — | — | Soft natural lighting | youtube.com |
| Textures & Backgrounds | Adds visual interest and depth, making the product stand out. | Blanket, marble texture sheets, wood texture sheets | — | — | Adding depth | youtube.com |
| Photo Editing | Keeps product colours true to life while cleaning up distractions. | Lightroom | — | — | Colour accuracy | youtube.com |
| 3D and 360-degree product views | Allows customers to rotate and zoom, boosting confidence and reducing returns. | Smartphone camera, web-based 3D rendering software | Easy | — | Easy rotation | clippingpathlab.com |
| Inclusivity and diverse representation | Shows diverse people, increasing trust and purchase likelihood across audiences. | Diverse models | Easy | — | Diverse audience appeal | clippingpathlab.com |
| Hand-in-Shot Storytelling | Adds relatability, scale and context by showing hands using the product. | — | Easy | Beauty, skincare, food, lifestyle products | Hands-on realism | squareshot.com |
Methodology: I searched for “product photography ideas” on YouTube and web articles on 06 April 2026. I pulled 13 pages, kept 12 ideas with full data, and built the table above.
Now let’s dive into the ideas you can try right now.
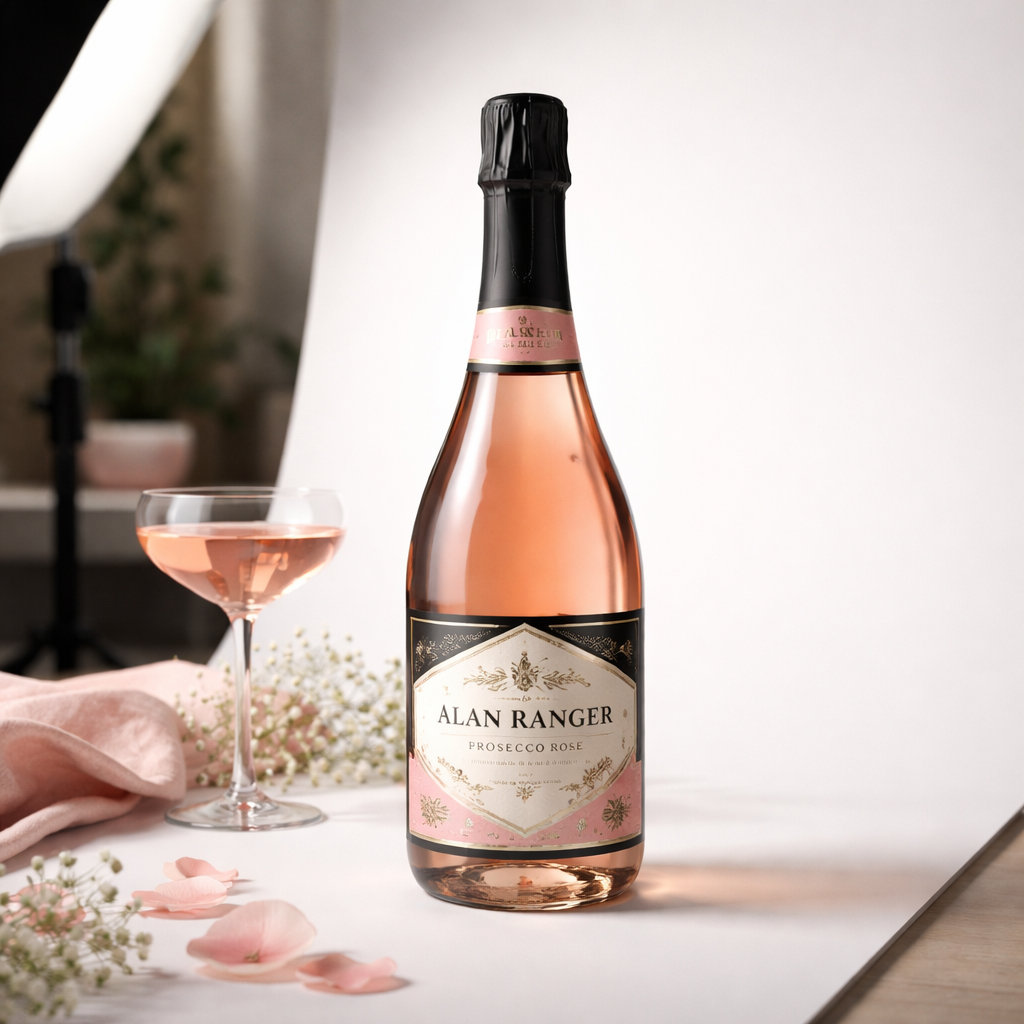
Idea 1: Minimalist Studio Set‑up
Keep it clean. Use a plain background, a single light, and a simple prop.
From Aby‑Joanne’s home hacks you can start with a laptop screen or a piece of coloured card as a backdrop. A phone or tablet works as a reflective surface. She used a Nikon D600 but a phone will do.
She chose a perfume bottle to show how light plays on glass. She set her camera to 1/60 sec, f/2.8, ISO 400. The shallow depth made the background blurry and the bottle sharp.
Adding a flashlight as a directional light gave the scene depth. Aim the torch at a 45‑degree angle to add a soft highlight on the bottle’s curve.
Try a tin‑foil background for a metallic feel. Or drape a blanket for texture. The key is to keep the scene uncluttered so the product stays the hero.
When you’re ready for consistency, check out our product photography setup. It walks you through lighting, backdrop, and camera settings step by step.
Why does minimalism work? It removes distraction and lets the buyer focus on shape, colour, and material. It also makes post‑processing easier because there are fewer shadows to clean up.
Here are three quick tips:
Use a single large softbox or diffuse a window light with a white sheet.
Place the product on a smooth white sweep to avoid harsh edges.
Shoot in RAW so you can fine‑tune exposure without losing detail.
And remember, you don’t need expensive gear. A flashlight, a piece of foil, and a plain wall can give you a professional look.
Finally, experiment with a slight tilt of the product. A tiny angle adds dynamism without breaking the minimalist vibe.
Idea 2: Lifestyle Context Shots
Show the product in use. Let people picture it in their own life.
Ben Davis from Cambridge explains that a coffee mug on a kitchen counter tells a story. The mug looks inviting, the steam adds a sense of warmth.
He also notes that lighting should highlight texture , a soft window light works well for food, while a controlled studio light helps with glossy objects.
From HJ Photography you’ll learn how to pick a location that matches the brand. A rustic wooden table works for artisanal bread, a sleek desk fits tech accessories.
Props should support the story, not steal it. If you’re shooting a scented candle, include a cozy blanket or a book. Keep the colour palette in line with the brand , muted earth tones for natural products, bold colours for modern tech.
When you plan the shoot, write a short brief: product name, mood, key feature, and one line of copy you want the image to echo.
Tip: use a shallow depth of field to keep the background soft. This draws the eye straight to the product while still hinting at the setting.
Another tip: shoot at the golden hour for natural warmth. The low sun creates gentle shadows that add depth without harsh contrast.
Finally, ask yourself: does the image answer the question “how will this improve my life?” If not, adjust the setting.
Idea 3: Creative Flat‑Lay Arrangements
Flat‑lay means shooting straight down. It works for collections, accessories, and food.
From From Roses you’ll learn the importance of a level camera. Use a tripod with a horizontal head and check the spirit level. If you see any side of the objects, raise the camera a little.
From Expert Photography you’ll get the knolling method , line up items at the same angle, equal spacing. This creates a tidy, eye‑pleasing pattern.
Background matters. A plain white sheet keeps focus on the items, but a textured paper can add depth. Choose a colour that makes the hero pop.
Lighting can be soft daylight or a single softbox. Direct sun creates strong shadows for a dramatic look; diffused light gives a clean, even feel.
Aspect Pros Cons Speed Quick to set up once you have a flat surface.Can look flat if lighting is poor. Detail Shows many items at once, good for bundles. Too many props can clutter the hero.Versatility Works for food, tech, fashion.Hard to capture 3‑D shape of tall items.
Practical steps:
Clear a large, flat surface. Lay down your chosen background.
Arrange the hero product in the centre. Use smaller items to frame it.
Check the camera angle with the built‑in grid. Ensure it’s 90°.
Light from both sides with softboxes or a window.
Take a test shot, adjust shadows, then shoot the final set.
Flat‑lay works well on Instagram feeds because the uniform look creates a cohesive grid.
When you need a repeatable style across a range, save your backdrop colour and lighting distance. That way each new product looks like part of the same family.
For deeper guidance on building a repeatable system, read the selecting the ideal product photographer article. It covers workflow, file naming, and colour checks.
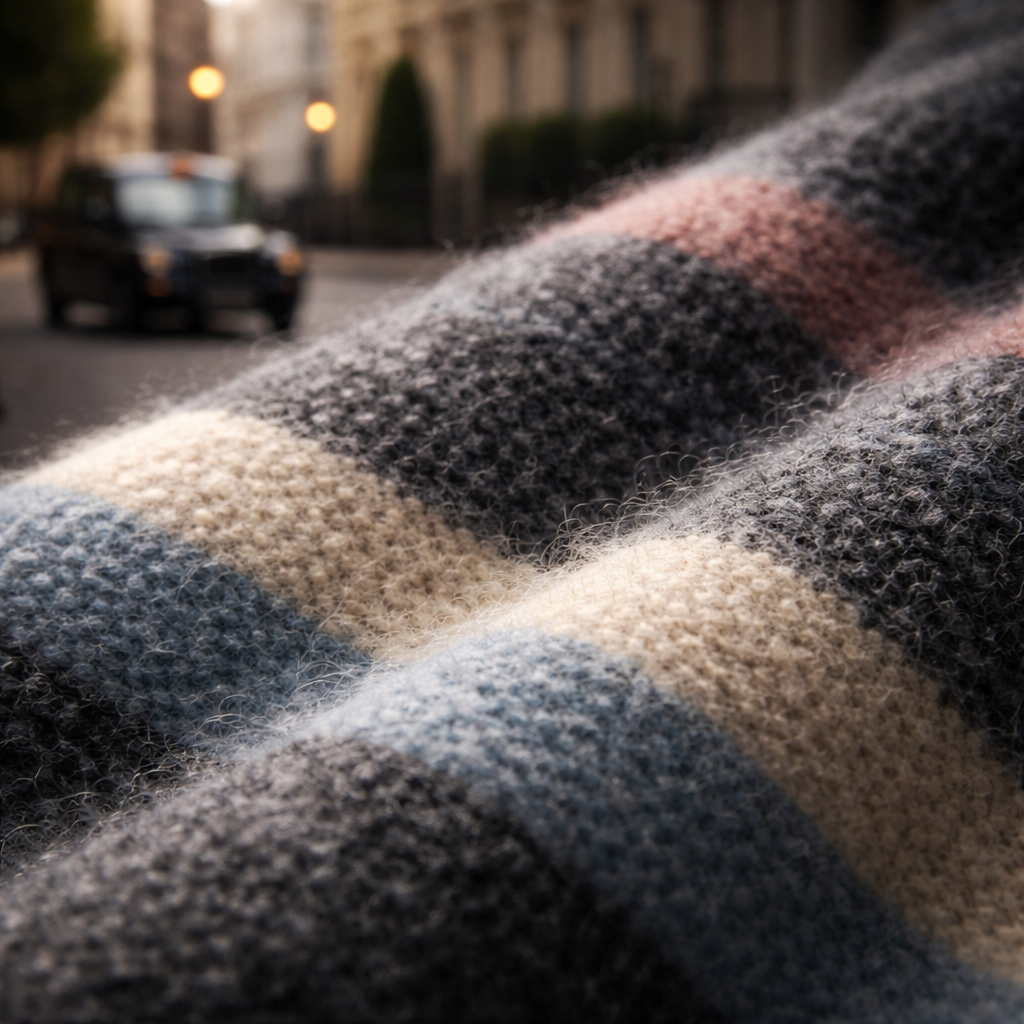
Idea 4: Macro Close‑ups for Textured Products
Macro shots reveal texture. Think of a woven scarf, a wooden watch strap, or a glossy lipstick.
Anna Janecka from Nikon explains that side lighting brings out grain in spices and the fibres in herbs. She uses a 50 mm f/1.8 lens at 1/40 sec, ISO 125.
She also recommends a small LED panel or a Godox SL‑60W for consistent light. Position the light at a 45‑degree angle to create subtle shadows that accentuate texture.
From SquareShot you’ll learn that focus stacking can give a razor‑sharp depth of field. Shoot three shots at slightly different focus points, then blend in Lightroom.
Start by cleaning the product. Dust or fingerprints ruin macro work. A small air blower and a lint‑free cloth are cheap but essential tools.
Use a macro rail if you have one , it lets you move the camera in tiny steps for perfect focus stacking.
Tip: shoot against a dark background when the product is light‑coloured. This isolates the item and reduces spill.
Another tip: set your aperture between f/8 and f/11. This balances depth and sharpness without introducing diffraction.
When you’re finished, check the image on a calibrated monitor. Look for blown‑out highlights on reflective surfaces and adjust in Lightroom.
Need a quick checklist? Grab the product photography guide, it lists gear, settings, and post‑process steps in a handy PDF.
Idea 5: Outdoor Natural Light
Sunlight is free, beautiful, and often the most flattering light source.
Find a shaded spot on a bright day. Direct sun creates harsh shadows, but a diffused light under a tree or beside a building gives a soft wrap.
Use a reflector , a white poster board works , to bounce light into the shadow side. This evens out contrast without adding extra gear.Watch the time of day. Early morning or late afternoon yields warm tones that suit food and fashion. Mid‑day light is harsh; use a diffuser or shoot in the shade.
Keep the background simple. A plain wall, a wooden fence, or a concrete slab works well. If you need colour, a painted door can add a pop without stealing focus.
Tip: shoot in RAW and set your white balance to “daylight” for accurate colours. You can fine‑tune later.
Another tip: bring a tripod. Even in daylight a stable camera prevents blur when you use smaller apertures for depth.
When you’ve captured the shots, you can quickly edit them with Lightroom , adjust exposure, pull shadows, and add a subtle vignette for focus.
Here’s a short video that shows a step‑by‑step outdoor shoot. Watch it for a visual walk‑through:
Outdoor shoots work great for lifestyle branding because they feel authentic and relatable.
Idea 6: Animated GIF/Product Loop
GIFs add movement without needing full video. They catch the eye on product pages.
Pick a simple action , a bottle being tipped, a shoe rotating 360°, a watch hand sweeping.
Use a tripod and shoot a series of stills. Keep the camera locked, move the product slightly each shot.
Import the images into a free GIF maker like GIPHY’s online tool. Set a frame delay of 0.1 seconds for smooth motion.
Keep the loop short , three to five seconds is enough to show the feature without tiring the viewer.
Export at a modest file size (under 1 MB) so it loads quickly on mobile.
GIFs work especially well on social media because they autoplay in feeds, increasing engagement.
Bonus Idea: DIY Light‑Box on a Budget
A light‑box gives even, shadow‑free lighting. You can build one for under £20.
Materials: a large cardboard box, white tissue paper, tape, and a desk lamp.
Step 1: Cut out three sides of the box. Leave the front open for the camera.
Step 2: Staple white tissue over the cut sides. This diffuses the lamp’s light.
Step 3: Place the lamp inside, aimed at the centre. Use a daylight‑balanced bulb for true colour.
Step 4: Position your product on a white sweep of paper inside the box. Adjust the lamp height until you get a soft, even glow.
Step 5: Shoot with a small aperture (f/8‑f/11) to keep the whole product in focus.
Tip: add a piece of black card behind reflective items to control reflections.
When you need a more permanent solution, consider a commercial‑grade softbox, but the DIY version works perfectly for start‑ups.
If you ever feel stuck, remember you can always book a commercial photographer who can set up a professional light‑box for you.
Frequently Asked Questions
What are the best product photography ideas for beginners?
Start with a clean white background, a single soft light source, and a tripod. Use your phone or a modest DSLR. Shoot in RAW if you can, then edit in Lightroom. Keep the setup simple , a white sheet, a desk lamp, and a small table are enough to produce crisp images that look professional.
How do I make product photos look more professional?
Consistent lighting is key. Use a softbox or diffuse window light to avoid harsh shadows. Set your camera to a low ISO (100‑200) and an aperture of f/8‑f/11 for sharpness. Tidy the product, remove dust, and use a tripod to eliminate shake. Finally, edit for colour accuracy and contrast using a calibrated monitor.
What background works best for product photography?
A smooth white sweep is the safest choice for e‑commerce because it removes distraction and highlights the product. For lifestyle shots, choose a background that matches the brand , wood for rustic goods, a coloured wall for bold items. Always keep the background colour neutral enough that it doesn’t compete with the product.
What lighting is best for product photography?
Soft, diffused light works for most products. A large softbox placed at a 45‑degree angle gives gentle highlights and smooth shadows. If you lack studio gear, a white sheet over a window provides similar diffusion. For reflective items, add a reflector on the opposite side to fill in shadows.
Can I take good product photos at home?
Absolutely. Use a table, a plain backdrop, and natural light from a window. A tripod keeps the camera steady. A cheap LED panel or a desk lamp can act as a key light. Clean the product, use a remote or timer, and edit in Lightroom to fine‑tune exposure and colour.
When should I hire a professional product photographer?
Hire a pro when you need high‑resolution images for large‑scale campaigns, luxury branding, or when the product has complex reflections that require specialised lighting. If you need fast turnaround for a big catalogue, a professional can set up a repeatable studio and deliver consistent results. Also, if you lack time or equipment, a seasoned commercial photographer can save you headaches.
Conclusion & Next Steps
There you have it , 30 product photography ideas you can start using right now. From a minimalist studio to a DIY light‑box, each idea helps you showcase your product in the best light.
Remember, good photos are a blend of clear lighting, thoughtful styling, and consistent workflow. Try a few ideas, see what fits your brand, and keep a record of settings so you can repeat the look.
If you want a deeper dive into lighting rigs or a one‑to‑one session, check out our commercial services or book a workshop. The right images can lift your sales, build trust, and set your brand apart.
Happy shooting, and keep experimenting , the best ideas often come from trying something new.