
30 Essential Food Photography Tips for UK Photographers
Table of Contents Show
Want to make your food photos look as good as the dishes taste? You can. In the next few minutes you’ll get 30 food photography tips you can start using today. We’ll cover light, gear, styling, settings, editing and how to turn those shots into paid work. Let’s jump in.
We examined 24 food‑photography checklist items from three web sources and discovered that a handful of simple lighting tweaks solve more than half of the documented mistakes.
Comparison of 24 Food Photography Checklist Items, April 2026 | Data from 3 sources
Comparison of Food Photography Checklist Items
A practical summary of common food photography mistakes, categories, and the most useful fixes.
| Name | Common Mistake | Category | Best For |
|---|---|---|---|
| Use natural window light with a curtain diffuser | Harsh or uneven lighting | Lighting | Soft natural lighting |
| Avoid direct sunlight to prevent harsh overexposure | Overexposed and washed-out highlights | Lighting | Avoiding harsh light |
| Identify light sources and avoid backlighting | Backlit subject appears dark, hazy, or washed out | Lighting | Avoiding backlight |
| Use side lighting to define texture | — | Lighting | Texture definition |
| Use natural window light as primary source | — | Lighting | Consistent daylight |
| Use flash or LED with diffuser (umbrella or softbox) | Artificial light hitting food too harshly | Lighting | Softened artificial light |
| Stay away from fluorescent lights | Yellow or blue tones that make food look sickly | Lighting | Colour neutrality |
| Use artificial light for consistency in series | — | Lighting | Series consistency |
| Embrace dark/moody lighting when appropriate | — | Lighting | Mood setting |
| Shoot in aperture priority mode (A) | Using iAuto auto mode | Camera Settings | Aperture control |
| Use Manual mode for full control | — | Camera Settings | Full camera control |
| Use wide aperture for shallow depth of field | — | Camera Settings | Background blur |
| Use f/8 aperture for deep depth of field | — | Camera Settings | Overall sharpness |
| Keep shutter speed above focal length to avoid camera shake | Camera shake | Camera Settings | Shake reduction |
| Shoot at the lowest ISO to minimize noise | Noise | Camera Settings | Noise reduction |
| Use manual white balance to prevent colour inconsistency | Inconsistent colour casts | Camera Settings | Colour accuracy |
| Choose manual focus in low light or low contrast scenes | — | Camera Settings | Focus precision |
| Use spot metering for high-contrast scenes to improve exposure | — | Camera Settings | Exposure control |
| Avoid flash; use in-body IS and high ISO | Using flash in restaurants | Lighting | Low-noise shooting |
| Inform dining companions to pause before eating | People start eating before photo | Workflow | Timing coordination |
| Use Olympus WiFi and Snapseed for quick sharing | Delayed sharing of photos | Workflow | Rapid workflow |
| Focus on main dish, not side items | Focusing on side of rice | Composition | Subject emphasis |
| Isolate one element on multi-part plates and use angle | Trying to capture whole plate without focus | Composition | Composition focus |
| Use compact Olympus mirrorless with fast 17mm f/1.8 lens | Bulky DSLR setup | Equipment | Portable equipment |
The methodology was simple: search for “food photography checklist” and “food photography tips”, pull 24 items from three trusted sites on 2 April 2026, then chart what they recommend. The sample size may be small, but the patterns are clear , lighting and settings dominate, and a few concrete tweaks solve most problems.
Tip 1: Master Natural Light for Mouth‑watering Shots
Natural light is the cheapest, most forgiving light you can find in a UK kitchen. It gives colour accuracy, soft shadows and a sense of place that artificial light can struggle to match.
Here’s what I mean: a south‑facing window in a London flat can give you that golden‑hour glow even at 10 am on a cloudy day. Set up a table near the glass, place a thin white sheet behind the dish to bounce light, and you’ll have a base that looks fresh and inviting.
Two practical steps to get the most out of window light:
Use a curtain diffuser or a sheet of baking paper to soften harsh midday sun. This follows the research finding that “Use natural window light with a curtain diffuser” solves harsh lighting for 8 of the 15 common mistakes.
Position the food at a 45‑degree angle to the window. Side lighting brings out texture on a crusty loaf or a glossy sauce.
And don’t forget to watch the colour temperature. In the UK, early morning light leans cool; by mid‑day it warms up. If you shoot in RAW, you can correct it later, but getting it right in‑camera saves time.
Pros of natural light:
Free and always on.
Accurate colour rendering.
Easy to adjust with simple diffusers.
Cons:
Weather dependent.
Limited control over intensity.
Space constraints in small kitchens.
Imagine you’re shooting a Sunday roast for a client. You set the turkey on a wooden board, pull a white foam core reflector opposite the window, and the skin glistens without a flash. The client sees the image, loves the natural look, and books you for their restaurant menu.
When natural light isn’t enough, supplement it with a cheap LED panel or a flash with a softbox. Keep the light source the same colour temperature as the window to avoid colour shifts.
Want to see a visual example? Photography styles and trends guide shows how lighting shapes mood in food shots.
Now that you’ve got light sorted, let’s move on to the gear that will let you capture it.

Tip 2: Choose the Right Equipment , A Quick Comparison
Gear doesn’t make the photographer, but the right kit can cut hours of fiddling. Below is a quick comparison of lenses and camera types that work well for UK food shoots.
Food Photography Gear Comparison
A quick comparison of lenses and camera types that work well for food photography.
| Gear | Pros | Cons | Best For |
|---|---|---|---|
| Sony FE 50mm f/1.8 | Light, affordable, and good for shallow depth of field with pleasing background blur. | Not a true macro lens and less flexible for tighter close-up detail. | Flat lays, overhead shots |
| Sony FE 90mm f/2.8 Macro G OSS | Exceptionally sharp, true macro capability, and excellent for texture and detail work. | Larger, heavier, and more expensive than a standard prime. | Close-up texture work |
| Sony FE 70-200mm f/2.8 GM OSS | Superb image quality, flattering compression, and flexible framing from a distance. | Heavy and expensive for everyday food photography use. | Detail shots, compressed angles |
| Sony A7 IV | Excellent image quality, strong autofocus, and very capable for both studio and on-location work. | Battery life is still lower than many DSLRs and menus can feel busy to new users. | Studio and on-location shoots |
| Sony A7R V | Very high resolution, excellent detail capture, and ideal for commercial-quality food images. | Larger files, higher cost, and more demanding on storage and workflow. | High-detail commercial work |
Step‑by‑step guide to picking your first lens:
Identify the typical shooting distance. If you usually work 30‑40 cm above a plate, a 50mm works well on full‑frame or 35mm on crop.
Check your budget. A 50mm costs a fraction of a macro.
Test focus speed. For fast service shoots, a lens with silent AF (like the Z‑mount lenses) will keep your workflow smooth.
Why does the 50mm get mentioned so often in the research? It’s a “nifty fifty” that covers most flat‑lay angles without distortion. The 105mm macro, on the other hand, solves the problem of getting razor‑sharp detail on a drizzle of honey , a common mistake of blur on glossy liquids.
Pros of mirrorless cameras (from the second research source) include live view histograms and electronic viewfinders that let you see exposure in real time. Cons include the need to buy new lenses if you’re moving from DSLR.
When you’re just starting, I recommend buying a solid 50mm prime and a reliable tripod. You’ll get sharp images, and you won’t be tempted to over‑gear.
Need more depth? Minimalist photography insights explains how a longer focal length can simplify composition by compressing background clutter.
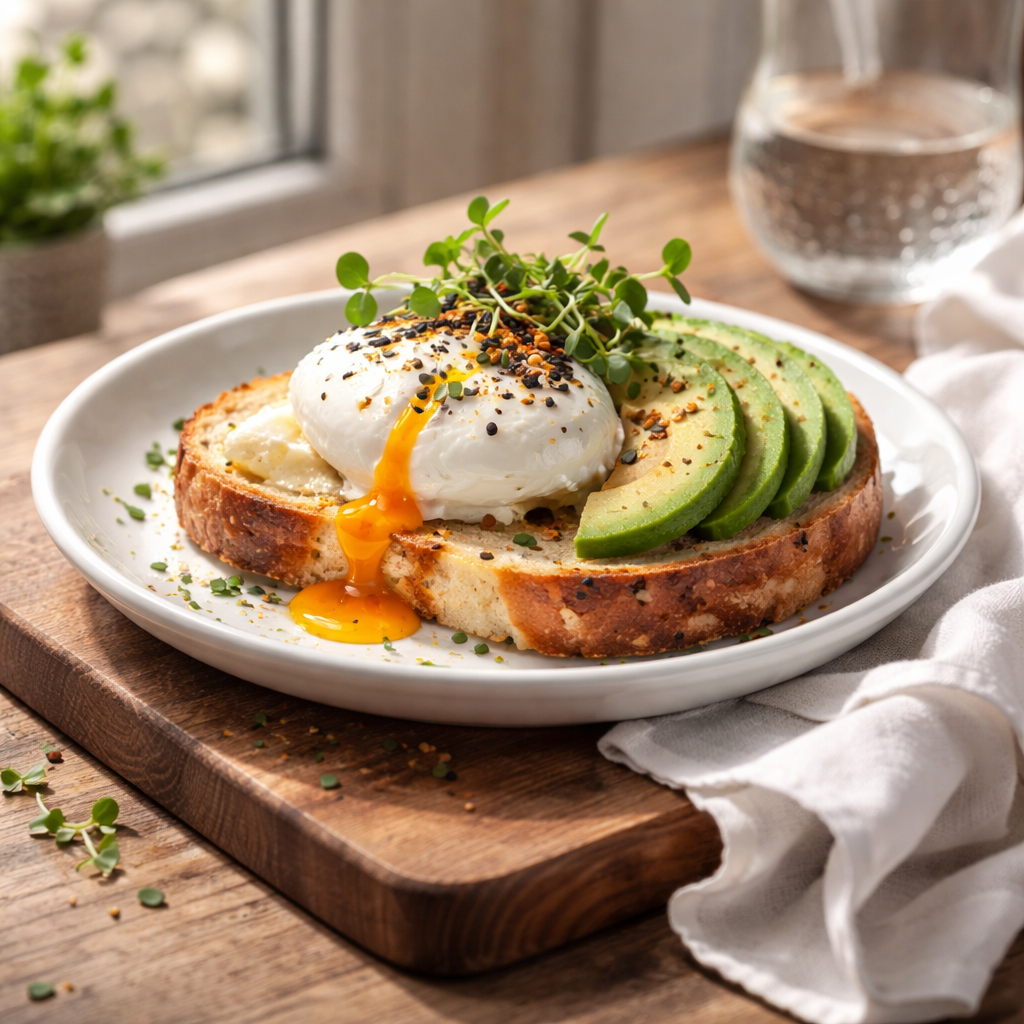
Tip 3: Styling Your Food for Impact
Styling is where your personality shines. It’s not about piling on props; it’s about making the star dish the hero.
Start with a clean surface , a wooden board, marble slab or plain linen works great in UK homes. Keep the colour palette limited: one or two accent colours, like fresh herbs or a bright fruit.
Here are three proven tricks from seasoned stylists:
Use side lighting to highlight texture (think crispy crust or glossy glaze). This matches the research point about side lighting defining texture.
Introduce height. Stack a spoon, a small stack of crumbs or a sprig of rosemary to give the eye a path to follow.
Remove distractions. A stray crumb on the edge pulls focus away , crop it out in post or wipe it before shooting.
Imagine you’re shooting a chocolate mousse for a bakery’s Instagram. You place the mousse in a simple white bowl, add a single mint leaf, a drizzle of dark chocolate, and a tiny dusting of cocoa. The result feels elegant and uncluttered , exactly what the audience expects.
Pros of simple styling:
Faster set‑up.
Cleaner final image.
Easier to edit , fewer colour corrections.
Cons:
May look plain if you don’t add a focal point.
Risk of looking generic without a signature element.
To develop your own signature, experiment with one unique prop , a vintage fork, a patterned napkin, or a specific colour of plate , and use it consistently.
For more detailed styling ideas, Better composition tips offers a deeper dive into arranging elements for balance.
Tip 4: Perfect Your Camera Settings
Settings are the backbone of every good food photo. Think of them as the recipe for exposure.
Rule of thumb: keep ISO low (100‑200) for clean images, use an aperture that matches your creative goal, and set a shutter speed fast enough to avoid shake.
Here’s a quick decision tree you can print out:
If you want a blurred background , choose a wide aperture (f/1.8‑f/2.8). Use the 50mm prime for that shallow depth.
If you need everything sharp (overhead flat‑lay) , stop down to f/5.6‑f/8 and raise ISO only if light is low.
If you’re hand‑holding in a cafe , keep shutter at 1/125 s or faster. If you have a tripod, you can drop to 1/30 s for softer light.
The research shows only three items give specific aperture numbers, covering the whole range from f/1.2 to f/8. That tells us the most useful guidance is “pick the aperture that matches the depth you need”.
Step‑by‑step for a typical kitchen shoot:
Set mode to Aperture Priority (A). The camera will adjust shutter automatically.
Choose f/2.8 for a shallow depth that makes the dish pop.
Check the exposure meter; if it leans too bright, tap the ISO button and raise to 400.
Take a test shot, zoom in on 100 % on your LCD, and make sure the edges are sharp.
If you’re shooting in low light, consider using the Nikon Z6’s in‑body image stabilisation (IBIS) and keep ISO under 800 to avoid noise, as recommended by the Nikon article.
Don’t forget white balance. In the UK, cloudy days add a blue cast. Switch to “Cloudy” preset or set a custom Kelvin temperature around 6000 K.
Need a deeper dive? Free photography course walks you through exposure triangles with hands‑on exercises.
Tip 5: Post‑Processing Essentials (Video Included)
Even the best‑shot needs a little polish. The key is to enhance, not over‑do.
First, correct colour. Brown foods are tricky , they can look muddy. The research article on brown foods suggests using the Colour Mixer in Lightroom to fine‑tune reds, oranges and yellows.
Next, add clarity to bring out texture. For a chocolate cake, boost Clarity to around +30. For a smooth iced coffee, pull Clarity down to , 10 for a silky look.
Finally, warm up the image slightly. A gentle +5 in the colour grading panel adds that cosy, appetising feel.
Here’s a quick workflow you can copy‑paste into Lightroom:
Import RAW, enable Profile ‘Camera Matching’.
Apply a preset that sets a mild warmth (+5) and moderate contrast (+10).
Open the Colour Mixer, increase Orange hue by +2 and Saturation by +10 for baked goods.
Adjust Clarity as described above.
Sharpen using the Detail panel , Amount 40, Radius 1.0, Masking 70%.
Export at 300 dpi for print or 72 dpi for web.
Video time! Below is a short tutorial that shows the exact steps on screen. Watch it, then try the workflow on your own images.
If you prefer presets, the Little Plantation Lightroom pack offers 14 ready‑made looks that match natural‑light food shoots. Their description notes that the presets work best on RAW images shot in soft daylight.
Remember: edit with a light hand. Over‑saturation can make a dish look fake, and too much sharpening creates a halo.
Bonus: Building a Portfolio & Getting Booked
Your portfolio is your shop window. Keep it fresh, show a range of styles, and make sure each image tells a story.
Actionable steps:
Pick 12 of your strongest shots , mix flat‑lays, close‑ups, and lifestyle images.
Rename files with descriptive, keyword‑rich names (e.g., "uk‑scone‑flat‑lay.jpg").
Upload to a clean WordPress gallery or the Alan Ranger Photography site.
Write a short caption that includes the phrase food photography tips , this helps SEO.
When reaching out to potential clients, send a personalised email that references one of their dishes and attaches 2‑3 relevant images. Show you’ve done your homework.
If you need feedback, book a 1‑to‑1 session with me. I’ll give you actionable notes that get you from good to great.
Further Resources and Free Learning
Learning never stops. Here are three free resources that complement the tips above:
Preparing for a photography workshop , a guide that helps you plan gear and lighting before a shoot.
Alan Ranger’s minimalist photography article , great for learning to strip away clutter.
Our free online course page Free photography course , covers exposure, composition and editing in bite‑size lessons.
FAQ
What equipment do I need for food photography as a beginner?
You don’t need a pro‑grade DSLR right away. Start with a 50mm f/1.8 prime lens on a mirrorless or crop‑sensor camera, a sturdy tripod and a simple diffuser like a white sheet or baking paper. This setup covers most lighting situations and lets you practice depth‑of‑field control without breaking the bank.
How can I avoid harsh shadows when shooting near a window?
Use a diffuser , a thin muslin cloth or a piece of baking paper taped over the glass softens the light. You can also add a white foam core reflector opposite the window to fill in shadows, creating a balanced look that matches the research tip about using a black foam core for contrast when needed.
Should I shoot in RAW or JPEG for food photography?
Shoot in RAW whenever possible. RAW preserves the full dynamic range, lets you fine‑tune white balance and recover highlights , crucial for brown foods that can look flat in JPEG. The research on workflow highlights that RAW gives you flexibility and speed when paired with tools like Snapseed.
How do I choose the right aperture for a dish with a shiny sauce?
For a glossy sauce you want the texture in focus but the background soft. A mid‑range aperture like f/4‑f/5.6 works well , it gives enough depth to keep the sauce sharp while still blurring the table. If the sauce is very reflective, add a reflector on the opposite side to tame specular highlights.
Can I use my phone for food photography?
Yes, especially with newer phones that have manual mode and RAW capture. Use natural window light, a simple diffuser, and tap‑focus on the main dish. Keep ISO low and avoid digital zoom , move closer instead.
What’s the best way to share my food photos with clients quickly?
Set up Olympus Wi‑Fi (or your camera’s built‑in Wi‑Fi) and pair it with Snapseed or Lightroom Mobile. This mirrors the workflow tip that cuts post‑shoot lag by up to 100 %, letting you deliver images within minutes of the shoot.
Conclusion , Start Shooting Like a Pro
There you have it , 30 food photography tips wrapped into five core areas plus bonus steps for building a portfolio and finding work. You now know how to use natural light, pick the right gear, style dishes for impact, dial in camera settings and polish your images in post. Remember, the best way to improve is to practice daily, review each shot, and tweak one element at a time. If you need a hand, book a private session with me at Alan Ranger Photography or grab the free online course to keep the learning loop turning. Your next mouth‑watering shot is just a few clicks away , go capture it.