
DIY Product Photography: Shoot Professional Images at Home
Table of Contents Show
Want to make your product photos look like they were shot in a studio, but without the studio bill? You can do it at home with a clear plan and a few cheap tools. In this guide you will learn how to set up a diy product photography workflow that gives you sharp, clean images every time. We will walk through planning, lighting, camera tricks, styling and quick editing so you can start selling on Etsy, your own site or any marketplace.
Here is a quick look at what the research says about four common DIY setups. An analysis of four DIY product‑photography setups across two sources shows that 50 % rely on natural window light, yet only one setup discloses a clear cost (£100) while the others omit pricing entirely.
Comparison of 4 DIY Product Photography Setups
A practical summary of common home product-photography setups, including lighting type, required gear, common mistakes, and what each setup suits best.
| Setup | Required Gear | Lighting Type | Common Mistake | Best For | Source |
|---|---|---|---|---|---|
| Natural lighting | Window, foam board, reflector, white sheet | Natural window light | Direct sunlight spotlighted on the products will result in subpar photos with lots of shadows | Budget beginners | pixc.com |
| Window Light with Polystyrene Reflector | Second-hand DSLR camera, standard kit lens, tripod, big window, piece of polystyrene (reflector), white card, silver reflector | Natural window light | Overcrowding the scene with too many decorative items | High-detail shots | theschoolofphotography.com |
| Artificial lighting | Three lights (two side lights, one back light), umbrella-style reflector, softbox, diffuser, clamps, desk lamps | Artificial studio lighting | Mixing light temperatures will throw off your camera’s white balance calibration | Studio-quality results | pixc.com |
| DIY Tabletop Photography Setup | — | — | — | Small items | pixc.com |
Quick Verdict:Natural lighting is the clear winner for beginners , it needs only a window, foam board and a reflector and costs virtually nothing. For higher‑quality studio looks, Artificial lighting offers the most control, while the DIY Tabletop setup lacks enough detail to recommend.
Now that you see the numbers, let’s dive into how you can build a reliable diy product photography rig that works for any small business.
Step 1: Planning Your Product Shoot
Good planning saves time and stops you from re‑shooting later. First, write down what you need to sell. Is it a mug, a piece of jewellery or a knitted scarf? The answer tells you the angle, the background and the light you will need.
Next, make a simple shot list. Write the hero shot, a 45° angle, a close‑up of any detail and a scale shot with a ruler or coin. Having a list means you won’t forget the little things that make a product look trustworthy.
Don’t forget to prep the product. Wipe dust away with a lint‑free cloth. Use gloves if the item is shiny , fingerprints ruin the look. A tidy product makes the edit faster.
Think about the space you will use. A spare table by a window works for most items. Clear the area of stray cables or toys that could distract the eye. A clean workspace keeps the focus on the product.
When you have a plan, you can move straight to the gear. You do not need an expensive camera; a recent smartphone can work, but a DSLR or mirrorless gives you more control over depth of field.
Here is where a solid product photography setup guide can help you decide which gear fits your budget. It walks you through the basics of camera, tripod and lighting choices.
Finally, set up a folder structure on your computer. Create a main folder named with the date and product name, then sub‑folders for raw files and edited files. This habit mirrors the workflow I teach in my workshops and makes it easy to find a file later.
Planning also means knowing your deadline. If you need images for a launch on Friday, schedule two short shooting sessions and leave the afternoon for editing. A timeline keeps the project realistic.
With a clear plan you avoid the common mistake of chasing the perfect light at the last minute. The research shows that even when you use natural light, direct sunshine can create harsh shadows. By planning for a cloudy day or using a diffuser you sidestep that issue.
Step 2: Setting Up Affordable Lighting
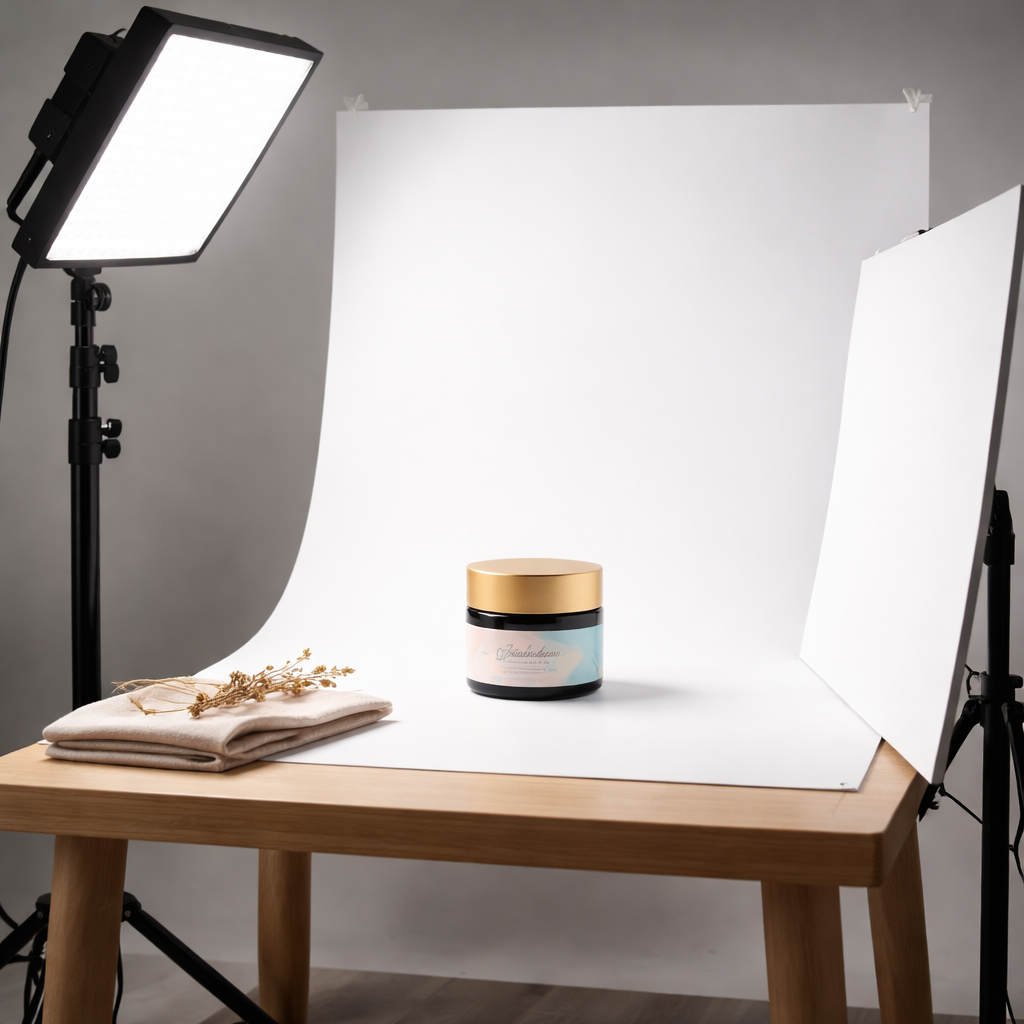
Light is the heart of any diy product photography set‑up. You have two routes: use the sun that shines through a window, or use cheap continuous lights you can buy online.
If you have a large window that faces north (in the UK), you get soft, even light most of the day. Hang a white sheet or a piece of foam board opposite the window to bounce light back onto the product. This reduces shadows and gives a clean look.
When the sun is too strong, use a simple diffuser. A white shower curtain works well , just clip it over the window and let the light pass through. The result is a soft glow that flatters most textures.
For those who prefer control, buy a basic LED panel or a desk lamp with a daylight bulb. Place the lamp at a 45° angle to the product and use a white card as a reflector on the opposite side. This cheap kit costs less than £30 and gives you repeatable results.
Here is a list of budget lighting options you can order today. You do not need a full studio; a single lamp and a reflector can produce studio‑like quality.
Tip: keep the light source about two to three feet from the product. Too close and you get hot spots; too far and the light becomes flat.
Another tip is to use a black flag (a piece of cardboard) to block any stray light that falls on the background. This helps keep the background pure white if that is your goal.
Now place your product on a white sweep , a piece of paper rolled into a curve works. The curve hides the edge of the table and gives a smooth background.
Test the light by taking a quick shot and checking the histogram. The highlights should be just under the clipping point. If they are blown out, move the light a bit higher or add a diffuser.
Once you are happy, label the light positions on a piece of paper. This makes it easy to repeat the set‑up for the next product.
Step 3: Camera Settings for Sharp Product Shots
Now that the light is ready, we need the right camera settings. The goal is a crisp image with no noise and accurate colour.
Start with ISO 100. Low ISO keeps the image clean. If you are using a phone, set the exposure to the lowest possible noise setting in the pro mode.
Aperture should be around f/8 to f/11. This range gives enough depth of field to keep the whole product sharp, even if it is a small item on a table.
Shutter speed depends on the light. With the soft window light you may need 1/60 sec or slower. Use a tripod to avoid shake. If you are using a lamp, you can often go up to 1/125 sec.
Set the camera to manual mode. That way you lock the exposure and white balance for the whole session. This prevents colour shifts between shots.
For colour, switch the white balance to ‘daylight’ or set a custom Kelvin value that matches your light source. A custom white balance ensures the colours stay true across all images.
Focus on the most important part of the product , usually the front centre. Use single‑point AF or manual focus and zoom in on the live view to confirm sharpness.
Here is a quick reference from camera settings guidet hat summarises the ideal values for most home shoots.
And for a deeper dive into the technical side, see the master settings guide. It explains why you want a low ISO and a mid‑range aperture for product work.
Below is a short video that shows how to set up your camera for product shots. Watch the steps and pause to apply them to your own gear.
Remember to shoot in RAW if your camera allows it. RAW files keep all the detail and give you latitude when you edit later.
Finally, write down the settings on a sticky note and place it on the tripod. This habit saves you from resetting everything when you change the product.
Step 4: Styling, Backdrops & Props
Styling makes a product look appealing. Keep the scene simple , one hero item, a couple of supporting props, and a clean background.
Choose a backdrop that matches the brand colour. White works for most e‑commerce sites because it removes distraction. If the product is colourful, a neutral grey or pastel can make it pop.
Use a table cloth, a sheet of matte paper or a piece of canvas as your background. Avoid glossy surfaces that reflect the product.
Props should add context, not clutter. For a candle, a small wooden block and a soft fabric work. For jewellery, a plain stand or a piece of bark can give a natural feel.
Arrange the items using the rule of odds , three objects look more natural than two or four. Vary the heights by using small books or blocks under the items.
Check the edges of the product. If any part hangs over the edge of the backdrop, lift it slightly to keep the line clean.
When dealing with reflective items, use a polarising filter or tilt the product so the glare moves away from the camera. A simple piece of white cardboard can also act as a flag to block reflections.
Take a test shot and look at it at 100% on your screen. Spot any dust, fingerprints or stray threads. Fix them now rather than later.
Here is a quick checklist from the product photography guide hat you can print and keep on hand during each shoot.
Finally, remember to keep the styling consistent across a range of products. Consistency builds brand trust and makes the shop look professional.
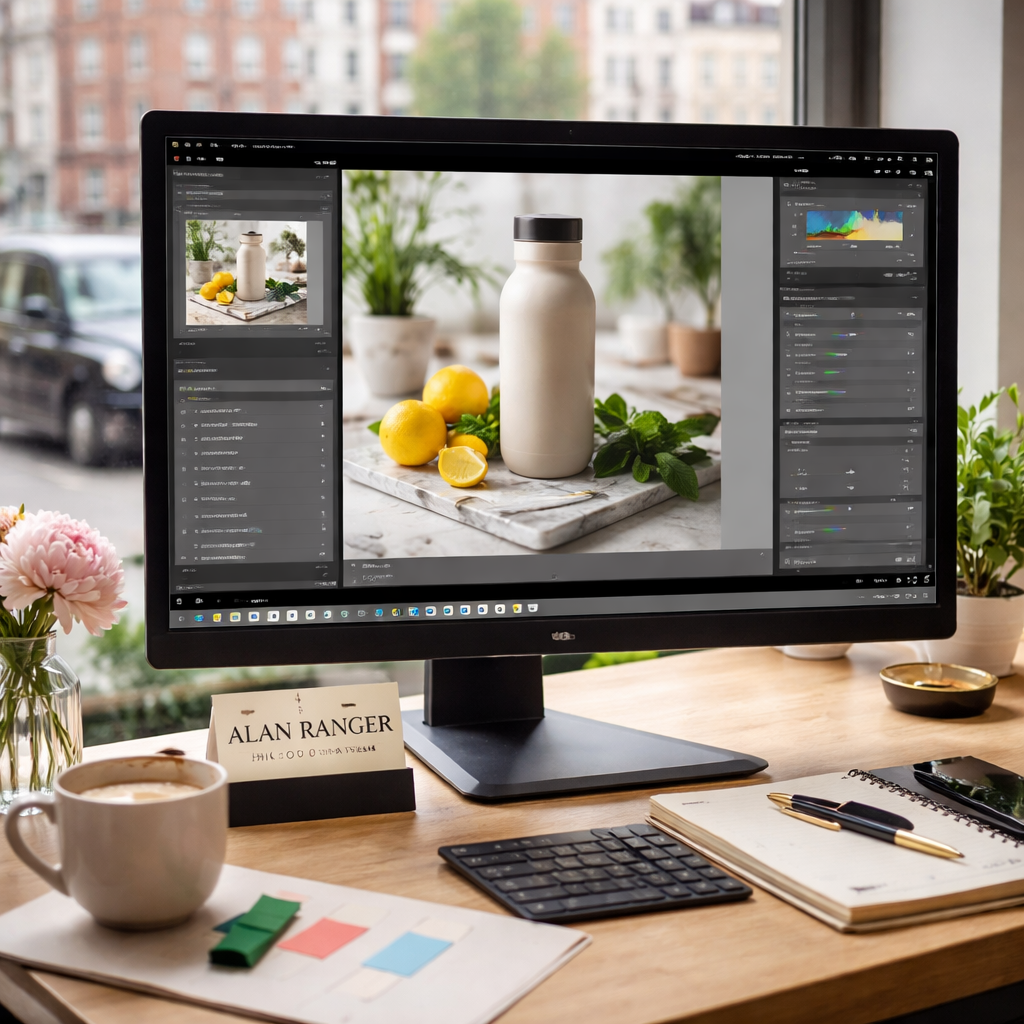
Step 5: Basic Post‑Processing Techniques
After the shoot, the work moves to the computer. The goal is to make the image look clean, bright and true to the product.
First, import the RAW files into Lightroom or a similar editor. Keep the folder structure you set up earlier , it helps you find the right file fast.
Start with basic exposure tweaks. Raise the shadows a bit if the product looks too dark, and pull down the highlights to keep the white background pure.
Next, set a custom white balance using the grey card you placed in the first shot. Apply that balance to all images in the batch.
Use the crop tool to remove any unwanted space. Keep a little breathing room around the product, but avoid cutting off parts.
Now sharpen the image. A modest amount of detail enhancement (around 25‑30) works well for most items. Be careful not to over‑sharpen, which can create halos.
Finally, export the files as JPEGs in sRGB colour space, sized to the dimensions required by your marketplace (usually 2000‑3000 px on the long edge). Use a quality setting of 80‑90 to keep the file size manageable.
For a more detailed workflow, see the post‑processing workflow that walks you through each step.
If you want to add a creative touch, read about colour grading tips. A subtle colour grade can give your images a signature look without breaking brand consistency.
Keep a saved preset for exposure, white balance and sharpening. Applying the preset to each new shoot saves time and guarantees consistency.
When you finish, back up the original RAW files to an external drive or cloud storage. That way you can revisit the images if you need a new crop or a different background later.
Frequently Asked Questions
What equipment do I need for diy product photography?
For a solid start you need a camera or a good phone, a sturdy tripod, a light source (window light or a cheap LED lamp), a white backdrop or sweep, a reflector (foam board or white card) and a few simple props. A laptop for editing and a free Lightroom preset round out the kit. This list keeps costs low while still delivering professional‑grade images.
Can I do product photography at home without a studio?
Yes, you can. A spare table by a north‑facing window gives you soft, even light. Add a white sheet as a diffuser and a piece of foam board as a reflector and you have a full studio in a living room. The key is to control the light and keep the background clean.
What is the best lighting for diy product photography?
Natural window light works for most beginners because it is free and soft. Position the product at a 45° angle to the window and use a white reflector opposite the light. If you need more control, a cheap daylight LED panel with a diffuser can replace the window.
What background works best for product photos?
A plain white sweep is the safest choice for e‑commerce because it removes distraction. For lifestyle shots you can use a muted colour paper, wood grain or fabric that matches the brand. Keep the background free of patterns that compete with the product.
Can I use a phone for diy product photography?
Modern phones have great sensors and can shoot RAW. Use the phone’s pro mode, set ISO low, tap‑focus on the product and keep the phone steady on a tripod or a stack of books. Add the same lighting tricks as you would with a camera and the results can look very professional.
When should I hire a professional product photographer?
Hire a professional when you need very high resolution for large print, when the product has complex reflections that need specialised light rigs, or when you lack the time to set up and edit many images. A commercial photographer can also help you create a consistent look across a full catalogue quickly.
Wrap‑Up & Next Steps
We have covered everything you need to start diy product photography at home. From planning the shoot, setting up affordable lighting, locking in the right camera settings, styling the scene and polishing the final image , each step builds on the last.
If you follow the checklist and keep the workflow simple, you will produce images that look like they were shot in a professional studio. That can boost sales on Etsy, boost your brand on Shopify and make your product stand out on Amazon.
Ready to try it? Pick one product, set up the light, shoot a few test shots and edit them using the preset we described. If you need more guidance, explore the selecting the ideal product photographer article for tips on when to go pro.
Good luck, and remember: clear light, steady camera and a tidy background are the three pillars of great diy product photography.