
How to Master a Product Photography Lighting Setup in 2026
Table of Contents Show
Good light can turn a dull product shot into a shop‑floor bestseller. Most small businesses miss that one thing and end up with flat, lifeless images. In this guide you’ll learn how to build a reliable product photography lighting setup, pick the right gear, position lights, tame reflections and keep every shot consistent.
Looking for expert help? Hire a professional photographer in Coventry to get perfect lighting every time.
We’ll walk through four clear steps. You’ll see real‑world examples, simple tables and quick tip lists. By the end you’ll be able to set up a studio that works for jewellery, cosmetics, tech gadgets or any other item you sell online.
And because the data matters, here’s a quick look at what recent research says about lighting rigs used by photographers today.
Comparison of 20 product photography lighting setups, April 2026 | Data from 3 sources
Comparison of 20 Product Photography Lighting Setups
A practical summary of common product-lighting rigs, the key components they use, and where each setup works best.
| Name | Key Components | Recommended Modifiers | Ideal Use Case | Best For | Source |
|---|---|---|---|---|---|
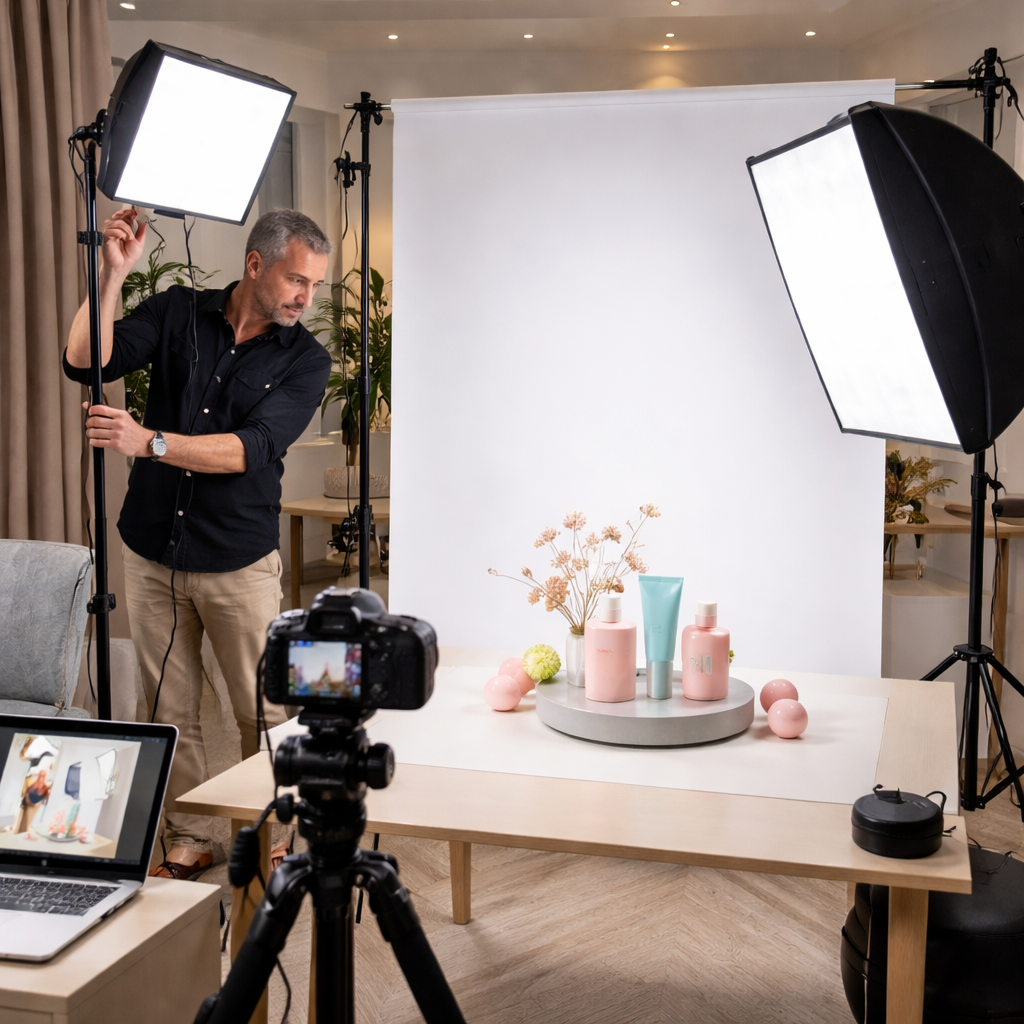
| The Ultimate Product Photography Lighting Setup | White shiny acrylic plate on table; vertical white acrylic plate 100cm behind table; 90x120cm Softbox with Siros 800S set to 400J; Octabox 150 with Siros 400S set to 132J; Octabox 75 with Siros 400S set to 283J; white or black cardboard for contrast control | 90x120cm Softbox; Octabox 150; Octabox 75; white or black cardboard | Medium-sized ecommerce products such as shoes, cosmetics, perfume; works on shiny, dark, or white objects | Complete e-commerce studio | broncolor.swiss |
| Three-Point Lighting Setup | Key light, fill light, backlight | — | Studio product photography for fashion, electronics, or items needing extra visual pop | High-impact studio shots | squareshot.com |
| Natural Light Setup | Large window or glass door; sheer curtains or scrims for diffusion; white foam board reflector | Sheer curtains, white sheets, scrims, foam board reflector | Lifestyle shots and cost-effective product photography with an organic feel | Organic lifestyle shots | squareshot.com |
| Natural light with umbrella-shaped diffuser | Sunlight; umbrella-shaped diffuser; stand (optional) | Umbrella-shaped diffuser | Outdoor product or portrait shots where harsh sun needs softening | Outdoor softening | photographylife.com |
| Off-camera flash with diffuser and reflector | Off-camera flash; diffuser; reflector | Diffuser; reflector | Studio product photography needing controlled shadows and highlights | Controlled studio shadows | photographylife.com |
| Flash upward to ceiling reflector | On-camera flash; white ceiling (acts as reflector) | Ceiling reflector | Indoor product photography where space is limited | Space-limited indoor shoots | photographylife.com |
| Flash with snoot | Flash; snoot | Snoot | Highlighting specific product details or creating a black background | Dramatic highlight isolation | photographylife.com |
| Flash with coloured gels | Flash; coloured gels | Coloured gels | Colour correction or creative colour effects in product photography | Creative colour effects | photographylife.com |
| LED panel constant light | LED panel; diffuser | Diffuser | Product photography where continuous light and real-time adjustments are preferred | Real-time continuous adjustments | photographylife.com |
| On-camera flash with circular diffuser (macro) | On-camera flash; large circular diffuser | Circular diffuser | Macro photography of small products or subjects | Macro detail | photographylife.com |
| Flash into umbrella | Flash; umbrella | Umbrella | Soft, even lighting for small product shots | Even small-product lighting | photographylife.com |
| Natural light with reflector | Reflector; stand (optional) | Reflector | Filling shadows in outdoor product photography | Shadow fill outdoors | photographylife.com |
| Softbox with Continuous Light | Softbox; continuous light | Softbox | Beauty products | Beauty product softness | squareshot.com |
| Umbrella Lighting Setup | Umbrella | Umbrella | Large items like furniture | Large-item coverage | squareshot.com |
| Continuous LED Panel | LED panel (Godox SL60W or FV150) | — | Adjustable, cool operation for versatile studio lighting | Low-power versatile lighting | squareshot.com |
| Strobe Light Setup | Strobe light (Godox AD600BM) | — | Crisp, detailed shots requiring pro-level power | High-power crisp detail | squareshot.com |
| Ring Light Setup | Ring light | — | Jewellery and cosmetics photography | Jewellery & cosmetics highlights | squareshot.com |
| Light Tent Setup | Light tent (light box) | — | Small products such as jewellery or electronics | Tiny product isolation | squareshot.com |
| Two-Light Setup | Key light (main light); fill light | — | Balanced detail and depth for polished professional look | Balanced professional look | squareshot.com |
| One-Light Setup | Single light | — | Minimalist or moody looks | Minimalist mood | squareshot.com |
The study shows that only a few rigs list power specs, yet most rely on diffusers. That tells us most photographers care more about quality of light than raw wattage. In the sections below we’ll use those insights to pick gear that works for you.
Step 1: Compare Essential Light Sources
When you start a product photography lighting setup you first need to decide how you will light your subject. There are three main families: continuous LEDs, flash (strobe) units and natural light. Each family has pros and cons.
Essential Light Sources for Product Photography
A quick comparison of the three main lighting routes and where each one fits best in a product photography workflow.
| Source | Power | Colour Control | Portability | Typical Use |
|---|---|---|---|---|
| Continuous LED panel (e.g., Godox SL60W) | 60W (research shows 60W is common) | Adjustable Kelvin | Lightweight, plug-in | Real-time tweaks, video, small-product work |
| Off-camera flash (e.g., Godox V860iii) | 200W–400W flash output | Consistent colour, TTL sync | Battery-powered, moderate size | Hard shadows, fast sync, high-detail |
| Natural window light | — | Daylight (approx. 5500K) | Free, no gear | Soft lifestyle shots, low-budget |
Here’s why the differences matter.
Continuous LED:Lets you see exposure on the camera screen. Great for beginners who need instant feedback.
Flash:Gives you a burst of light that can freeze motion. Ideal for shiny items that need crisp detail.
Natural light:Is free and soft when diffused. Perfect for a relaxed, organic feel, but you lose control over time of day.
And remember the research note , only two setups listed power. That means most users focus on light quality, not raw wattage. Choose the source that lets you shape quality first.
For a deeper dive into beginner kits, on essential lighting kits for students. It breaks down price, size and what each kit includes.
But if you prefer a modern LED with high colour accuracy, the review on best lighting kits 2026 shows why the Bi‑Color LED Panel Duo is popular among new e‑commerce sellers.
And if you want to see a live demo of a simple LED rig, watch the video below.
Now that you know the light families, let’s pick the gear that fits your space and budget.
Step 2: Choose the Right Gear for Your Studio
Gear is the backbone of any product photography lighting setup. You don’t need a million dollars worth of equipment, but you do need the right basics.
First, a sturdy light stand. A solid stand keeps your lights steady and lets you raise or lower them to change the light size on the product.
Second, a modifier. Softboxes are the most versatile , they turn a harsh point source into a large, even light. If you prefer a cheaper route, a white sheet or a DIY diffuser works just as well for small items.
Third, a reflector. A 5‑in‑1 reflector gives you white bounce, silver bounce, gold, black and a diffuser. It’s a cheap way to fill shadows without adding another light.
Here’s a quick gear checklist for a starter studio:
1 × continuous LED panel (60 W) or 1 × off‑camera flash.
1 × softbox (at least 60×90 cm) with Bowens mount.
1 × light stand (minimum 2 m height).
1 × 5‑in‑1 reflector.
1 × white smooth paper roll for background.
Tripod for camera stability.
And don’t forget a power strip with surge protection , a flickering light can ruin a shoot.
When you’re ready to see the full list of gear, the product photography setup page gives a printable checklist you can print and tape to your wall.
Need inspiration? Explore our product photography ideas for creative setups.
But gear alone won’t solve reflections. That’s where modifiers come in, which we’ll cover next.
For those who like a quick look at what a pro studio uses, the article on essentialphoto.co.uk lists a few kits that include softboxes and reflectors together.
And if you’re curious about the newest LED tech, the GVM LED review shows why colour temperature sliders matter for brand consistency.
Notice how the LED sits just a foot above the table. That distance gives a soft fall‑off while keeping the light source small enough to avoid harsh glare.
With gear sorted, you can move on to positioning lights for the look you want.
Step 3: Position Lights and Use Modifiers Effectively
Position is where theory meets practice. The size of your light source decides whether you get hard or soft light. A big softbox creates soft, gradual shadows. A bare flash creates hard, crisp shadows.
Here’s a simple rule: the closer the light, the softer it looks. If you move the softbox twice as far away, the shadows become twice as hard.
Let’s look at three common setups.
Single‑light, front‑facing
This is the easiest start. Place the light 45° to the left of the camera, a foot above the product. Use a softbox and a reflector opposite the light to fill the shadow side.
Result: even illumination, minimal shadows, great for white‑background shots.
Two‑light, side‑and‑fill
Key light stays at 45°, fill light sits on the opposite side at a lower intensity. Use a smaller softbox or a bounce board for the fill.
Result: a bit of depth, subtle shadow that adds shape , perfect for textured items like leather bags.
Three‑light, rim light for gloss
Key and fill as above, plus a backlight aimed at the back of the product. Use a grid or snoot to keep the rim narrow.
Result: a thin highlight that separates the item from the background, ideal for jewellery or metallic gadgets.
The visualeducation.com article stresses that understanding the inverse square law helps you predict how light falls off with distance. A light twice as far away is four times less intense. That’s why moving a softbox just a few inches can change the look dramatically.
And don’t forget to test with your camera’s histogram. If the right side spikes, you’re clipping highlights , a common problem with glossy items.
For more on using reflectors and diffusers, on product photography lighting tips. It walks you through scrims, softboxes and when to use a black card.
But if you want a quick cheat sheet, the selecting the ideal product photographer page lists the exact modifiers we just discussed.
Step 4: Fine‑Tune, Test, and Capture Consistent Results
Consistency is the secret behind professional e‑commerce catalogues. You want every shoe, every bottle, every watch to look like it belongs to the same shoot.
Start by writing down your settings: light height, distance, power level, camera ISO, aperture, white balance. Keep a small notebook or a digital note on your phone.
Next, run a test shot. Check three things:
Exposure , use the histogram to make sure no clipping.
Colour , compare the product’s colour to a reference swatch or a grey card.
Reflection , look for hot spots on shiny surfaces.
If the test fails, adjust one variable at a time. For example, move the light 2 inches closer to soften shadows, or add a black card behind a metallic watch to curb reflections.
When you’re happy with the test, lock the light stands with a bit of gaffer tape. That stops accidental movement.
During the shoot, use a remote trigger or the camera’s timer. That removes camera shake and lets you keep the composition exact.
After the shoot, export a few RAW files to a calibrated monitor. Adjust exposure, white balance and contrast in Lightroom. Use the same preset for every image , that guarantees uniform colour across the range.
Need a visual guide? The lighting guide on SquareShot shows side‑by‑side before‑and‑after examples of fine‑tuned lighting.
And if you ever feel stuck, the product photography guide offers a printable checklist that you can tick off as you go.
Finally, back up your images on two separate drives. One on‑site, one cloud‑based. That protects your work and lets you revisit the raw files if you need to re‑process later.
Conclusion & Next Steps
We’ve covered the whole journey , from picking a light source, through buying the right gear, to positioning lights, tweaking settings and keeping everything consistent. A solid product photography lighting setup doesn’t need a million‑pound budget, just a clear plan and a bit of practice.
If you’re ready to try it out, start with a single LED panel, a softbox and a reflector. Record your settings, test, and refine. When you hit a wall, you can always call acommercial photographerfor a quick studio session , they can show you the same techniques in a professional space.
And don’t forget to download the free photo course that walks you through the workflow step‑by‑step. Happy shooting, and may your products always look their best.
FAQ
What is the best lighting setup for product photography?
The most reliable setup is a two‑light arrangement with a key softbox at 45° and a white reflector opposite it. Pair that with a consistent background and low ISO (100‑200). This gives even light, soft shadows and colour accuracy for most e‑commerce items.
Do I need two lights for product photography?
Two lights are ideal because they let you shape both the main highlight and the fill. A single light can work for minimalist looks, but you’ll often end up with harsh shadows or uneven colour, especially on textured or reflective items.
Can I use natural light for product photography?
Yes. A large window with sheer curtains gives soft, diffused light that works well for lifestyle shots. You’ll need a reflector to fill shadows and a white sweep to keep the background clean. The downside is that the light changes throughout the day, so you must shoot at the same time for consistency.
How do I stop reflections in product photography?
Use a large softbox or diffuse a desk lamp to soften the light. Add a black card behind glossy items to absorb stray highlights. A white reflector on the opposite side fills in shadows without creating new reflections. Position the product slightly off‑centre to move the hot spot out of view.
What light is best for white background product photos?
A soft, even light from a large modifier (softbox or LED panel with built‑in diffuser) placed at 45° works best. Pair it with a white reflector to bounce light into the shadow side. Keep the background a few inches behind the product to avoid spill and keep the background pure white in the histogram.
When should I hire a professional product photographer?
If you need a large catalogue, have reflective or highly detailed items, or lack time to fine‑tune lighting, a professional can save you weeks of work. They have calibrated equipment, studio space and the know‑how to get consistent results fast. For a small batch of items, a DIY setup may be enough.