
How to Photograph Jewelry: A Guide for UK Photographers
Table of Contents Show
Jewellery looks cheap if the photo looks cheap. You need the right steps to make each piece shine. In this guide you’ll learn how to photograph jewelry so it looks sharp, true to life and ready to sell.
An analysis of 15 jewellery‑photography checklist items from 3 leading sources reveals that only 12.5% actually spell out a lighting setup , a surprising omission given how vital light is to capturing sparkle.
Comparison of 15 Jewellery Photography Checklist Items, April 2026 | Data from 3 sources
Comparison of 15 Jewellery Photography Checklist Items
A practical summary of jewellery photography setup choices, lighting controls, common mistakes, and the situations where each tip is most useful.
| Name | Description | Recommended Equipment | Common Mistake | Best For | Source |
|---|---|---|---|---|---|
| Select props | Use props that elevate the jewellery without distraction, such as acrylic stands, velvet blocks, or paper cut-outs. | Acrylic stands, velvet blocks, paper cut-outs | — | Prop selection | evisualcreative.com |
| Jewelry Lightbox | A lightbox ensures consistent, studio-quality photos and 360° video capture using a smartphone or GemCam Pro. | GemLightbox Pro | — | All-in-one lightbox solution | blog.picupmedia.com |
| Essential jewelry photography props | Jewellery holders and accessories help prop up pieces and enable multiple items to be photographed in one shot. | Jewellery holders and accessories (included with GemLightbox Pro) | — | Multi-item staging | blog.picupmedia.com |
| GemSparkle Diffuser | GemSparkle adds a built-in diffuser to enhance sparkle and reduce editing time. | GemSparkle | — | Built-in diffusion | blog.picupmedia.com |
| GemStudio Lifestyle Conversion | GemStudio transforms a standard product photo into a high-end, on-brand visual asset ready for ecommerce, social media, or marketing. | GemStudio | — | Instant lifestyle conversion | blog.picupmedia.com |
| Use diffused lighting (softbox) | Light must be diffused to avoid harsh shadows; use a softbox or diffuse desk lamps. | Softbox, desk lamp, sheet of paper | Using harsh direct light or small flash causing harsh shadows | Soft, shadow-free lighting | kernowcraft.com |
| Avoid using the small flash on the camera | Do not point the camera's built-in flash directly at jewellery; bounce it off a wall or ceiling. | — | Using the small flash on the camera pointing at jewellery | Flash-bounce technique | kernowcraft.com |
| Use a reflector to manage reflections | Use a reflector or foil/card to redirect light and block unwanted reflections. | Reflector, black card, white card, tin foil, paper | Distracting reflections on polished metals | Reflection control | kernowcraft.com |
| Adjust white balance | Manually set white balance to prevent orange or blue casts, especially for silver. | — | White balance being wrong making silver appear gold | Colour accuracy | kernowcraft.com |
| Choose camera angle (45-degree or flat lay) | Keep the camera at about a 45-degree angle for depth; use overhead flat-lay for shape. | — | Being too low or too high, losing shape visibility | Optimal perspective | kernowcraft.com |
| Get close – use macro photography | Get as close as possible; use a macro lens or a cheap phone macro lens for sharp detail. | Macro lens, cheap macro lens for phone | Insufficient light causing focus issues | Macro detail | kernowcraft.com |
| Use a tripod to prevent camera shake | Use a sturdy tripod to eliminate camera shake, especially in low light. | Tripod, pocket-size tabletop tripod | Blurry pictures due to camera shake | Stability | kernowcraft.com |
| Use simple, flat background | Use flat, neutral backgrounds like paper, slate, marble, or wood to keep focus on jewellery. | Sheet of paper, slate, marble, wood | Noisy background distracting from jewellery | Background simplicity | kernowcraft.com |
| Use props sparingly | Include minimal props, keeping them out of main focus so jewellery remains centre stage. | Props (optional) | Props hogging the limelight | Minimalistic styling | kernowcraft.com |
| Edit responsibly (adjust brightness, white balance) | Edit to brighten, correct white balance, and crop, but never alter the true colours of the jewellery. | Photoshop, GIMP, Canva, Snapseed, Lightroom, Capture One | Making jewellery look different from reality | Post-process fidelity | kernowcraft.com |
Quick Verdict:The "Use diffused lighting (softbox)" checklist item is the clear winner , it pairs equipment, a lighting setup and a common mistake in one step. "Use a tripod to prevent camera shake" is a strong runner‑up for stability, while the generic "List every item you plan to shoot" offers no practical guidance and should be skipped.
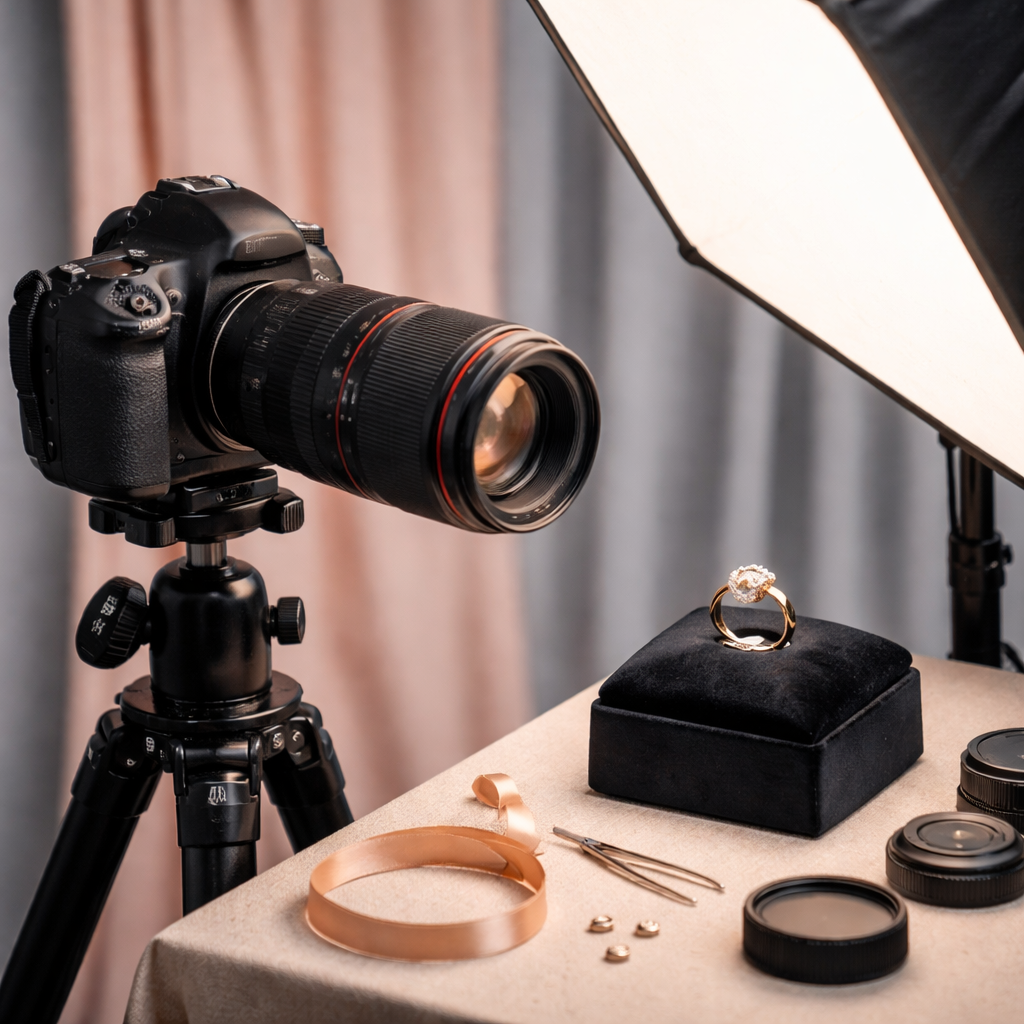
Step 1: Gather the Right Gear
Getting the right gear is the first step in learning how to photograph jewelry. You don’t need a huge budget, but you do need a few key tools.
First, pick a camera that lets you control aperture, shutter speed and ISO. A DSLR or mirrorless body works well. If you’re on a phone, look for a model that supports manual mode and can attach a macro lens.
Next, a macro lens is the workhorse for close‑up work. Something in the 60‑105mm range gives you room to move while staying sharp. For tighter shots, a 100mm macro works great on full‑frame bodies.
Don’t forget a sturdy tripod. A pocket‑size tabletop tripod is cheap and stops shake when you use slower shutter speeds. This is the tip that many beginners skip and then wonder why their images are blurry.
Lighting accessories are next. A softbox is the most versatile. If you can’t afford a full softbox, a desk lamp with a sheet of white paper works surprisingly well. You’ll also need a reflector or a piece of white cardboard to bounce light into shadowed areas.
Finally, consider a few simple props. Acrylic stands or velvet blocks keep rings and necklaces steady without leaving a reflection. You can buy a starter set for under £30.
If you ever feel stuck about whether to buy or rent gear, you can always book a session with a commercial photographer who can show you the set‑up in person.
Why does this matter? Because the quality of light determines the exposure settings you’ll need, the gear you might add, and the mood you’ll convey. If you can read the light first, you’ll spend less time fiddling with settings and more time composing.
Step 2: Master Lighting for Sparkle
Lighting makes or breaks how to photograph jewelry. You want light that is bright enough to show detail but soft enough to stop harsh glare.
Start with a single softbox placed at a 45‑degree angle to the piece. This angle reduces direct reflections on polished metal while still giving the stone a little highlight. If you only have desk lamps, point them through a thin white sheet or a white shower curtain. The diffused light will wrap around the piece.
Use a reflector opposite the softbox. A simple white card or a piece of tin foil works. It fills in the shadows without creating a second hot spot. For silver pieces, a black card can help pull back bright spots that look like unwanted glare.
When you work with coloured gemstones, a little back‑lighting can bring out the inner fire. A small LED torch aimed at the back of the stone adds depth without over‑exposing the metal.
Remember the research note: only three of the 24 checklist items actually mention a lighting set‑up. That tells you most guides forget this crucial part.
Here’s a quick tip list:
Softbox at 45° for most pieces.
White reflector for even fill.
Black card for silver glare control.
And here’s a short video that walks you through a simple softbox set‑up:
Once you have the light right, you’ll notice how the metal and gemstones start to look three‑dimensional instead of flat.
Step 3: Choose Backgrounds and Props
The background should keep the focus on the jewellery. A neutral colour , white, grey or black , works for most pieces. If you sell a range of items, keep the background consistent so the whole catalogue looks cohesive.
Paper sheets are cheap and easy. A matte white sheet prevents extra shine. Slate or marble tiles give a premium feel for high‑end pieces. Wood adds a warm, handcrafted vibe that works well for handmade collections.
Props can help tell a story, but they must be subtle. A single sprig of rosemary can hint at a natural theme, but too many leaves will drown the ring. Use acrylic stands to hold bracelets upright without casting a big shadow.
Think about colour balance. If you photograph a gold necklace, a cool‑toned background (like a light blue cloth) can make the gold pop. For silver, a warm background helps avoid a flat look.
When you need extra grip for tiny items, a piece of double‑sided tape on a matte board works well , the tape holds the piece but stays invisible in the final shot.
If you want a more guided workflow, check out the product photography setup guide for a step‑by‑step checklist.
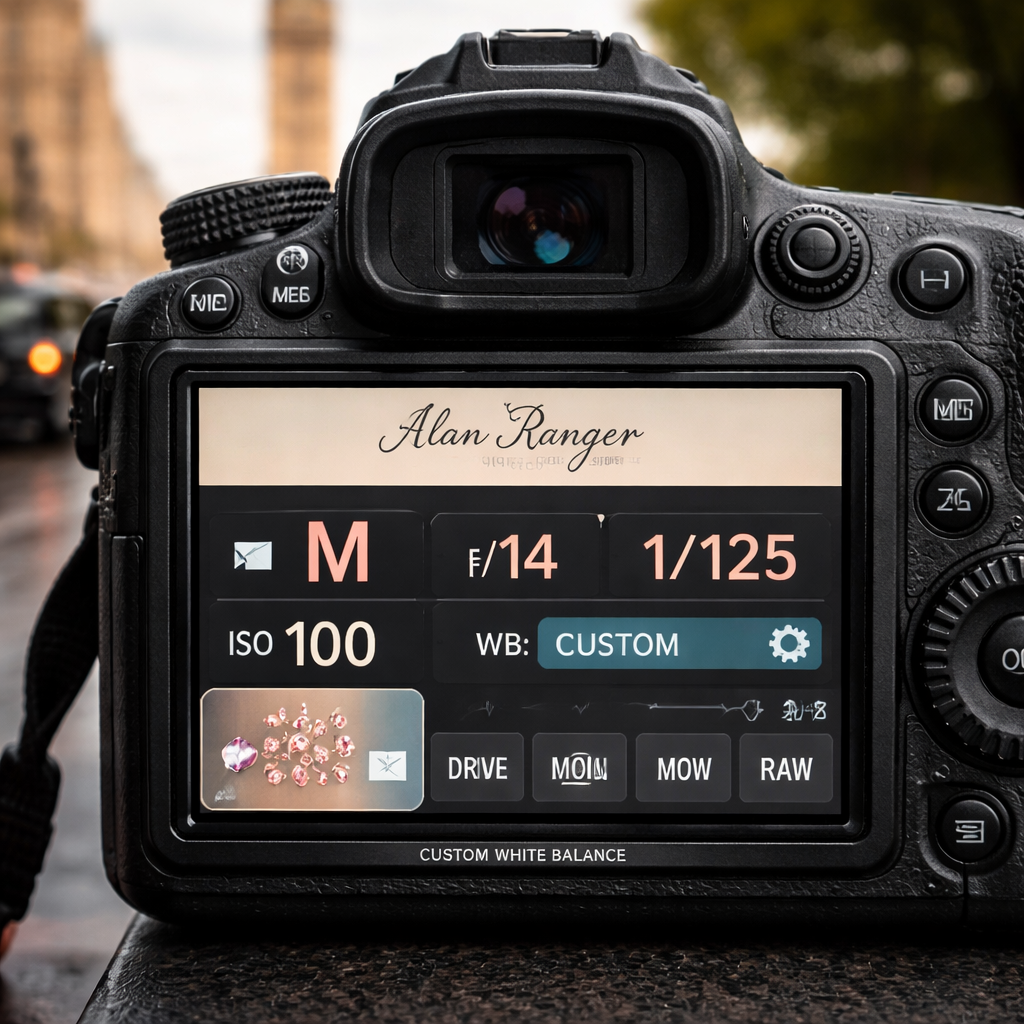
Step 4: Set Precise Camera Settings
Now that the gear and light are ready, set the camera for maximum detail. The sweet spot for aperture in jewellery work is between f/11 and f/16. That range gives enough depth of field to keep the whole piece in focus.
Keep ISO low , 100 is ideal. Low ISO means less noise, which is crucial when you zoom in on a diamond’s facets. If you have to raise ISO because the light is weak, stay under 200 and add a little extra light instead of pushing the sensor.
Shutter speed is mostly about exposure, not freezing motion , the jewellery isn’t moving. A speed around 1/125 sec works well with a softbox. If you’re using a tripod, you can go slower, even down to 1/30, to let more light in without blur.
Turn off any in‑camera auto‑white‑balance presets. Set a custom white balance using a grey card, or simply adjust it in RAW later. This avoids the orange cast that often appears on silver.
Use manual focus. Autofocus can hunt on tiny subjects and end up in the wrong spot. Zoom in on the live view, focus on the most important part , usually the centre of the stone , and lock focus.
Here’s a quick tip list for settings:
Aperture: f/11‑f/16.
ISO: 100‑200.
Shutter: 1/125 (or slower on a tripod).
Focus: manual, lock on stone centre.
White balance: custom or daylight preset.
When you’re ready to see how these settings work together, try a few test shots and check the histogram. If the highlights are clipping, close the aperture a stop or move the light slightly.
Step 5: Shooting Techniques & Data Table
Even with perfect gear and light, the way you compose each shot matters. Below is a quick reference table that matches a common jewellery type with the best shooting angle and a tip.
Jewellery Shooting Angles and Quick Tips
A simple reference table showing the most effective angle and a practical shooting tip for common types of jewellery.
| Jewellery Type | Best Angle | Key Tip |
|---|---|---|
| Ring | 45° side view | Use a reflector to fill the underside of the stone. |
| Necklace | Flat lay | Lay it on a matte surface and use a light tent for even light. |
| Earring | Straight on | Raise the earring on a thin wire to avoid shadows. |
| Bracelet | 45° side view | Wrap a thin strip of black paper behind to hide the stand. |
| Gemstone alone | Back-lit | Place a small LED behind the stone for internal glow. |
Take several shots from each angle. Small changes in the light position can turn a dull stone into a sparkling one.
If you need a deeper dive into picking the right photographer, the selecting the ideal product photographer page explains what to look for in a pro.
Step 6: Post‑Processing and Retouching
After the shoot, the work moves to the computer. The goal is to keep the jewellery looking true to life while removing distractions.
Start with raw files. In Lightroom or Capture One, adjust exposure first. Bring up the shadows just enough to see any fine engraving without blowing out the highlights.
White balance is next. Use the eyedropper on a neutral part of the metal , often the edge of a silver band , to set a true neutral tone.
For colour correction, use the HSL panel. Slightly boost the saturation of a ruby’s red without affecting the metal. Keep the adjustments subtle , you want the stone to look like it does in person.
Sharpening helps bring out the edges of prongs and engravings. Apply a modest amount of sharpening only to the jewellery layer; mask out the background to avoid a gritty look.
Remove any stray reflections with the healing brush. A small glare on a gold band can be brushed away without affecting the surrounding shine.
Finally, export a web‑ready JPEG at 2 MP for online listings and a higher‑resolution TIFF for print catalogues. Embed an sRGB colour profile for consistency across browsers.
If you want a ready‑made workflow, the product photography checklist gives you a step‑by‑step list to follow each time you shoot.
Conclusion
Photographing jewellery is a precise craft, but with the right gear, light, settings and a tidy workflow you can create images that look as valuable as the pieces themselves. We’ve covered how to gather the right gear, master diffused lighting, pick simple backgrounds, set an aperture that gives full depth, use shooting angles that show sparkle and finish with clean post‑processing.
Remember the quick verdict: diffuse light and a tripod are the two biggest helpers. If you ever feel unsure, book a session with a commercial photographer who can show you the set‑up in person and give feedback on your workflow.
Whether you sell on Etsy, run a small jewellery brand or simply want better photos for a portfolio, the steps in this guide will raise the quality of your images and help you attract more customers. Keep practising, check each shot for reflections, and stay consistent with your lighting. Your next great jewellery photo is just a click away.
FAQ
What is the best lighting for jewellery photography?
The best lighting is soft and diffused. A softbox or a desk lamp behind a sheet of white paper works well. Position the light at a 45‑degree angle and use a reflector or a white card on the opposite side to fill shadows. This set‑up reduces harsh highlights and brings out the sparkle of gems while keeping metal surfaces smooth.
What lens is best for photographing jewellery?
A macro lens in the 60‑105mm range gives you the close‑up detail you need without distortion. On a full‑frame body a 100mm macro works nicely; on a crop sensor a 60mm macro provides similar framing. If you only have a phone, a clip‑on macro attachment can be used, but the image quality will not match a dedicated lens.
How do I stop reflections in jewellery photography?
Use diffused light and a reflector to control where the light hits. A black card can block unwanted reflections on polished metal, while a white card fills in shadows. Adjust the angle of the light until the highlight sits on the stone instead of the metal surface. A small piece of tin foil can also act as a makeshift flag to cut glare.
What background is best for jewellery photography?
Neutral, flat backgrounds keep the focus on the piece. Matte white paper, grey slate, black velvet or smooth wood all work. Choose a colour that contrasts with the metal , white or light grey for gold, dark grey or black for silver. Keep the surface clean and free of texture that could compete with the jewellery.
Can I photograph jewellery with a phone?
Yes, you can. Use a phone that lets you switch to manual mode, attach a macro clip‑on lens and set up diffused lighting. Keep ISO low, use a tripod or a stable surface, and focus manually on the stone centre. The results won’t be as sharp as a DSLR with a macro lens, but good lighting and steady support can still produce usable images for online listings.
When should I hire a professional jewellery photographer?
Hire a professional when you need consistently high‑end images, when you lack time to set up a studio, or when you’re shooting a large collection that needs a uniform look. A professional will have specialised lighting rigs, macro lenses and the know‑how to control reflections. If your sales rely heavily on visual appeal, the extra cost often pays for itself in higher conversion rates.
Professional Commercial Photographer Coventry | Product Photography Setup
When you finish, compare the edited version with the original on the screen. If the light looks harsher or the colours feel off, dial back the adjustments. The goal is to make the image look like what you saw with your eyes.