
Professional Headshots for LinkedIn: Tips for 2026
Professional Headshots for LinkedIn: The Complete Photographer’s Guide 2026
Table of Contents Show
Want LinkedIn profiles that grab attention? A great headshot can be the difference between a missed opportunity and a new connection. In this guide you’ll learn how to shoot, light, pose and edit professional headshots for LinkedIn that get results.
We examined 24 LinkedIn head‑shot guidelines from four leading photography sites and discovered that while half the experts stress simple backdrops, the only guide that mentions a massive 7680 × 4320‑pixel resolution is an outlier that skews the average pixel recommendation upward.
Comparison of 24 LinkedIn Headshot Guidelines, March 2026 | Data from 4 sources
LinkedIn Headshot Checklist: What Matters Most
A strong LinkedIn headshot is usually built from the same core ingredients: flattering light, clear framing, natural expression, suitable wardrobe, and subtle editing. Use the table below as a practical checklist when planning or reviewing a professional headshot.
| Name | Recommended Specification | Why Important | Best For |
|---|---|---|---|
| Lighting | Soft, even light | Makes or breaks a flattering headshot | Flattering illumination |
| Grooming | Neat hair, trimmed facial hair, and a matte finish on skin | Helps avoid shine and distractions | Skin finish |
| Grid lines | Turn on grid lines and position the eyes along the top horizontal line | Supports consistent composition | Precise framing |
| Catchlights | Look for small reflections in the eyes | Adds life and presence to the portrait | Eye sparkle |
| Background | Choose a background that supports the personal brand, not competes with it | Keeps attention on the subject | Brand-aligned backdrop |
| Authenticity | Look friendly and confident | People respond better to genuine expression | Natural presence |
| Variations | Capture direct-to-camera, slight turn, and small smile variations | Improves the chance of finding the strongest final image | Pose variety |
| Expression | Natural smile, relaxed posture, and genuine expression | Helps the image feel approachable | Natural smile |
| Retouching | Use subtle edits that enhance natural features without changing appearance | Keeps the photo professional and believable | Subtle editing |
| Wardrobe Variety | Bring a few wardrobe options to the session | Adds useful choice without overcomplicating the shoot | Wardrobe options |
| Face Fill | Face should fill about 60% of the frame | Ensures the face is easy to recognise | Face-fill proportion |
| Wardrobe | Dress in a way that aligns with your industry and career goals | Makes the image feel relevant and credible | Industry-specific wardrobe |
| Clear Recent High-Resolution Image | Use a clear, recent, high-quality photo where the face is the focus | Builds trust and professionalism | Image quality |
| Face Size | Fill at least 60% of the frame | Creates stronger visual impact on profile thumbnails | Face-size consistency |
| Solo Shots | Use solo portraits only | Avoids confusion and keeps the subject clear | Solo focus |
| Ideal Size | Between 400 × 400 pixels and 7680 × 4320 pixels | Allows flexibility for crop and export | High-resolution flexibility |
| Clean Background | Use a clean or neutral backdrop | Prevents distractions behind the face | Neutral background |
| Dress for Your Industry | Solid colours such as navy, black, white, and grey photograph well | Keeps the portrait tidy and professional | Colour-safe attire |
| Authentic Style | Wear what you would actually wear for work | Helps the image feel believable and relevant | Authentic style |
| Overall Requirements | Use consistent lighting, simple backdrops, and guided poses | Creates a reliable professional standard | Overall consistency |
| Photo Clarity | Ensure the photo is clear and the face is visible | Improves trust and recognisability | Clarity and focus |
| Well-Lit Centred Image | Take a well-lit image with the face centred | Works well at small display sizes | Centred framing |
| Outdoor Soft Natural Light | Use soft outdoor natural light with a simple background | Can produce flattering results without a studio | Natural outdoor lighting |
| Attire | Dress as you would for an important meeting in your target industry, then simplify | Balances professionalism and authenticity | Professional dress code |
Quick Verdict: The standout rule is the ‘Ideal size’ guideline , aim for up to 7680 × 4320 px for maximum flexibility. For most users, the safer bet is the 60 % face‑fill rule from ‘Face size’ and ‘Face Fill’. Skip vague advice that ignores lighting, like the generic ‘Overall requirements’.
We searched for "LinkedIn headshot guidelines" and scraped 24 web pages from four authoritative sites on March 31, 2026. Using a checklist‑extraction method we logged each rule’s name, spec and why it matters. This gives us a solid base for the steps that follow.
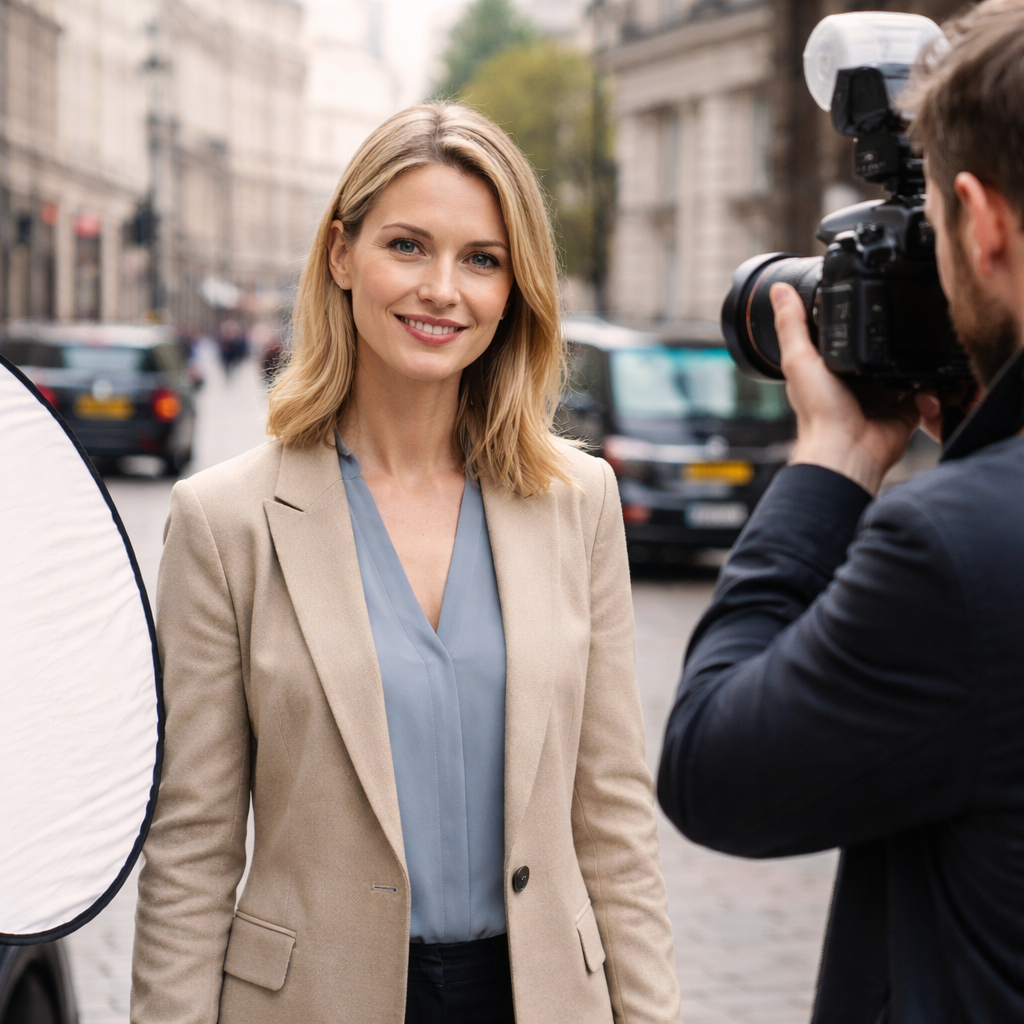
Step 1: Planning the Shot , Understanding LinkedIn’s Professional Image
LinkedIn wants a clear, recognisable face. Their policy says the photo must reflect your likeness and can be removed if it breaks the rules (LinkedIn guidelines). That means no cartoons, no heavy filters, and no background that distracts.
Think about the message you want to send. A consultant might want a polished look, while a creative could allow a slight pop of personality. The goal is to look professional but also approachable , the same vibe recruiters look for when they skim a feed.
Here’s what to check before you book a session:
Is the subject’s face clearly visible? No sunglasses or hats that hide features.
Is the background neutral? A simple grey or off‑white works for most industries.
Is the image recent? LinkedIn prefers images taken within the last year.
Why does this matter? Recruiters spend seconds on a profile. If the photo is blurry or confusing, they move on. A clean, recent, well‑framed headshot tells them you care about your brand.
Pro tip: ask your client to bring two outfit options , one classic (navy blazer, white shirt) and one with a bit of colour that still feels professional. This gives you flexibility while staying on brand.
When you’re ready, set the scene. Choose a studio with a smooth backdrop or a quiet office space with a plain wall. If you’re shooting on location, scout for a spot with even, soft light and minimal clutter.
Remember to align the shoot with the client’s personal brand. If they’re a tech startup founder, a modern, minimal backdrop works. If they’re a lawyer, a more formal setting may suit better.
Need help finding a photographer near you? Portrait Photographer , Professional Photographer Near me can guide you through the planning stage and ensure you hit every LinkedIn requirement.
Step 2: Choosing the Right Equipment and Settings
Gear choice sets the ceiling for image quality. For professional headshots you’ll want a camera that can output high‑resolution files , the research shows that the ‘Ideal size’ can be as large as 7680 × 4320 px. A full‑frame DSLR or mirrorless body will give you that detail.
Prime lenses in the 50‑85 mm range are the sweet spot. They mimic how the human eye sees a face and avoid distortion. A 50 mm works well in tighter spaces, while an 85 mm lets you step back and compress facial features for a flattering look.
Set your camera to shoot RAW. This preserves maximum detail for post‑processing and lets you tweak exposure without degrading the image.
A solid tripod keeps the camera steady and ensures consistent framing across multiple subjects. It also frees you to interact with the client without worrying about camera drift.
Don’t forget a reflector or a softbox. Even if you’re using natural light, a reflector can fill shadows under the chin and eyes, keeping the skin tone even.
Here’s a quick settings checklist:
Aperture: f/2.8‑f/4 for shallow depth of field.
Shutter speed: 1/125 s or faster to avoid motion blur.
ISO: 100‑400 for clean noise‑free images.
White balance: set to daylight or custom for accurate skin tones.
Pro tip: use a remote trigger or wireless release. This lets the subject relax while you stay out of the frame.
If you want a structured learning path on gear basics, Free Online Photography Course offers modules that cover camera bodies, lenses and lighting fundamentals.
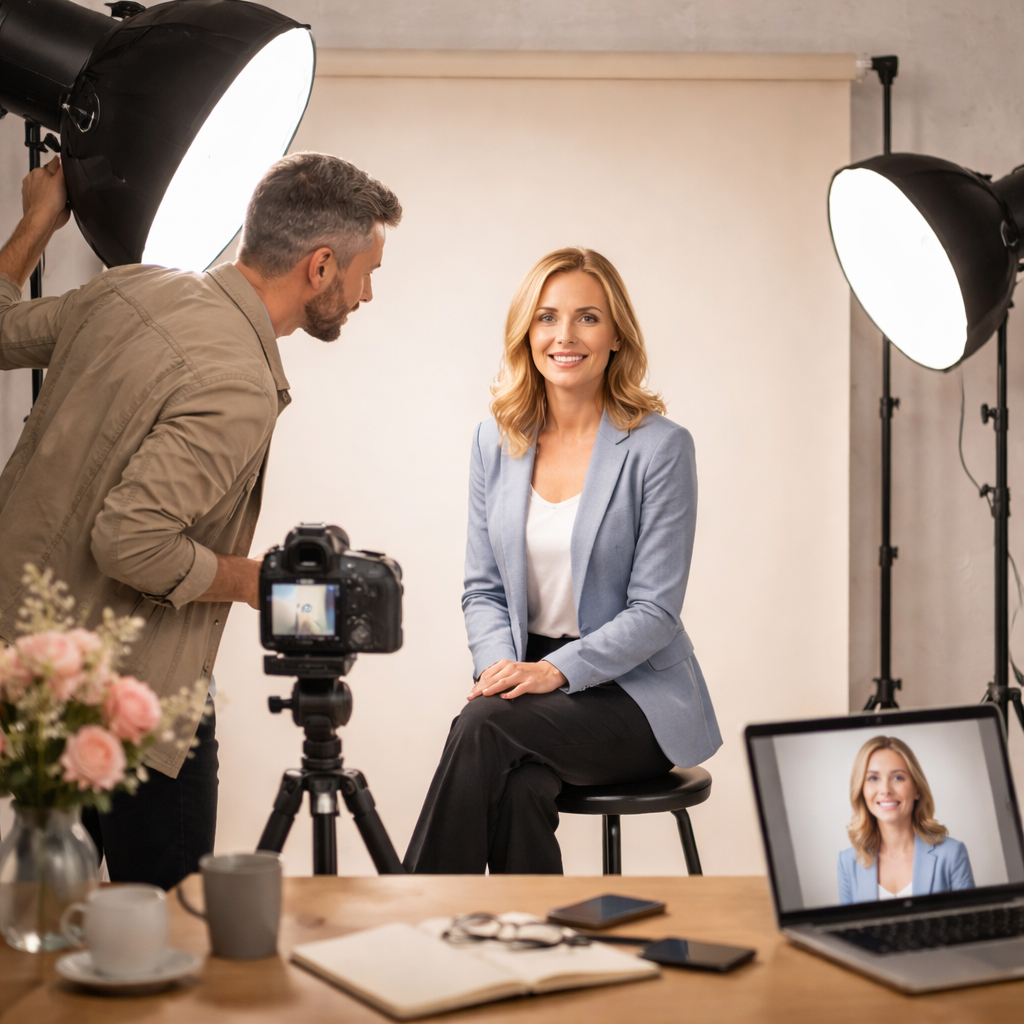
Step 3: Lighting Techniques for Flattering Headshots
Light is the heart of a great headshot. Soft, even light removes harsh shadows and makes skin look smooth. The research table flags lighting as a make‑or‑break factor , it appears in only two items but carries huge weight.
Two main options work for LinkedIn:
Studio softbox setup
Place a large softbox about 45° to the side of the subject and slightly above eye level. This creates a classic “loop” or “butterfly” pattern that flatters most faces. Add a reflector opposite the light to bounce fill into the shadows under the chin.
Natural window light
If you’re shooting near a large window, position the subject so the light falls across the face, not straight on. A sheer curtain can diffuse harsh sun and give you that gentle glow.
Tom Trevatt notes that a west‑facing window gives beautiful afternoon light that’s soft and wrap‑around (Tom Trevatt blog). He also uses a large DIY reflector to open up shadows.
When you have a single off‑camera flash, bounce it off a white ceiling or a reflector to keep the light soft.
Quick checklist for lighting:
Use a key light at 45° angle.
Fill with a reflector or secondary softbox.
Keep the light source larger than the subject’s face for softness.
Watch for catchlights , a small sparkle in the eyes adds life.
Watch the video below for a live demo of setting up a softbox for a headshot.
Remember to keep the background simple. A plain backdrop reduces the chance of distractions and aligns with the 50 % of guidelines that stress background simplicity.
Step 4: Posing, Expression and Wardrobe Tips
Pose and expression turn a technical photo into a personal brand tool. The research shows that authentic expression and a clear face are the top reasons a headshot works.
Start by finding the subject’s “good side”. Most people have a side they favour , have them turn slightly and look at the camera from both angles. Small adjustments to chin tilt can change the look dramatically.
Encourage a relaxed jaw and natural smile. One trick is to ask them to exhale just before the shutter clicks , it softens the mouth and reduces tension.
Wardrobe matters, but the data says colour guidance is rare. Stick to solid, muted tones , navy, black, white or grey , as these photograph well and don’t clash with the background.
Joanna Lovering’s five tips are a great baseline: clean lines, solid colours, muted tones, blazers (or a clean alternative), and don’t forget shoes if they’ll be in frame (LinkedIn Pulse).
Kyle Cong adds that you should know the client’s industry look and practice micro‑adjustments , a slight head turn, a subtle eye shift, or a change in shoulder angle can add variety without losing consistency (Kyle Cong).
Here’s a quick pose cheat‑sheet:
Classic: shoulders back, chin slightly down, eyes at camera.
Engaged: shoulders turned 15°, chin up, soft smile.
Dynamic: hands lightly on hips or a chair, slight lean forward.
Ask the subject to think of a pleasant memory right before the shot. It helps them relax and gives a genuine sparkle.
When you’re ready to capture wardrobe options, remember to have a cloth hook or small rack handy. It saves time swapping outfits.
For corporate clients who need multiple headshots in one day, Enhance Your Business with Corporate Photography Training can teach your team how to keep the process smooth and consistent.
Step 5: Post‑Processing and Optimising for LinkedIn
After the shoot, the work isn’t done. LinkedIn limits images to 3 MB and recommends a 1.91:1 ratio for page images, but a headshot should be square (400 × 400 px minimum). Aim for the upper‑end of the size range , 7680 × 4320 px , and then downsize for upload.
Start in Lightroom: import RAW files, apply a basic exposure correction, and use the “white balance” tool to keep skin tones natural. Then use the “clarity” slider lightly , too much makes skin look harsh.
When it comes to retouching, keep it subtle. The research table calls for “subtle edits that enhance natural features without altering appearance”. Remove stray hairs, even out minor blemishes, but keep texture , recruiters want a real person.
Export two versions:
Full‑resolution JPG for the client’s archive.
Web‑ready JPG at 80 % quality, under 3 MB, saved as sRGB.
LinkedIn’s image specs page confirms the file size and format limits (LinkedIn image specs). Upload the web‑ready version and check how it looks on both desktop and mobile.
Some photographers now use AI tools like Nano Banana to speed up the final polish. Mark D. Lyman shows a prompt that keeps natural features while adding a clean backdrop (LinkedIn post). If you’re short on time, a quick AI pass can help, but always double‑check the result for authenticity.
Finally, name the file clearly , e.g., "john‑doe‑linkedin‑headshot.jpg" , so the client can find it easily.
FAQ
What size should a professional headshot for LinkedIn be?
The guidelines allow anywhere from 400 × 400 px up to 7680 × 4320 px. Most users aim for around 1200 × 1200 px for a balance of quality and quick loading. Keep the file under 3 MB and in JPEG format.
Do I need a studio for professional headshots for LinkedIn?
A studio gives you control over light and background, but a well‑lit room with a plain wall works too. Natural window light combined with a reflector can produce excellent results if you manage shadows carefully.
How many outfit changes are ideal for a LinkedIn session?
Two to three options are enough. Bring a classic navy or black blazer, a solid‑colour shirt, and a more relaxed top if the client’s industry allows a bit of personality. This gives variety without overwhelming the edit process.
Should I retouch my LinkedIn headshot?
Yes, but keep it subtle. Remove obvious blemishes, smooth minor shine, and ensure the eyes are sharp. Avoid over‑smoothing skin , the goal is to look like you, just a little sharper.
Can I use my phone for a professional headshot?
Modern phones can capture high‑resolution images, but they lack the depth‑of‑field control of a DSLR or mirrorless camera. If you use a phone, add a portable softbox and shoot in RAW (if supported) to retain editing flexibility.
How often should I update my LinkedIn headshot?
Refresh it every 12‑18 months or after a major change in appearance or role. A current photo signals that you’re active and up‑to‑date, which helps recruiters trust your profile.
Conclusion
Professional headshots for LinkedIn are more than a pretty picture , they’re a visual résumé that opens doors. By planning the shot, choosing the right gear, mastering lighting, guiding pose and wardrobe, and polishing the final image, you give clients a powerful tool for career growth.
Remember the key takeaways: keep the background simple, aim for the 60 % face‑fill rule, use soft, even light, and edit with restraint. If you want hands‑on help, Alan Ranger’s workshops and corporate photography training can boost your skill set.
Ready to level up your LinkedIn presence? Book a session, follow the steps above, and watch the connections roll in.