
10 Things to Do with Your New Camera - Basic camera settings
Table of Contents Show
Clients often ask me for guidance on setting up their new or existing cameras for the basic camera settings. Understanding the numerous menu options and technical terms can be overwhelming for beginners. While I can't address all your queries, I've compiled a list of ten essential steps to help you get started after unboxing your camera. Let's dive in!
Congratulations on your new camera! Getting a new camera is exciting whether you're a budding photographer or just starting. But before snapping away, you should do a few essential things first to ensure you get the best out of your camera. In this guide, I will walk you through the ten essential things to do with your new camera. From updating the firmware to customizing function keys, these steps will help you optimize your camera settings and enhance your photography skills.
10 Tips for Basic Camera Settings for your new camera.
1. Update the Firmware
The first thing you should do when you get a new camera is to check if there are any firmware updates available. Firmware updates contain important improvements and bug fixes that can enhance the performance and functionality of your camera. The firmware is the operating system for your camera, much like Windows Or Mac IOS updates the camera OS for the latest updates. Manufacturers often update the firmware to include new functionality like focus stacking or changes to the bracketing range so it is certainly worthwhile checking on the manufacturers site to see what new features have been added since your camera was built and sat in a warehouse for x months!
To update the firmware, visit the manufacturer's website and download the latest version for your camera model. Follow the instructions provided to install the update onto your camera. By keeping your camera's firmware up to date, you ensure that it is running smoothly and efficiently and it may also add new features and functions. It may provide new features and improvements to your basic camera settings

Update the Firmware
2. Set Your Diopter
One of the most important things to do when you first get a new camera is to set your diopter. The diopter is a small adjustment that allows you to customize the viewfinder to match your eyesight. To set your diopter, look through the viewfinder and locate the diopter adjustment dial, usually located near the viewfinder. Adjust the dial until the text and numbers in along the bottom of the viewfinder appear sharp and clear. This will ensure a clear and accurate view of your subject when composing your shots.
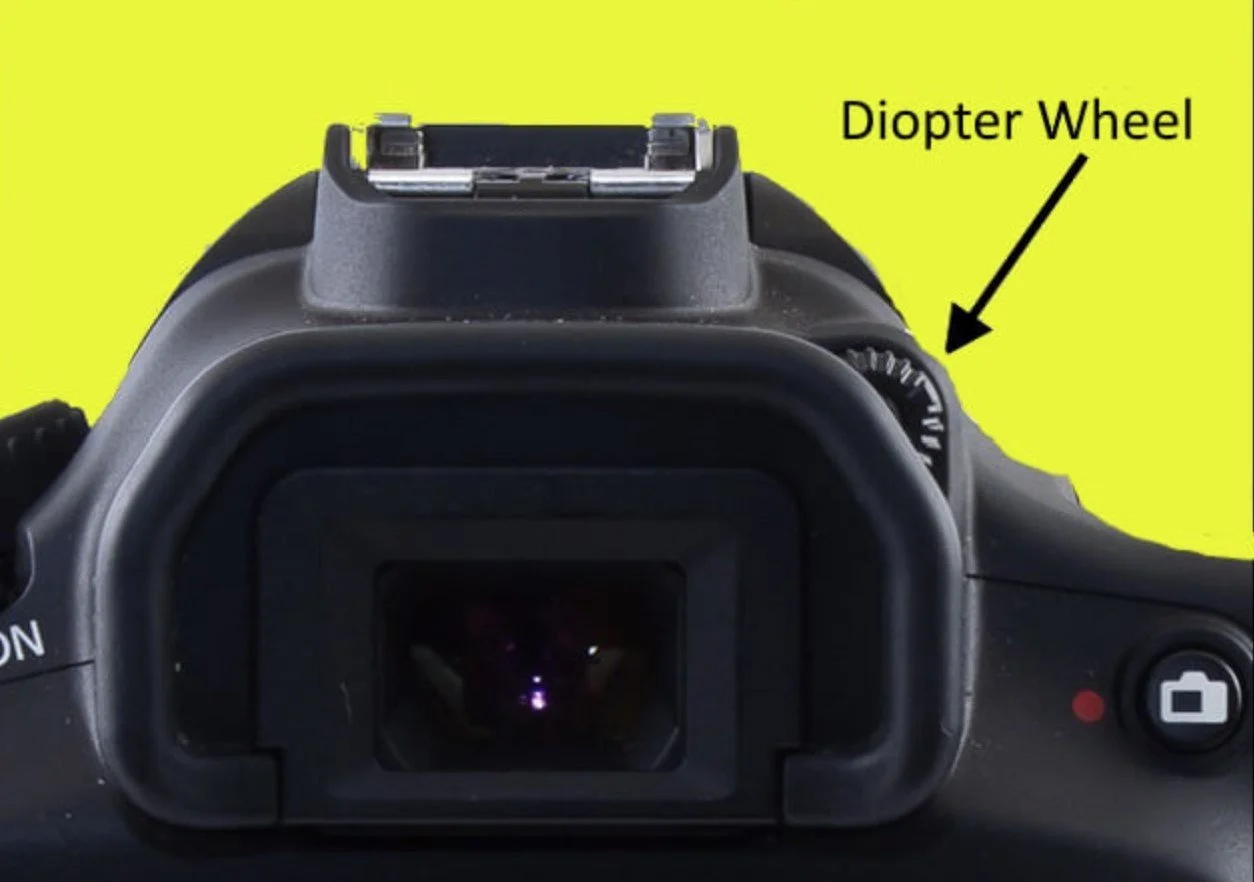
Set Your Diopter
3. Select Image Quality
To get the best results from your camera, it's important to select the right image quality settings. Most cameras offer a range of image quality options, such as JPEG, RAW, or both. JPEG is a compressed file format that is ideal for sharing and printing photos directly from the camera. RAW, on the other hand, is an uncompressed file format that captures all the data from the camera's sensor, allowing for greater flexibility in post-processing. If you are serious about photography and plan on editing your photos, shooting in RAW is recommended. However, if you prefer the basic camera settings and convenience of ready-to-use images, JPEG is a good option, but always go for the maximum size and quality in JPG mode so you have the option to reduce size if needed.

4. Read the Manual or Watch YouTube for Your Model
While it may seem tempting to dive right in and start shooting, reading the manual or watching tutorial videos for your specific camera model can make a world of difference. The manual will provide valuable information about your basic camera settings, different features and functions, and tips for achieving optimal results. Additionally, YouTube is a treasure trove of tutorials and guides created by experienced photographers and camera enthusiasts. Watching these videos can help you familiarize yourself with your camera's advanced settings and capabilities, giving you a head start in your photography journey. Whenever I upgrade my camera body, I will spend several hours trawling through YouTube Videos to explain specific camera menu options to understand what settings suit me for different situations. Knowing what each function does in your camera is worth that investment in time. It increases your confidence in using your camera and helps you decide if specific basic camera settings may be helpful in certain situations, which you can save as a custom user preset. See Point 10. Save Camera Settings to Custom for Different Shooting Situations
5. Learn How to Use Quick Menu Functions
Most cameras come equipped with a quick menu that allows you to access frequently used settings with ease. Familiarising yourself with the quick menu functions will save you time and help you quickly adjust settings on the go. Standard quick menu functions include ISO, white balance, exposure compensation, and drive mode. Experiment with these settings and understand how they affect your images. You can capture the perfect shot in any situation by mastering the quick menu functions. Many modern cameras also allow you to configure and change the quick menu , metering, focusing, and other basic camera settings that you want to access without delving into menu systems. On the Sony, it’s the Fn key, Canon the Q key and Nikon “i” key
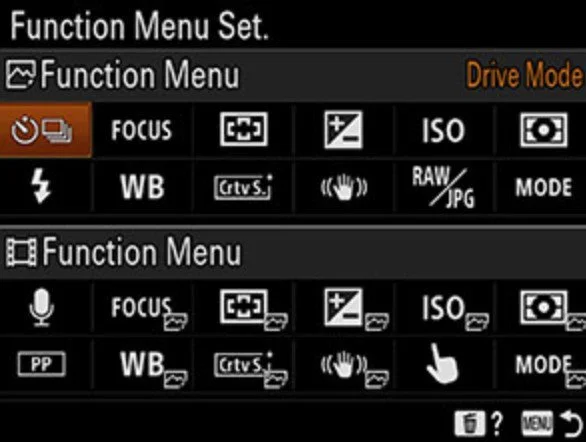
Quick Menu Functions
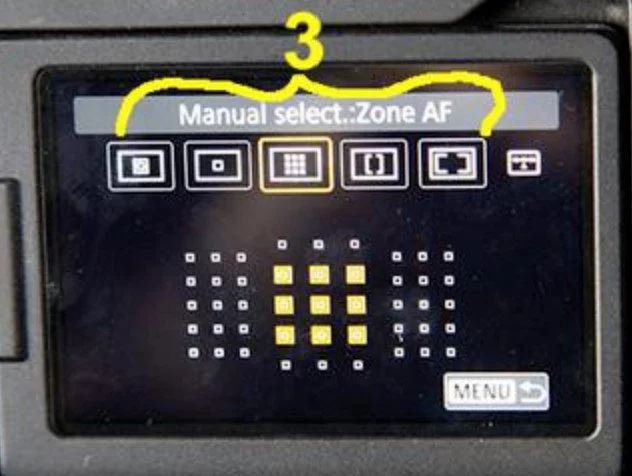
6. Learn How to Change Auto Focus Settings
Auto focus is a powerful tool that can help you achieve sharp and well-focused images. Understanding how to change the auto focus settings on your camera will allow you to adapt to different shooting scenarios. Experiment with different auto focus modes, such as single point, zone, or tracking, to see which one works best for your subject. Additionally, learning how to manually override the auto focus and fine-tune your focus point will give you more control over your images. Take the time to practice and experiment with the auto focus settings to improve your photography skills. There are two settings to look at. Focus Mode which sets whether single shot or continuous focusing and Focus Area which is more important when you want to pinpoint where to focus in the frame rather than allow the camera to decide for you.
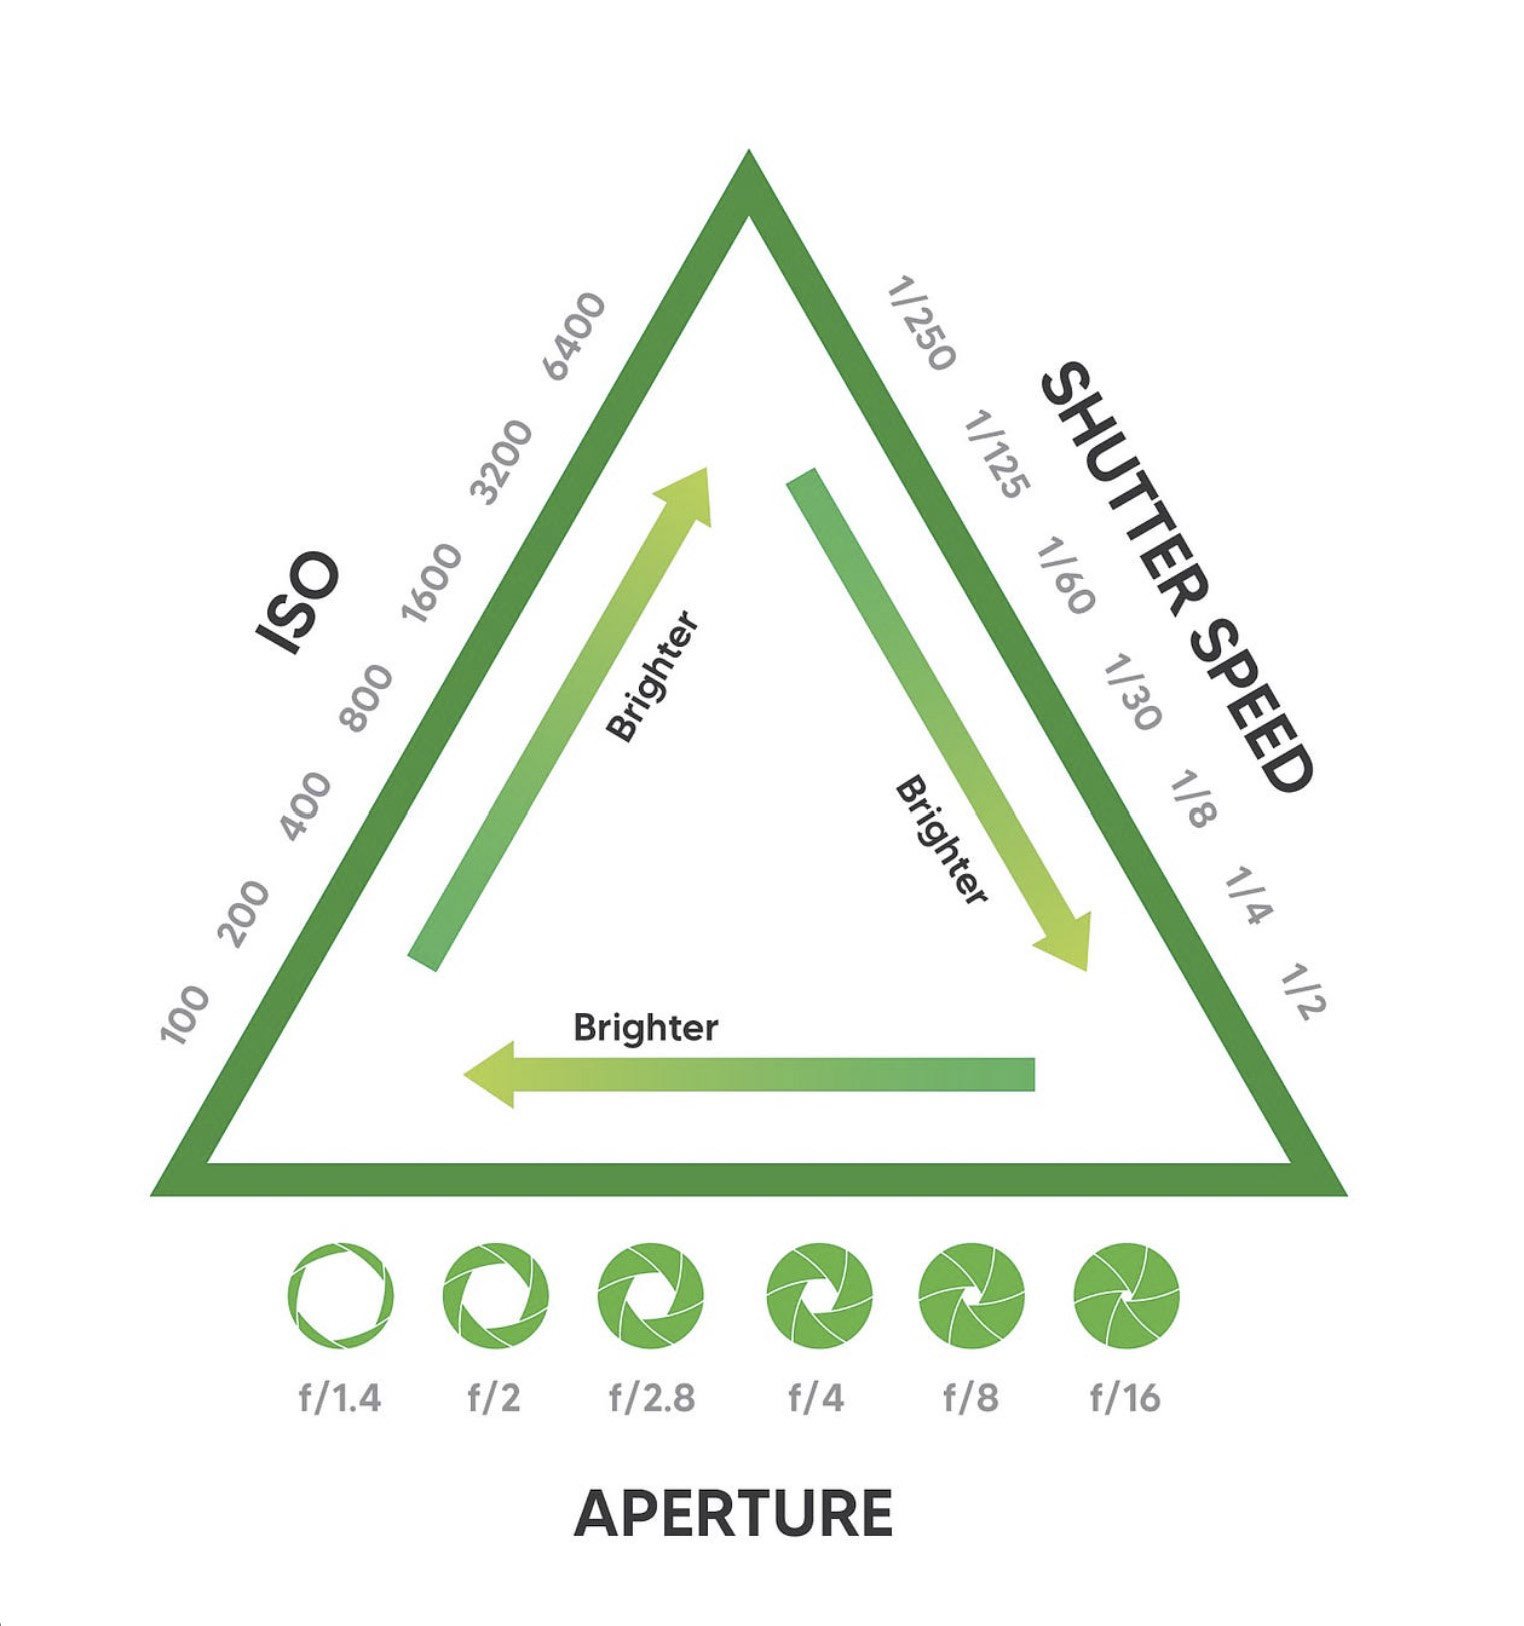
7. Learn Exposure Settings
Understanding exposure is crucial in photography. The exposure settings determine how light or dark your image will be. The three main components of exposure are aperture, shutter speed, and ISO. Aperture controls the amount of light that enters the camera through the lens, shutter speed determines how long the camera's sensor is exposed to light, and ISO measures the sensor's sensitivity to light. By learning how to adjust these settings, you can achieve the desired exposure for your photos. Experiment with different exposure settings to see their effects on your images and develop your style and use of the camera. This is the subject that the majority of newbies struggle with, and that’s why I provide a 5-week beginners photography course made up of five weekly two-hour lessons to teach you to understand the exposure triangle and when to use different exposure settings to deal with the light and the subject you’re photographing. My photography classes cover all the main basic camera settings you need.
8. Learn About Drive Modes
Drive modes determine how your camera captures multiple images in succession. Understanding the different drive modes will enable you to capture fast-moving subjects or create stunning time-lapse sequences. Common drive modes include single shot, continuous shooting, self-timer, and interval shooting. Experiment with these modes to see how they can enhance your photography. By mastering drive modes, you'll be able to capture the perfect moment and create images that capture a split second in time.

Drive Modes
9. Customize Function Keys
Customizing function keys allows you to personalize your camera settings and access frequently used features quickly. Most cameras offer the ability to assign specific functions to different buttons on the camera body. For example, you can assign aspect ratio or other basic camera settings to a function button for easy access. Take the time to explore the customization options available on your camera and set up the function keys according to your preferences. This will streamline your workflow and make shooting more efficient.
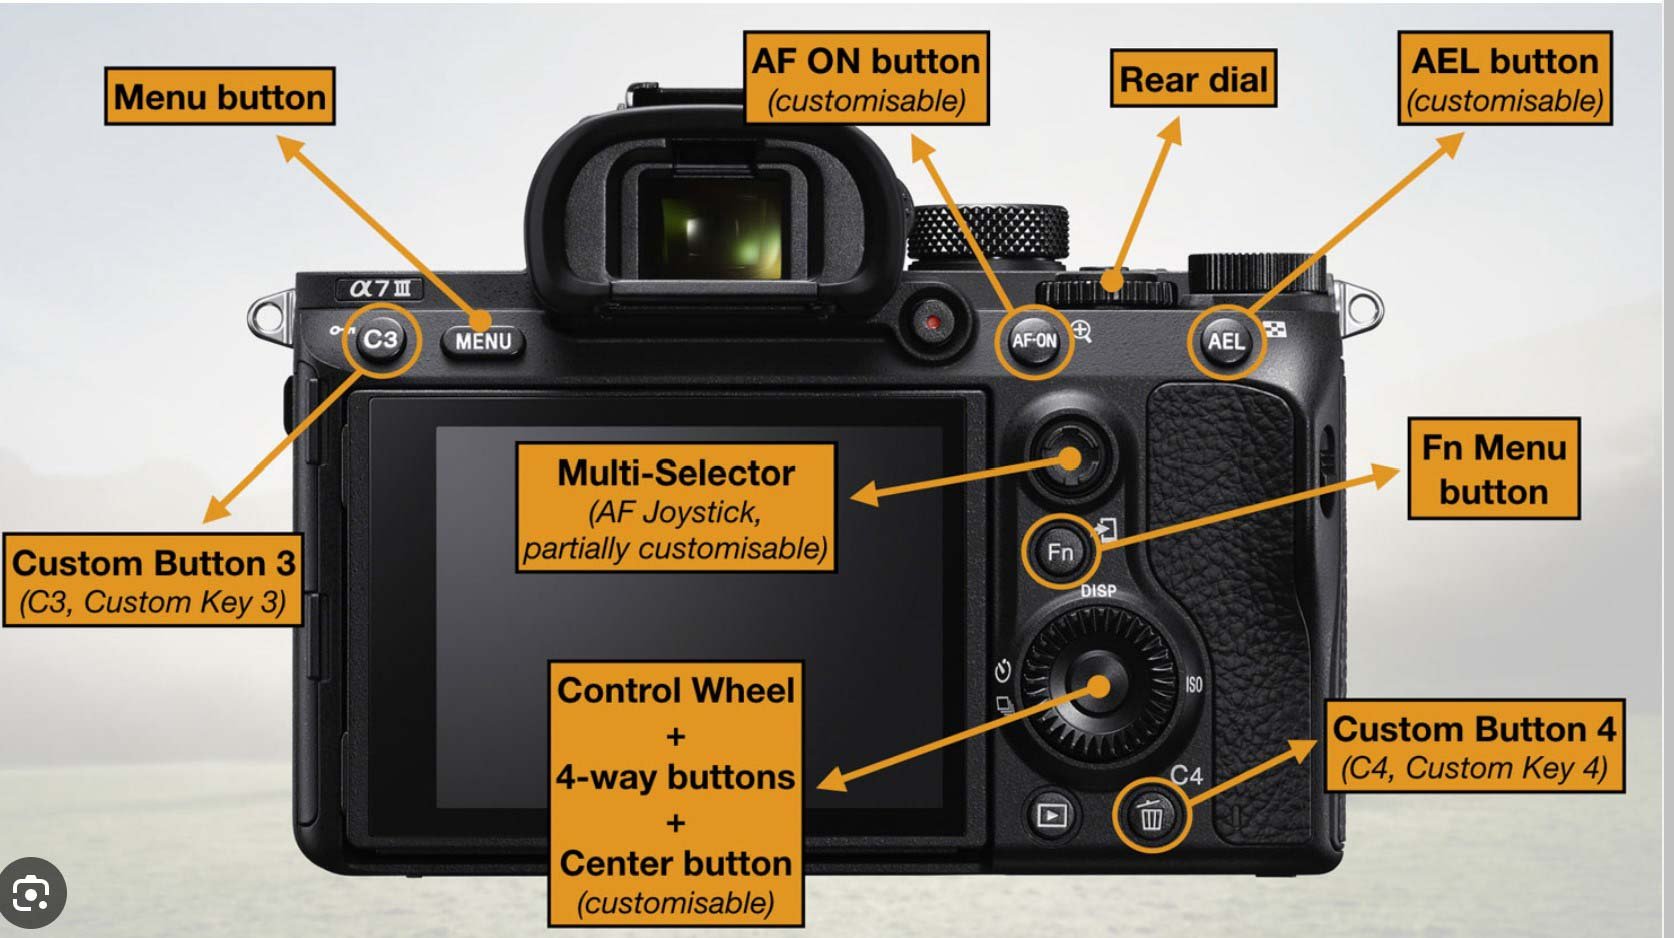
Example of customisable buttons on a Sony. Other camera will have similar options to configure.
10. Save Camera Settings to Custom for Different Shooting Situations
Once you've mastered the various camera settings, it's a good idea to save them as custom presets for different shooting situations. For example, you can save one preset for landscape photography and another for low-light conditions. and so on. By saving your preferred settings, you can quickly switch between presets without having to manually adjust each setting. This will save you time and ensure that you're always ready to capture the perfect shot in any situation.
I have three different shooting presets saved on my camera.
General - Landscapes / Outdoors
Portraits
Wildlife / Fast moving subjects
Each preset has slightly different settings for:metering (spot or evaluative) , drive mode (burst or one-shot), exposure mode (manual or aperture and with different ISO, aperture and shutter speed settings), focusing mode (single shot or continuous), focus area (single point or tracking, eye), and so on.
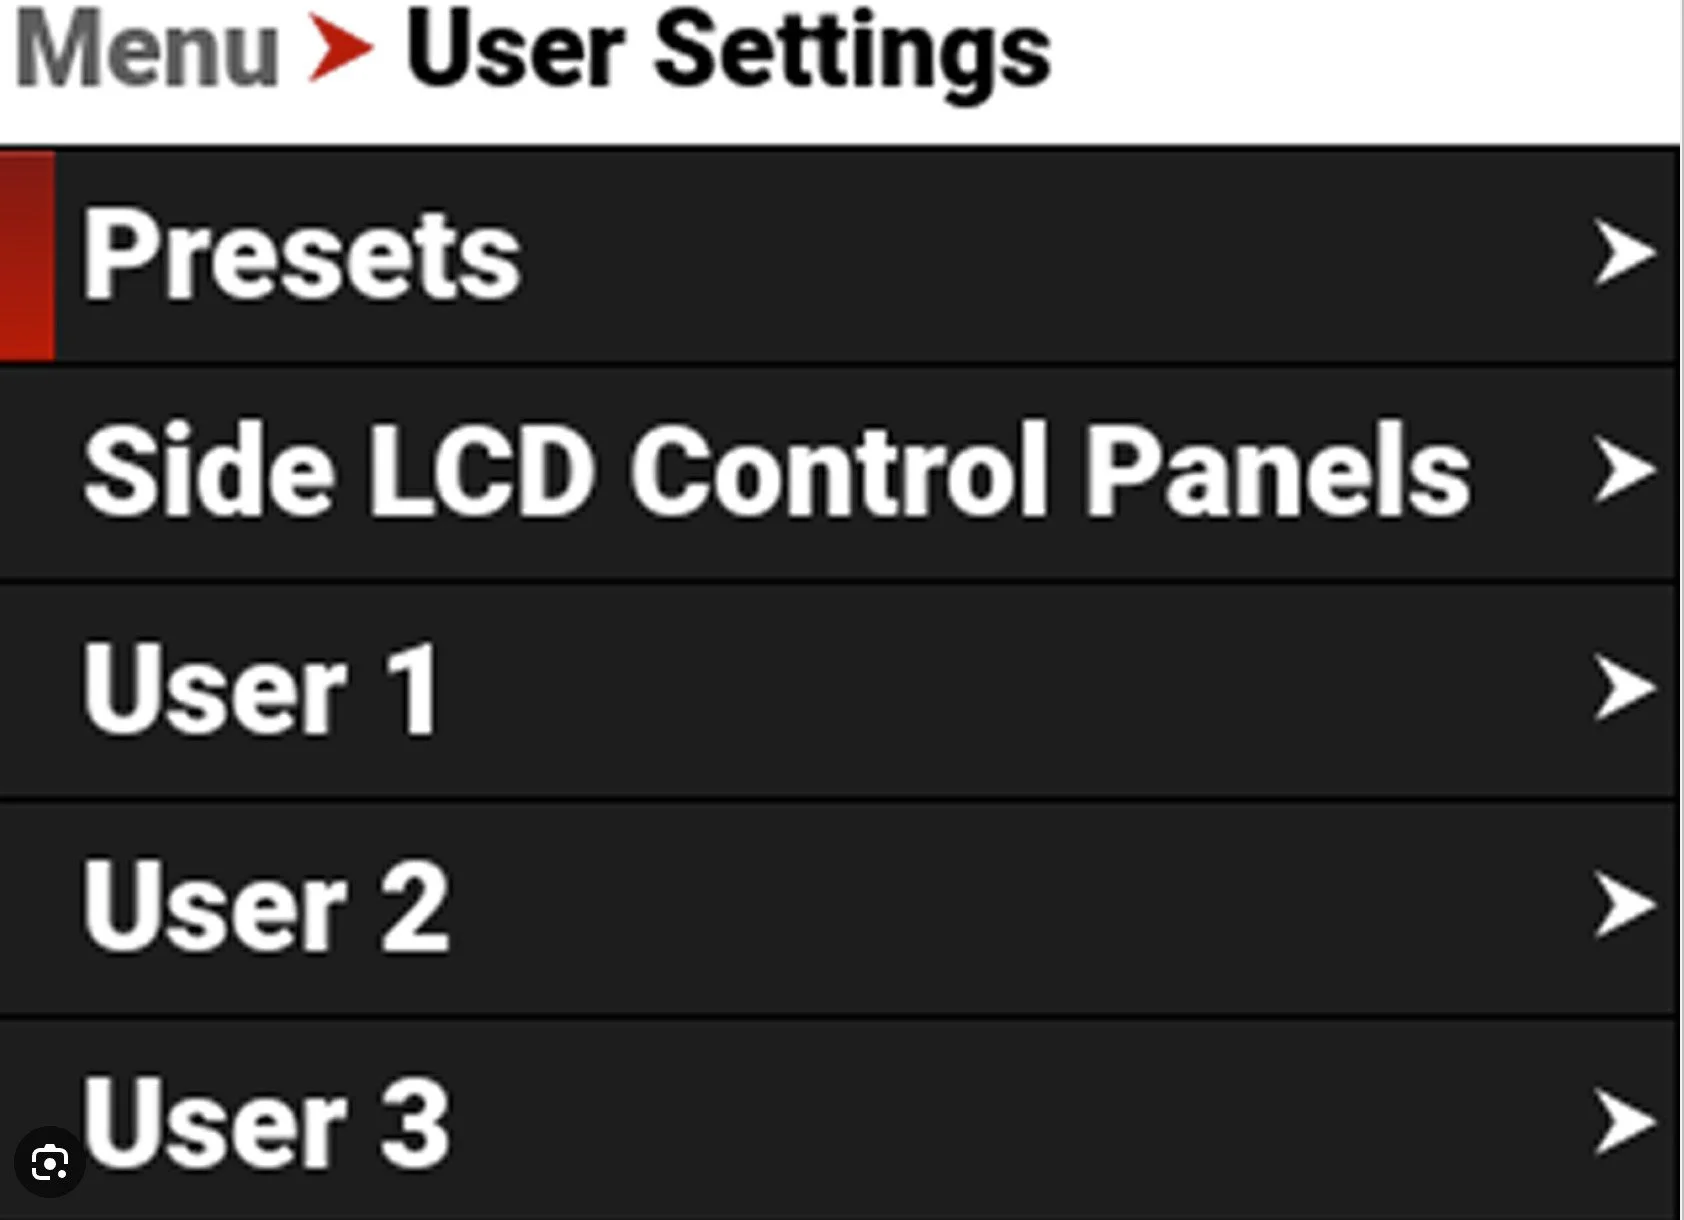
Save camera settings for typical scenarios to user settings for instant access.
Conclusion
In conclusion, getting a new camera is an exciting milestone in your photography journey. By following these 10 essential steps, you can optimise your basic camera settings and enhance your photography skills. Remember to update the firmware, set your diopter, select the appropriate image quality, and familiarise yourself with the manual or tutorial videos. Learn how to use quick menu functions, change autofocus settings, and understand exposure settings. Explore drive modes, customise function keys, and save camera settings for different shooting situations. With these steps, you'll be well on your way to capturing amazing photos with your new camera. So, what are you waiting for? Sign up for photography lessons and take your skills to the next level! If you want a professional to go through your specific camera and help you set up the configuration buttons, and explain the various options, then book a private photography session with me; it usually takes about 2hrs to go through all the essentials and get everything configured correctly for your shooting scenarios.